Ansible Code Scanning and Quality Checks With SonarQube
Learn how to set up and configure the SonarQube plugin to analyze Ansible playbooks and roles for security vulnerabilities and technical debt.
Join the DZone community and get the full member experience.
Join For FreeYou should have heard about SonarQube as a code scanning and code quality check tool. SonarQube doesn't support Ansible by default. A plugin needs to be set up to scan Ansible playbooks or roles. In this article, you will learn on how to set up and use SonarQube on your Ansible (YAML) code for linting and code analysis. This article uses the community edition of SonarQube.
What Is Ansible?
As explained in previous articles around Ansible: Ansible Beyond Automation and Automation Ansible AI, Ansible is a simple IT automation tool that helps you provision infrastructure, install software, and support application automation through advanced workflows.
Ansible playbooks are written in YAML format and define a series of tasks to be executed on remote hosts. Playbooks offer a clear, human-readable way to describe complex automation workflows. Using playbooks, you define the required dependencies and desired state for your application.
What Is SonarQube?
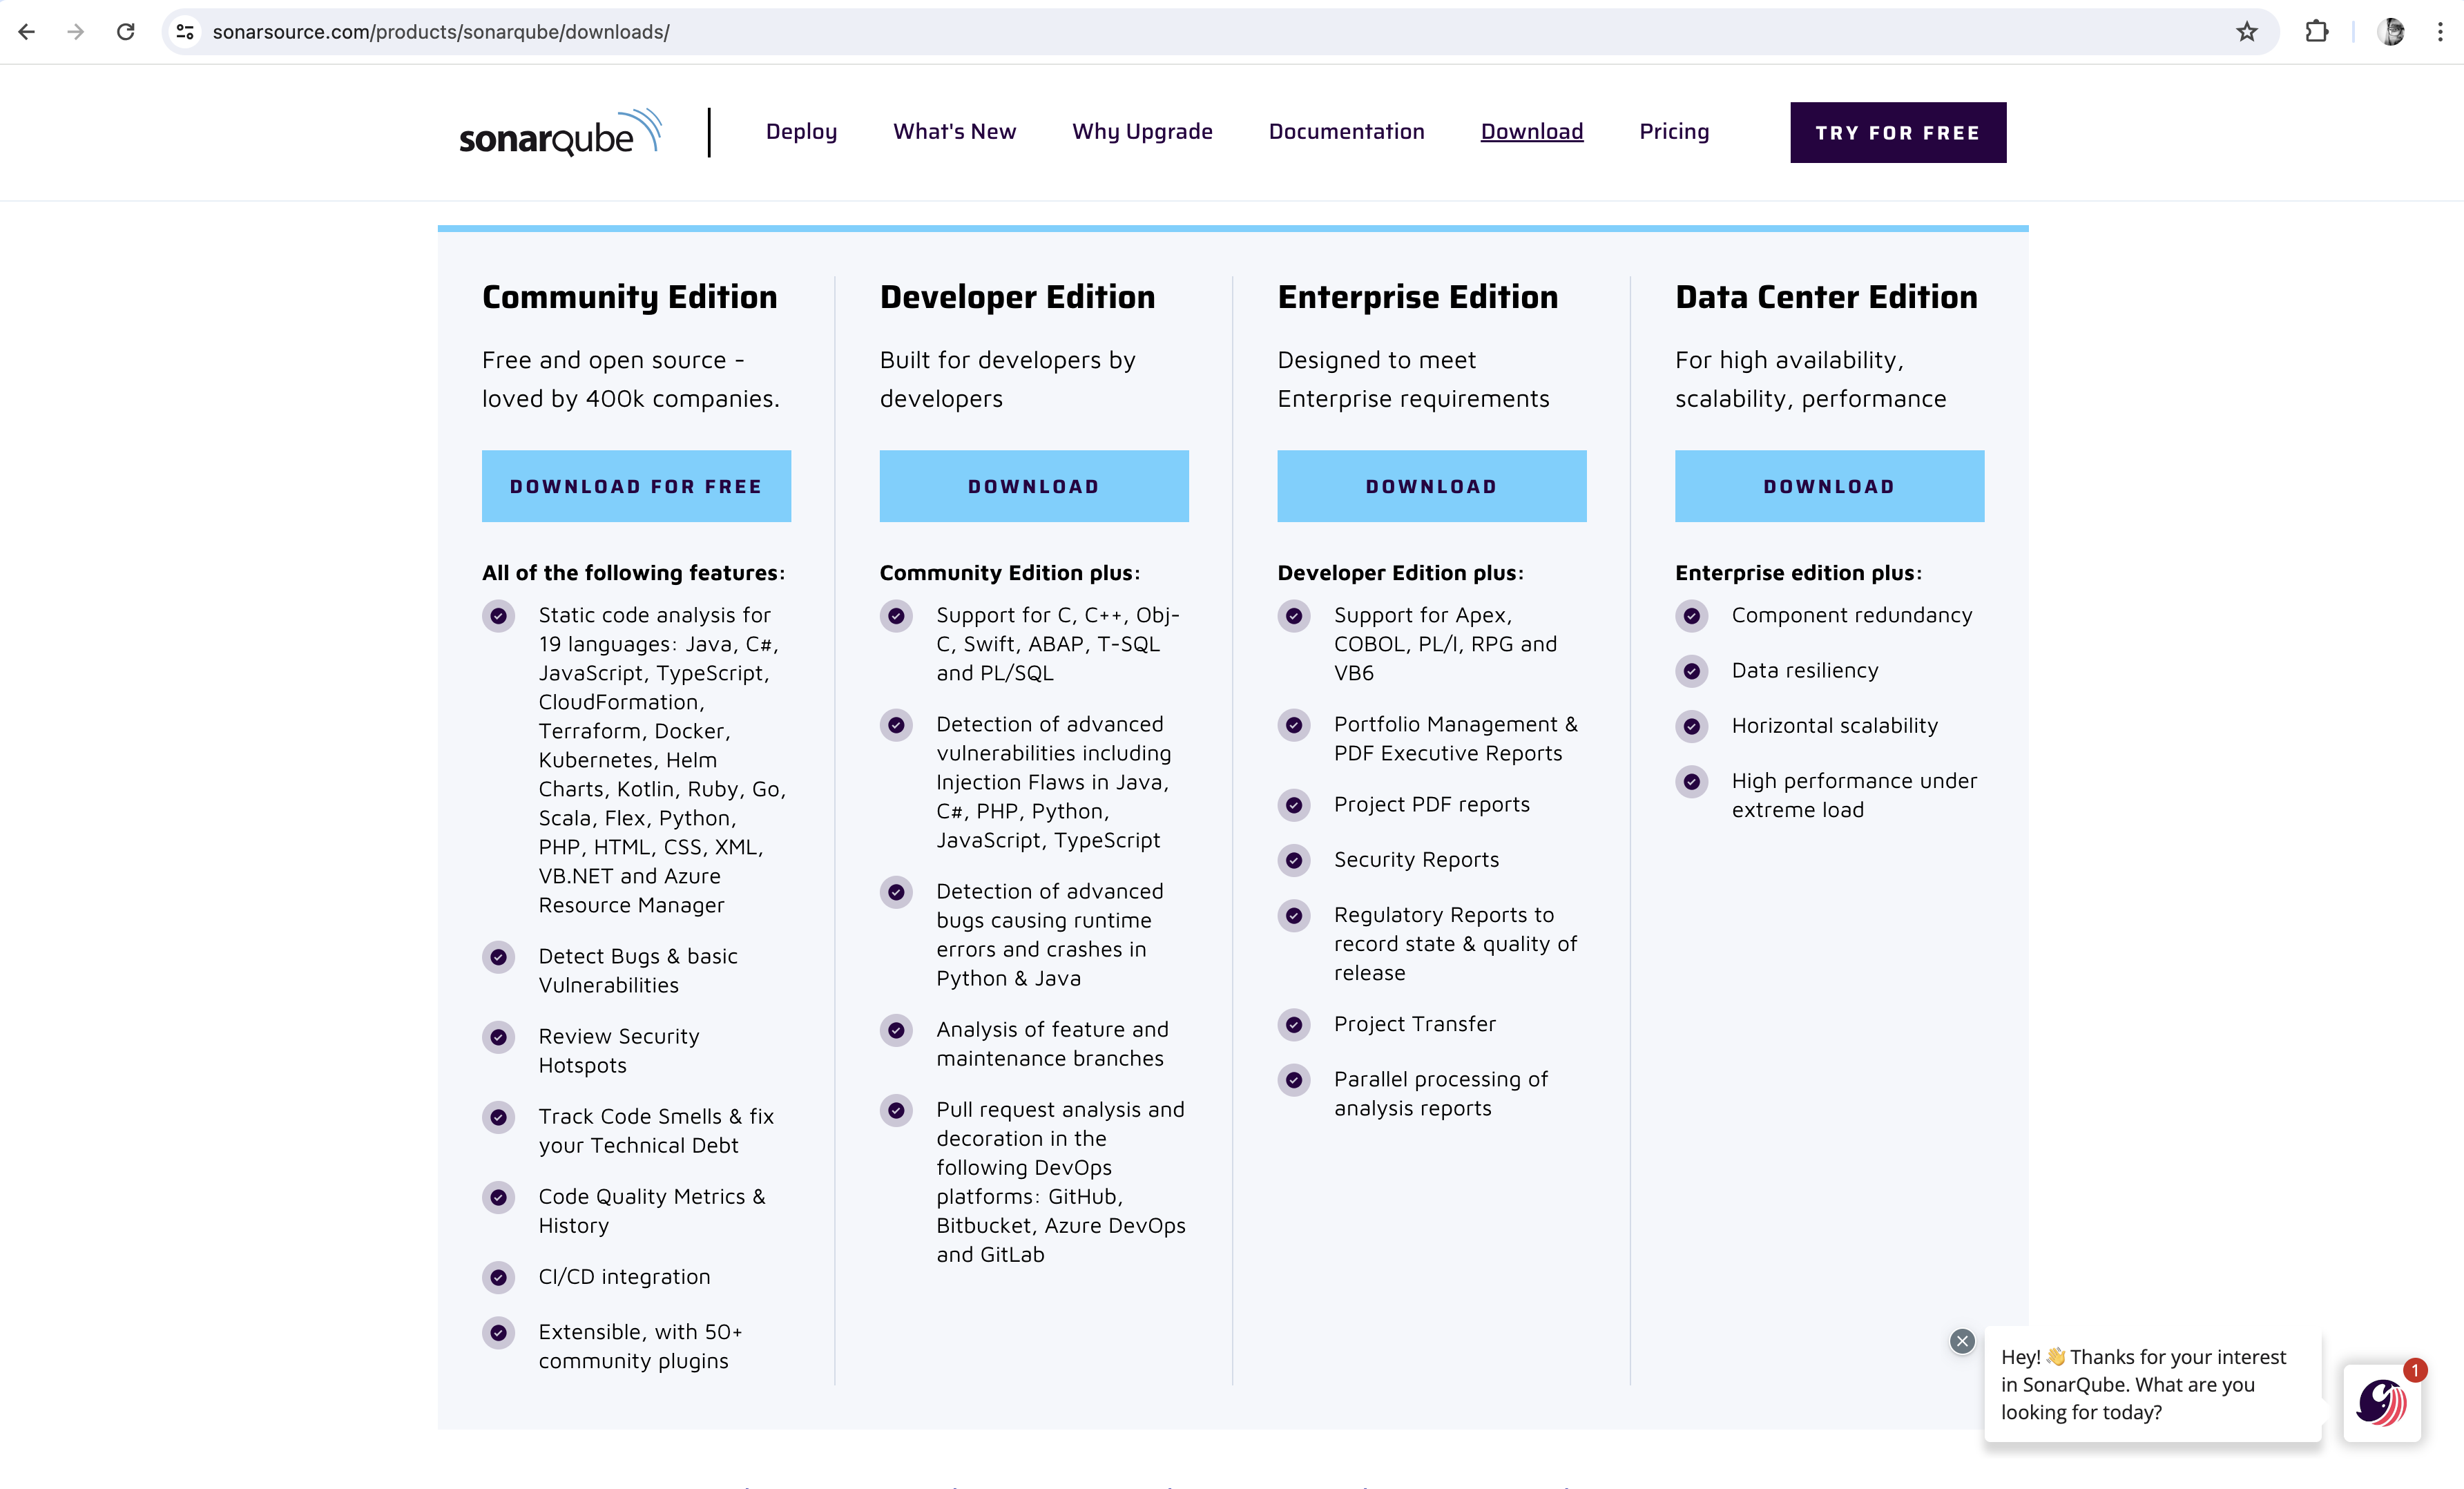
SonarQube is a widely used open-source platform for continuous code quality inspection and analysis. It is designed to help developers and teams identify and address potential issues in their codebase, such as bugs, code smells, security vulnerabilities, and technical debt. SonarQube supports a wide range of programming languages, including Java, C#, C/C++, Python, JavaScript, and many others. The community edition of SonarQube can perform static code analysis for 19 languages like Terraform, code formation, Docker, Ruby, Kotlin, Go, etc.,
Code Scanning and Analysis
SonarQube performs static code analysis, which means it examines the source code without executing it. This analysis is performed by parsing the code and applying a set of predefined rules and patterns to identify potential issues. SonarQube covers various aspects of code quality, including:
- Code smells: SonarQube can detect code smells, which are indicators of potential maintainability issues or design flaws in the codebase. Examples include duplicated code, complex methods, and excessive coupling.
- Bugs: SonarQube can identify potential bugs in the code, such as null pointer dereferences, resource leaks, and other common programming errors.
- Security vulnerabilities: SonarQube can detect security vulnerabilities in the code, such as SQL injection, cross-site scripting (XSS), and other security flaws.
- Technical debt: SonarQube can estimate the technical debt of a codebase, which represents the effort required to fix identified issues and bring the code up to a desired level of quality.
Importance of Code Scanning and Analysis
Code scanning and analysis with SonarQube offer several benefits to development teams:
- Improved code quality: By identifying and addressing issues early in the development process, teams can improve the overall quality of their codebase, reducing the likelihood of bugs and making the code more maintainable.
- Increased productivity: By automating the code analysis process, SonarQube saves developers time and effort that would otherwise be spent manually reviewing code.
- Consistent code standards: SonarQube can enforce coding standards and best practices across the entire codebase, ensuring consistency and adherence to established guidelines.
- Security awareness: By detecting security vulnerabilities early, teams can address them before they become exploitable in production environments, reducing the risk of security breaches.
- Technical debt management: SonarQube's technical debt estimation helps teams prioritize and manage the effort required to address identified issues, ensuring that the codebase remains maintainable and extensible.
Perform Static Application Security Testing
SonarQube is a leading tool for performing SAST, offering comprehensive capabilities to enhance code security and quality. Static Application Security Testing (SAST) is a method of security testing that analyzes source code to identify vulnerabilities and security flaws. Unlike Dynamic Application Security Testing (DAST), which tests running applications, SAST examines the code itself, making it a form of white-box testing.
SonarQube integrates seamlessly with popular development tools and continuous integration/continuous deployment (CI/CD) pipelines, making it easy to incorporate code analysis into the development workflow. With its comprehensive analysis capabilities and support for various programming languages, SonarQube has become an essential tool for development teams seeking to improve code quality, maintain a secure and maintainable codebase, and deliver high-quality software products.
Install SonarQube on Your Local Machine
You can set it up using a zip file or you can spin up a Docker container using one of SonarQube's Docker images.
1. Download and install Java 17 from Eclipse Temurin Latest Releases. If you are using a macOS, you can install using HomeBrew with the below command.
brew install --cask temurin@172. Download the SonarQube Community Edition zip file.
3. As mentioned in the SonarQube documentation, as a non-root user unzip the downloaded SonarQube community edition zip file to C:\sonarqube on Windows or on Linux / macOS /opt/sonarqube
On Linux / macOS, you may have to run a command to create folder as a root sudo mkdir -p /opt/sonarqube
4. The folder structure in your /opt/sonarqube should look similar to the below image. The key folders that you will be using for this article would be bin and extensions/plugins 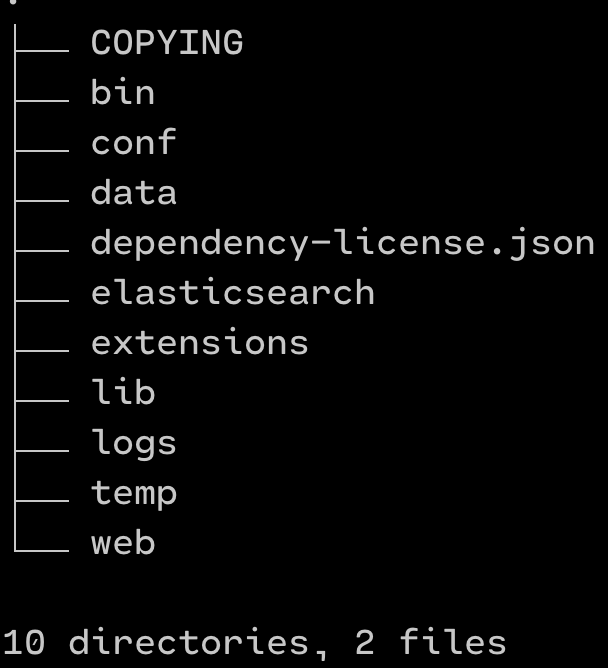
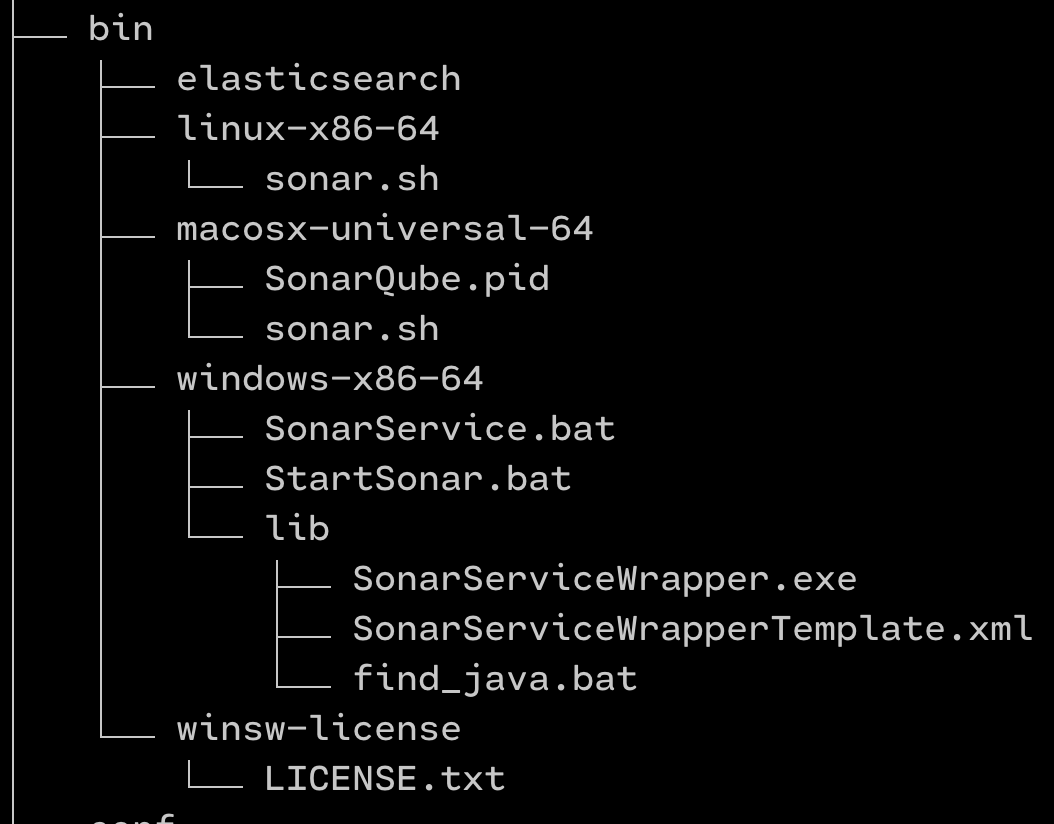
5. To start the SonarQube server, change to the directory where you unzipped the community edition and run the below commands under the respective Operating System. For example, If you are running on a macOS, you will change the directory to /opt/sonarqube/bin/macosx-universal-64
# On Windows, execute:
C:\sonarqube\bin\windows-x86-64\StartSonar.bat

# On other operating systems, as a non-root user execute:
/opt/sonarqube/bin/<OS>/sonar.sh console
Here's the folder structure under the bin folder.
6. On a macOS, this is how it looks when you run the server with Java 17 setup
# To change to the directory and execute
cd /opt/sonarqube/bin/macosx-universal-64
./sonar.sh console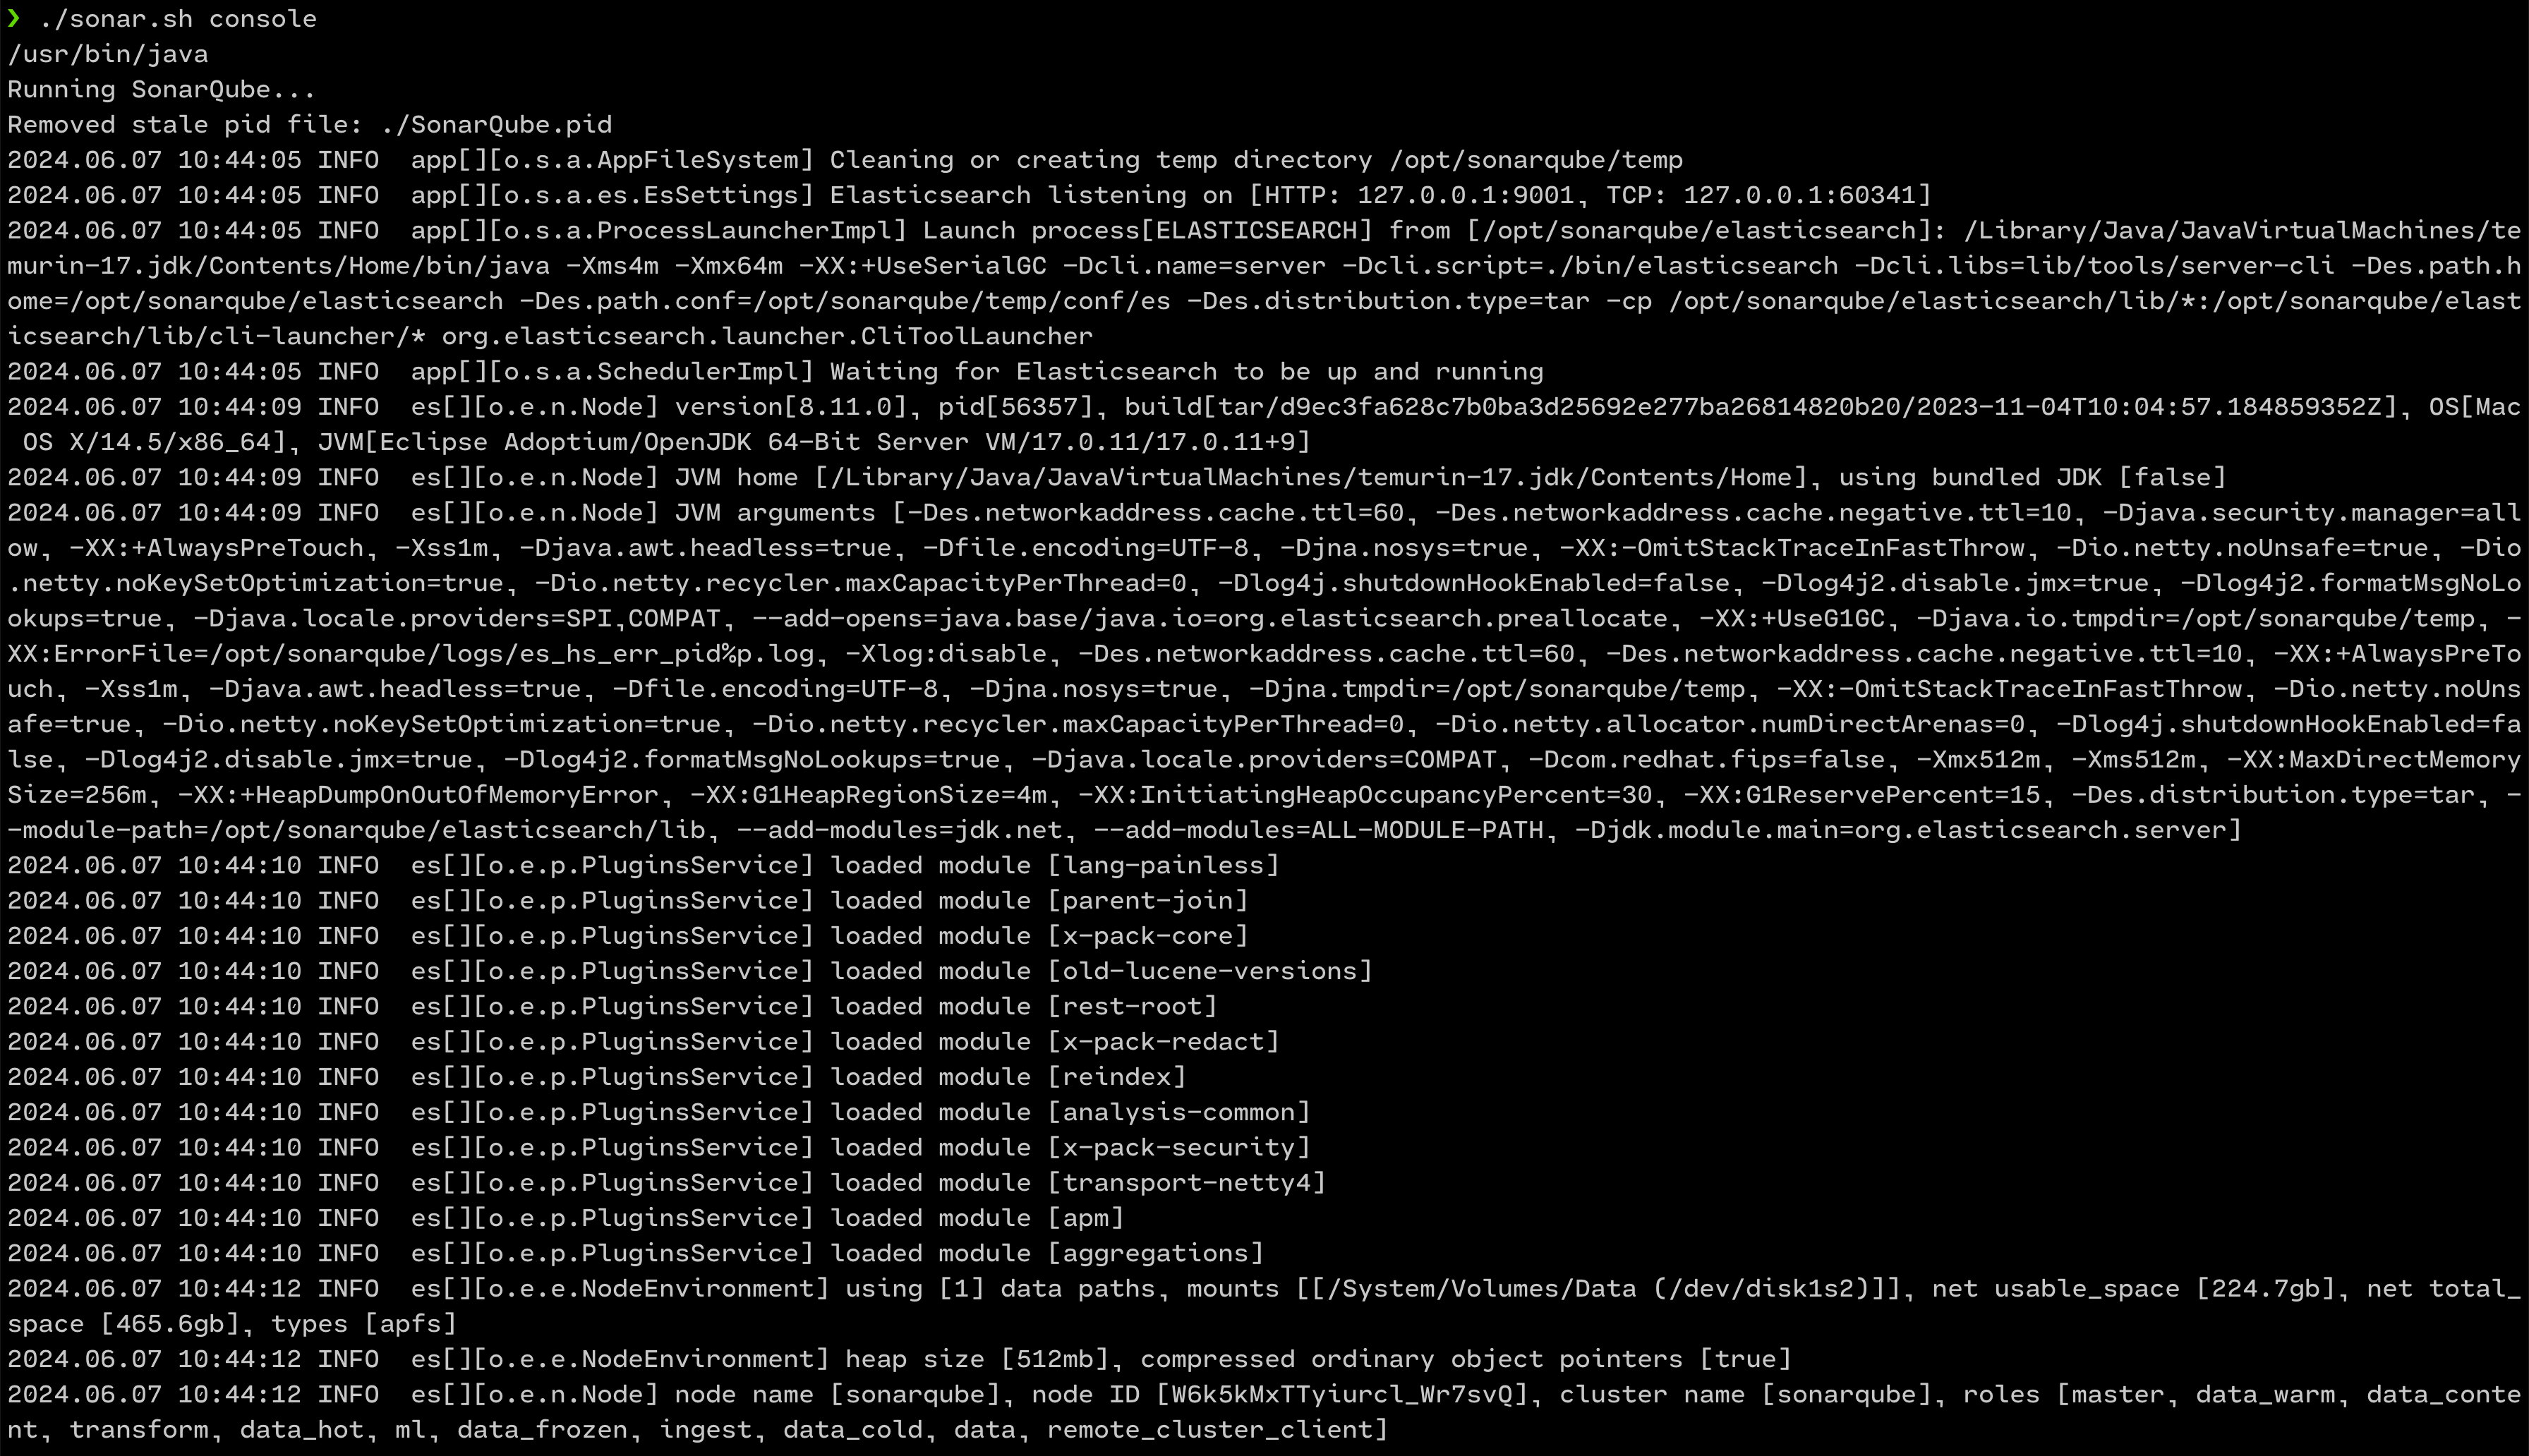
SonarQube server up and running
If you are using a Docker image of the community edition from the Dockerhub, run the below command
docker run -d --name sonarqube -e SONAR_ES_BOOTSTRAP_CHECKS_DISABLE=true -p 9000:9000 sonarqube:latest7. You can access the SonarQube server at this localhost. Initial system administrator username: admin and password: admin. You will be asked to reset the password once logged in.
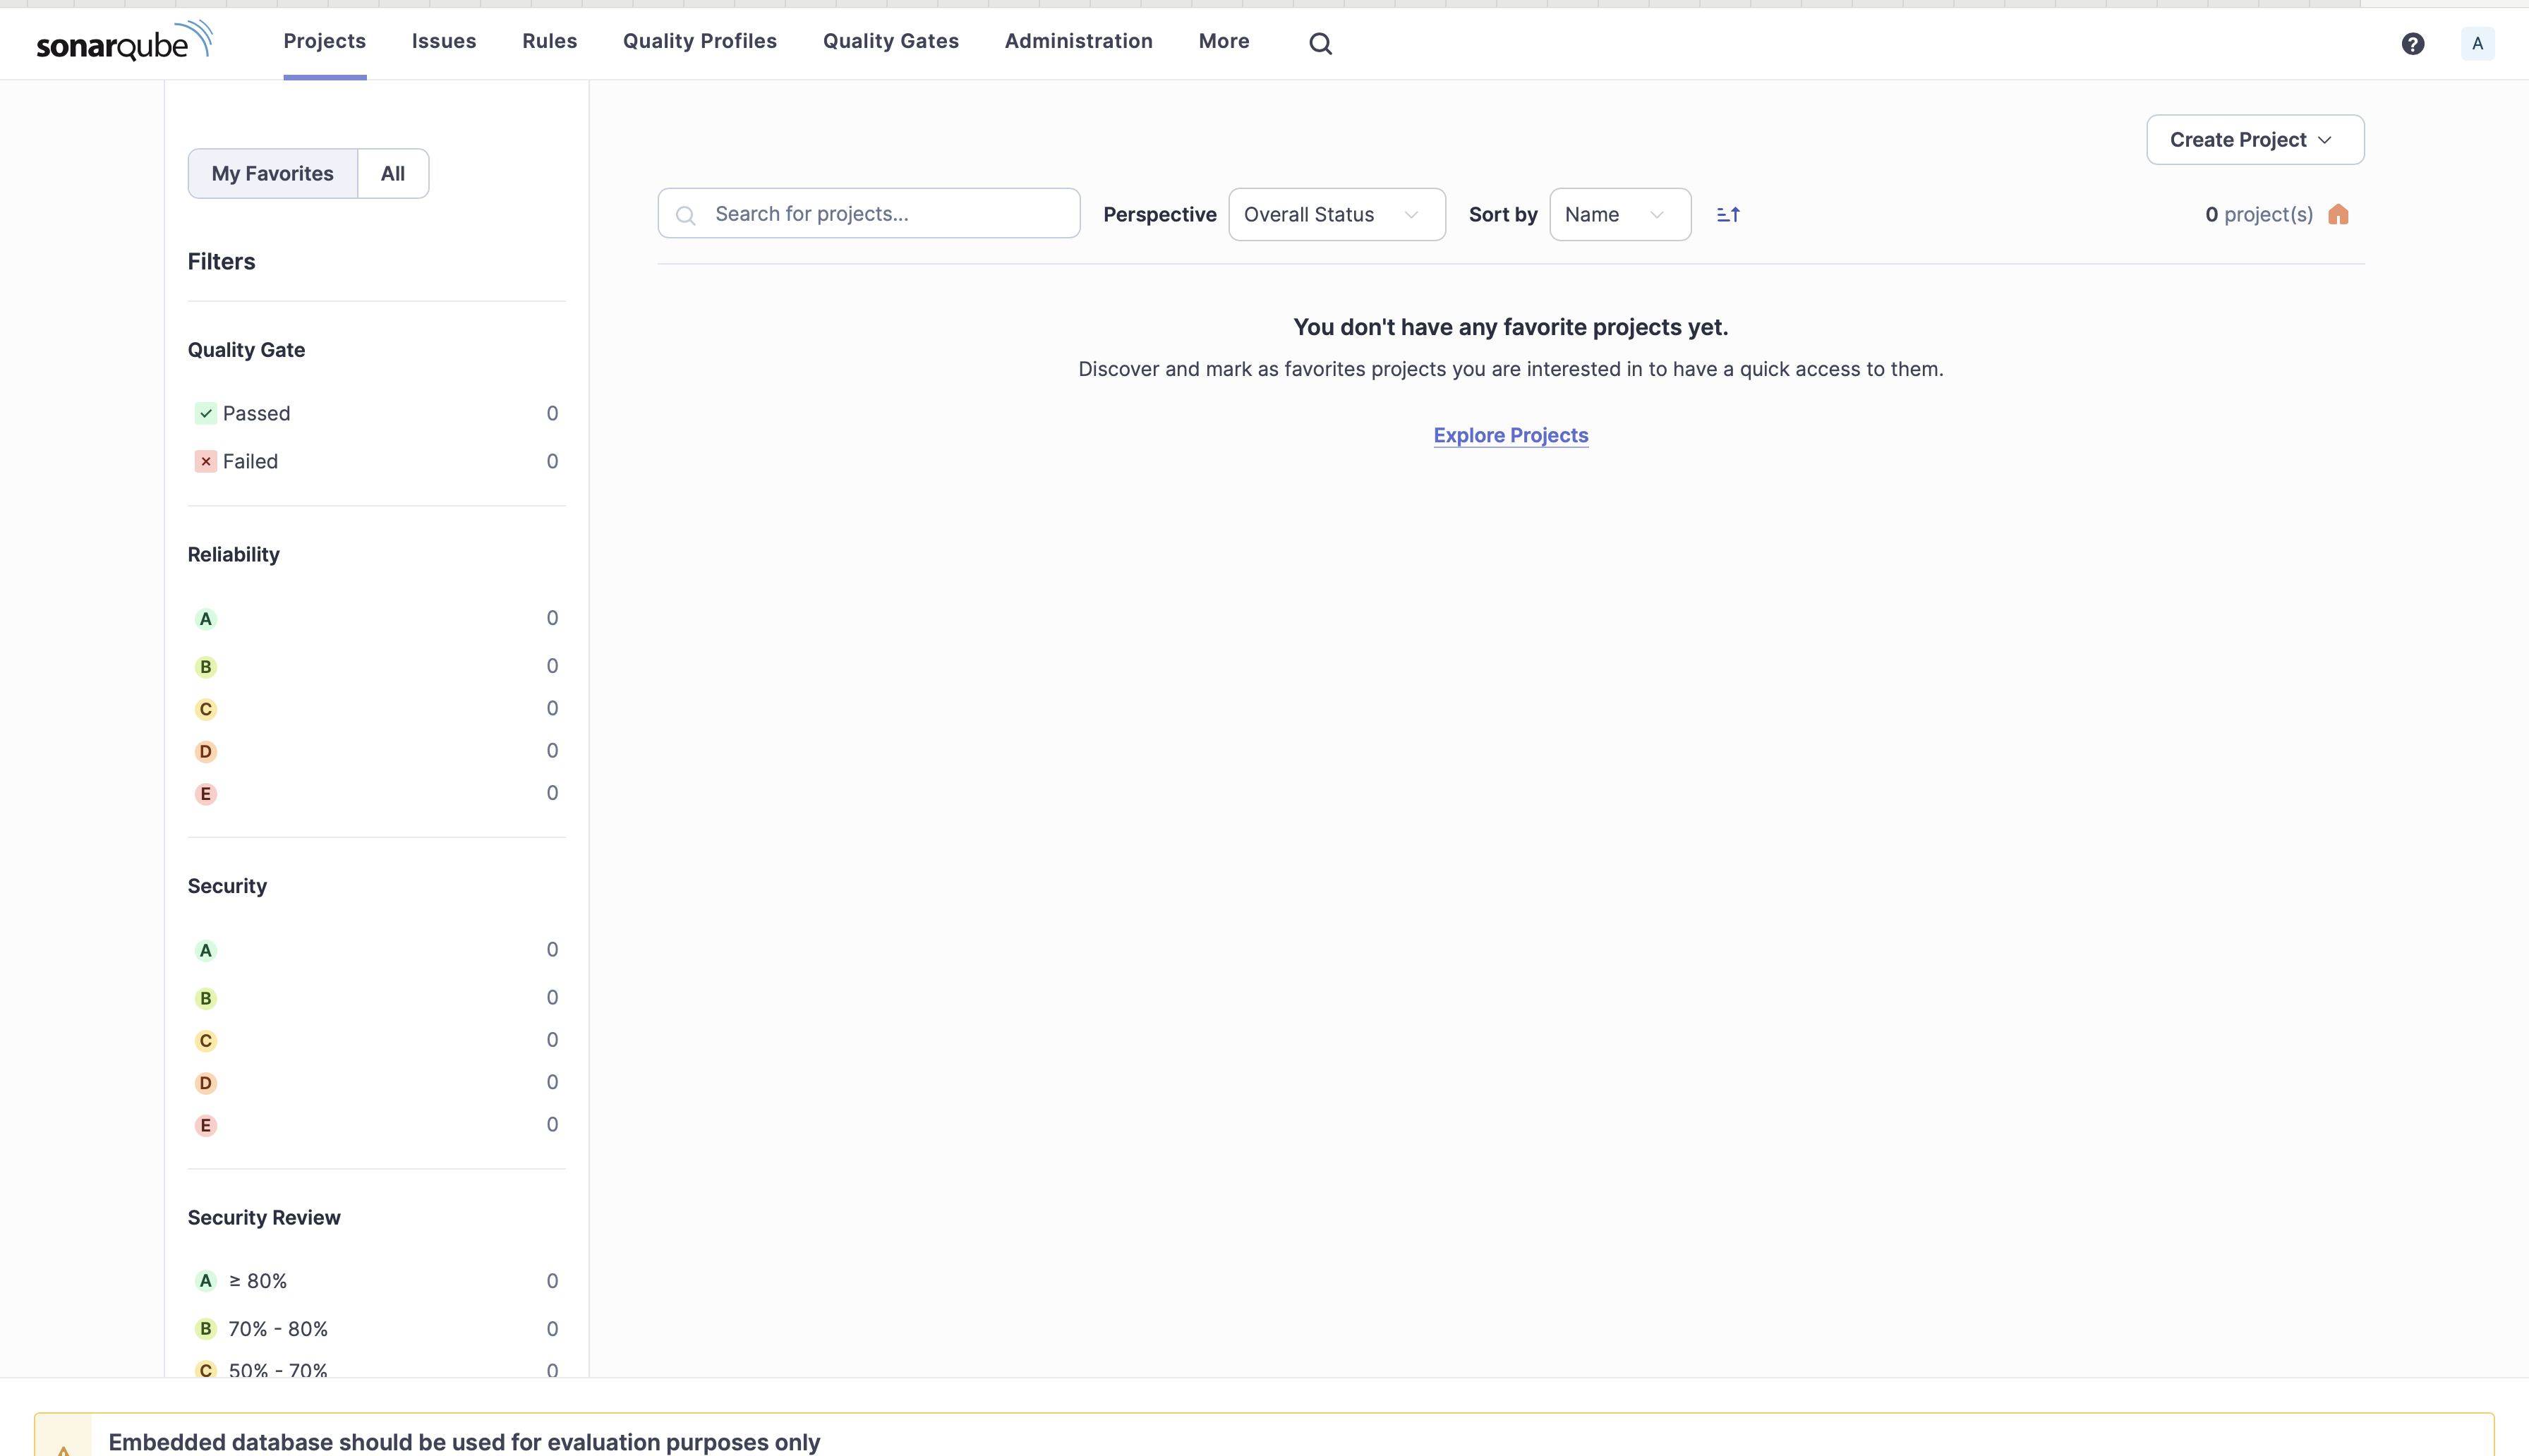
SonarQube Projects
A SonarQube project represents a codebase that you want to analyze. Each project is identified by a unique key and can be configured with various settings, such as the programming languages used, the source code directories, and the quality gates (thresholds for code quality metrics). You can create a new project in SonarQube through the web interface or automatically during the first analysis of your codebase. When creating a project manually, you need to provide a project key and other details like the project name and visibility settings.
Scanner CLI for SonarQube
A scanner is required to be set up that will be used to run code analysis on SonarQube. Project configuration is read from file sonar-project.properties or passed on the command line.
The SonarScanner CLI (Command Line Interface) is a tool that allows you to analyze your codebase from the command line. It is the recommended scanner when there is no specific scanner available for your build system or when you want to run the analysis outside of your build process.
Download and Configure SonarScanner CLI
- Based on the Operating system, you are running your SonarQube server, download the sonar-scanner from this link.
- Unzip or expand the downloaded file into the directory of your choice. Let's refer to it as
<INSTALL_DIRECTORY>in the next steps. - Update the global settings to point to your SonarQube server by editing
$install_directory/conf/sonar-scanner.properties
# Configure here general information about the environment, such as the server connection details for example
# No information about specific project should appear here

#----- SonarQube server URL (default to SonarCloud)
sonar.host.url=http://localhost:9000/

#sonar.scanner.proxyHost=myproxy.mycompany.com
#sonar.scanner.proxyPort=8002
4. Add the <INSTALL_DIRECTORY>/bin directory to your path. If you are using macOS or Linux, add this to your ~/.bashrc or ~/.zshrc and source the file source ~/.bashrc
Setup Ansible Plugin
Before you set up the SonarQube plugin for Ansible, install ansible-lint
npm install -g ansible-lintOn macOS, if you have homebrew installed, use this command brew install ansible-lint
To install and setup the SonarQube plugin for Ansible, follow the instructions here
- Download the YAML and Ansible SonarQube plugins
- Copy them into the
extensions/pluginsdirectory of SonarQube and restart SonarQubeLaTeX├── README.txt ├── sonar-ansible-plugin-2.5.1.jar └── sonar-yaml-plugin-1.9.1.jar - Log into SonarQube Server console.
- Click on Quality Profiles to create a new quality profile for YAML.
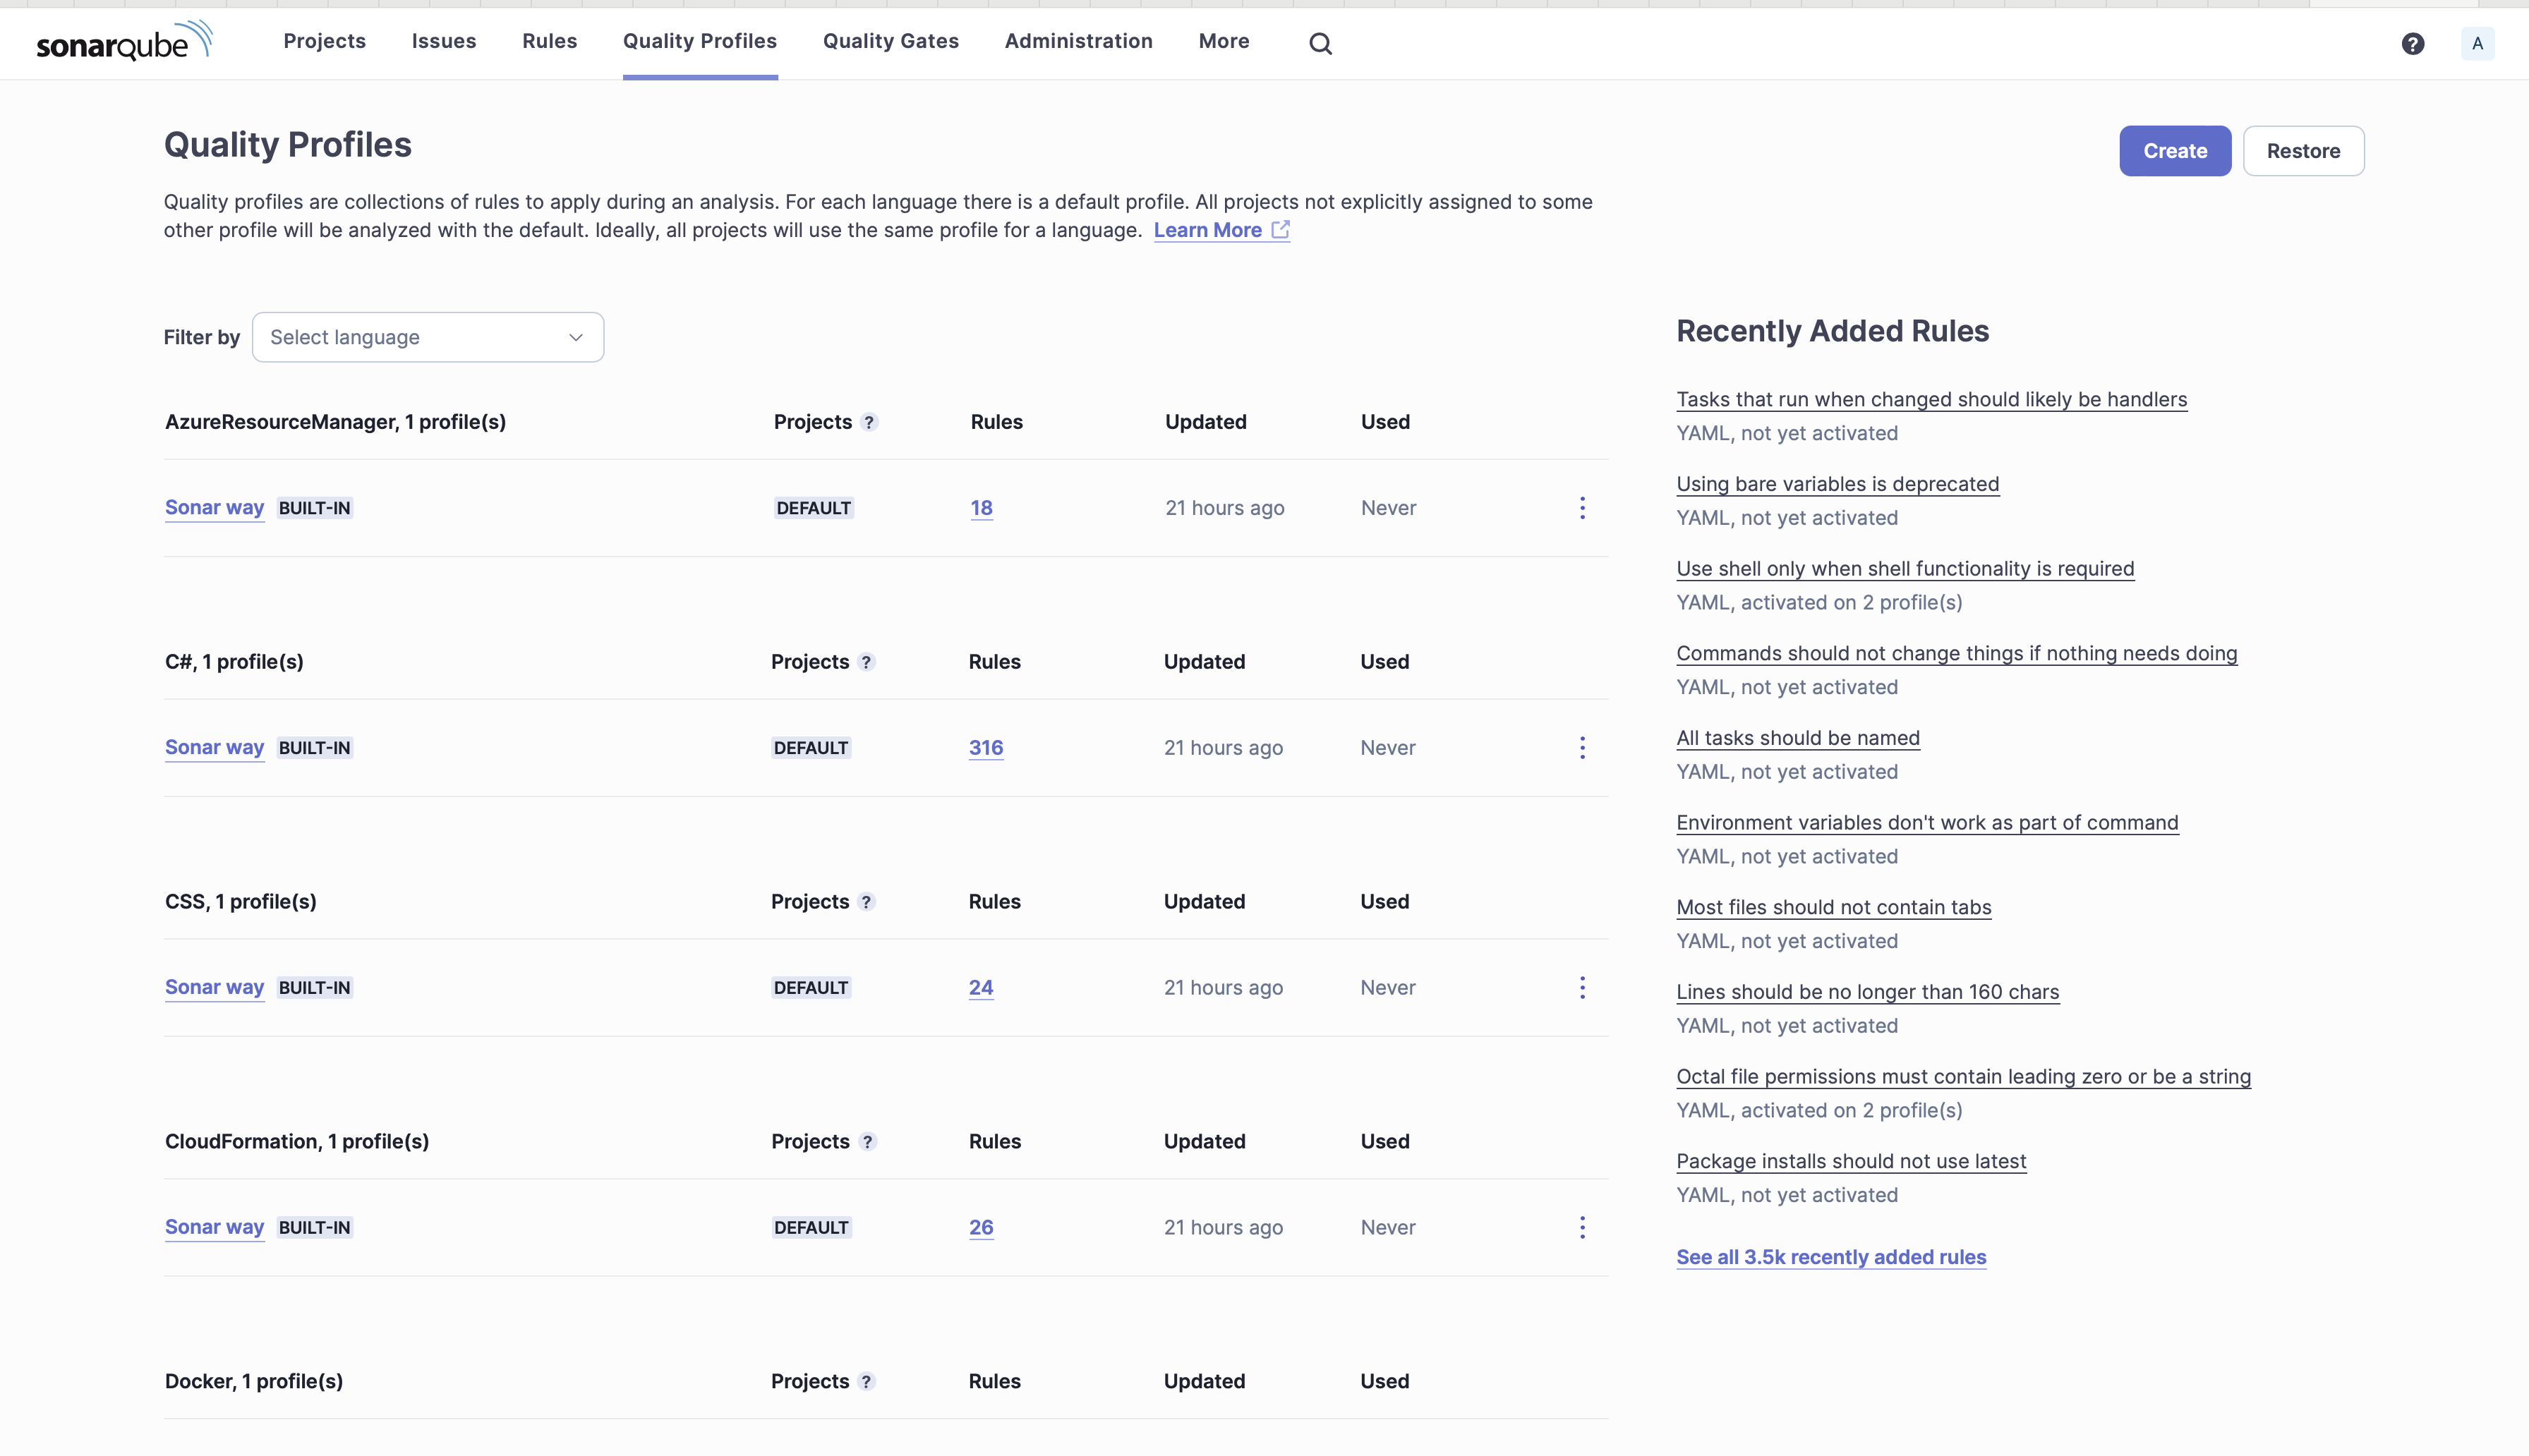
5. Click Create.
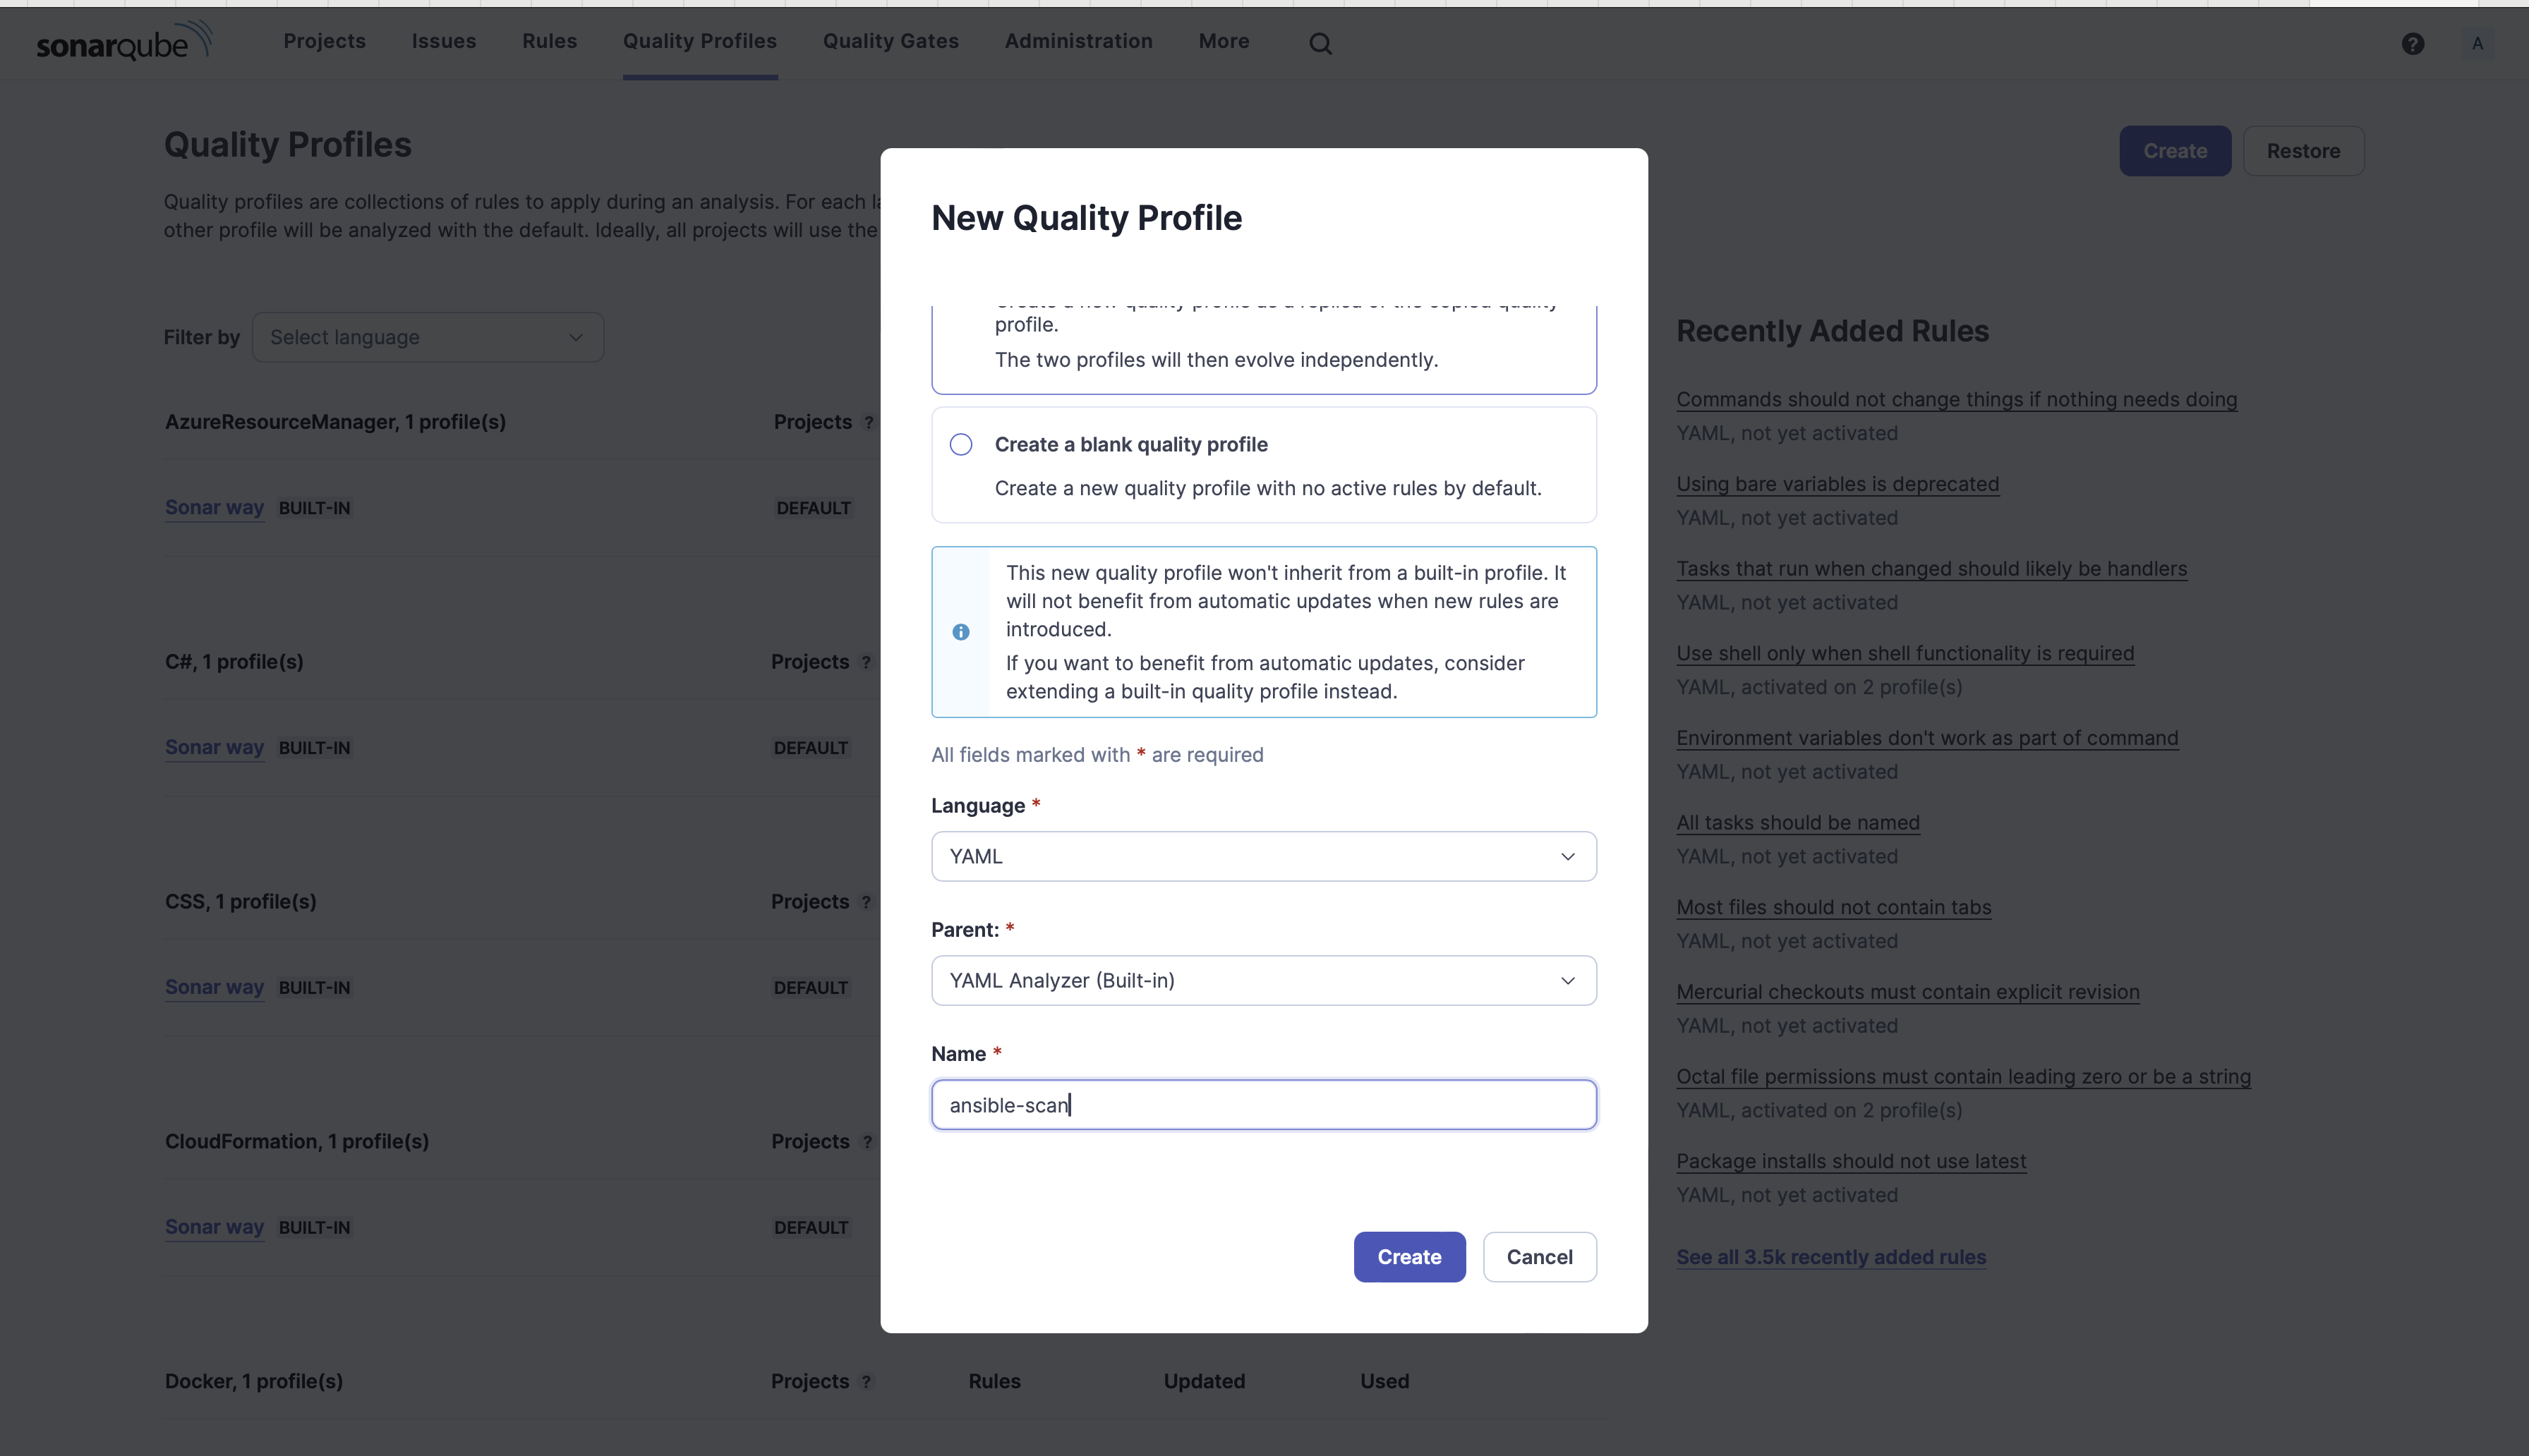
6. Select Copy from an existing quality profile, fill in the below details and click Create.
- Language: YAML
- Parent: YAML Analyzer (Built-in)
- Name: ansible-scan
7. Activate the Ansible rules on the ansible-scan quality profile by clicking on the menu icon and selecting Active More Rules.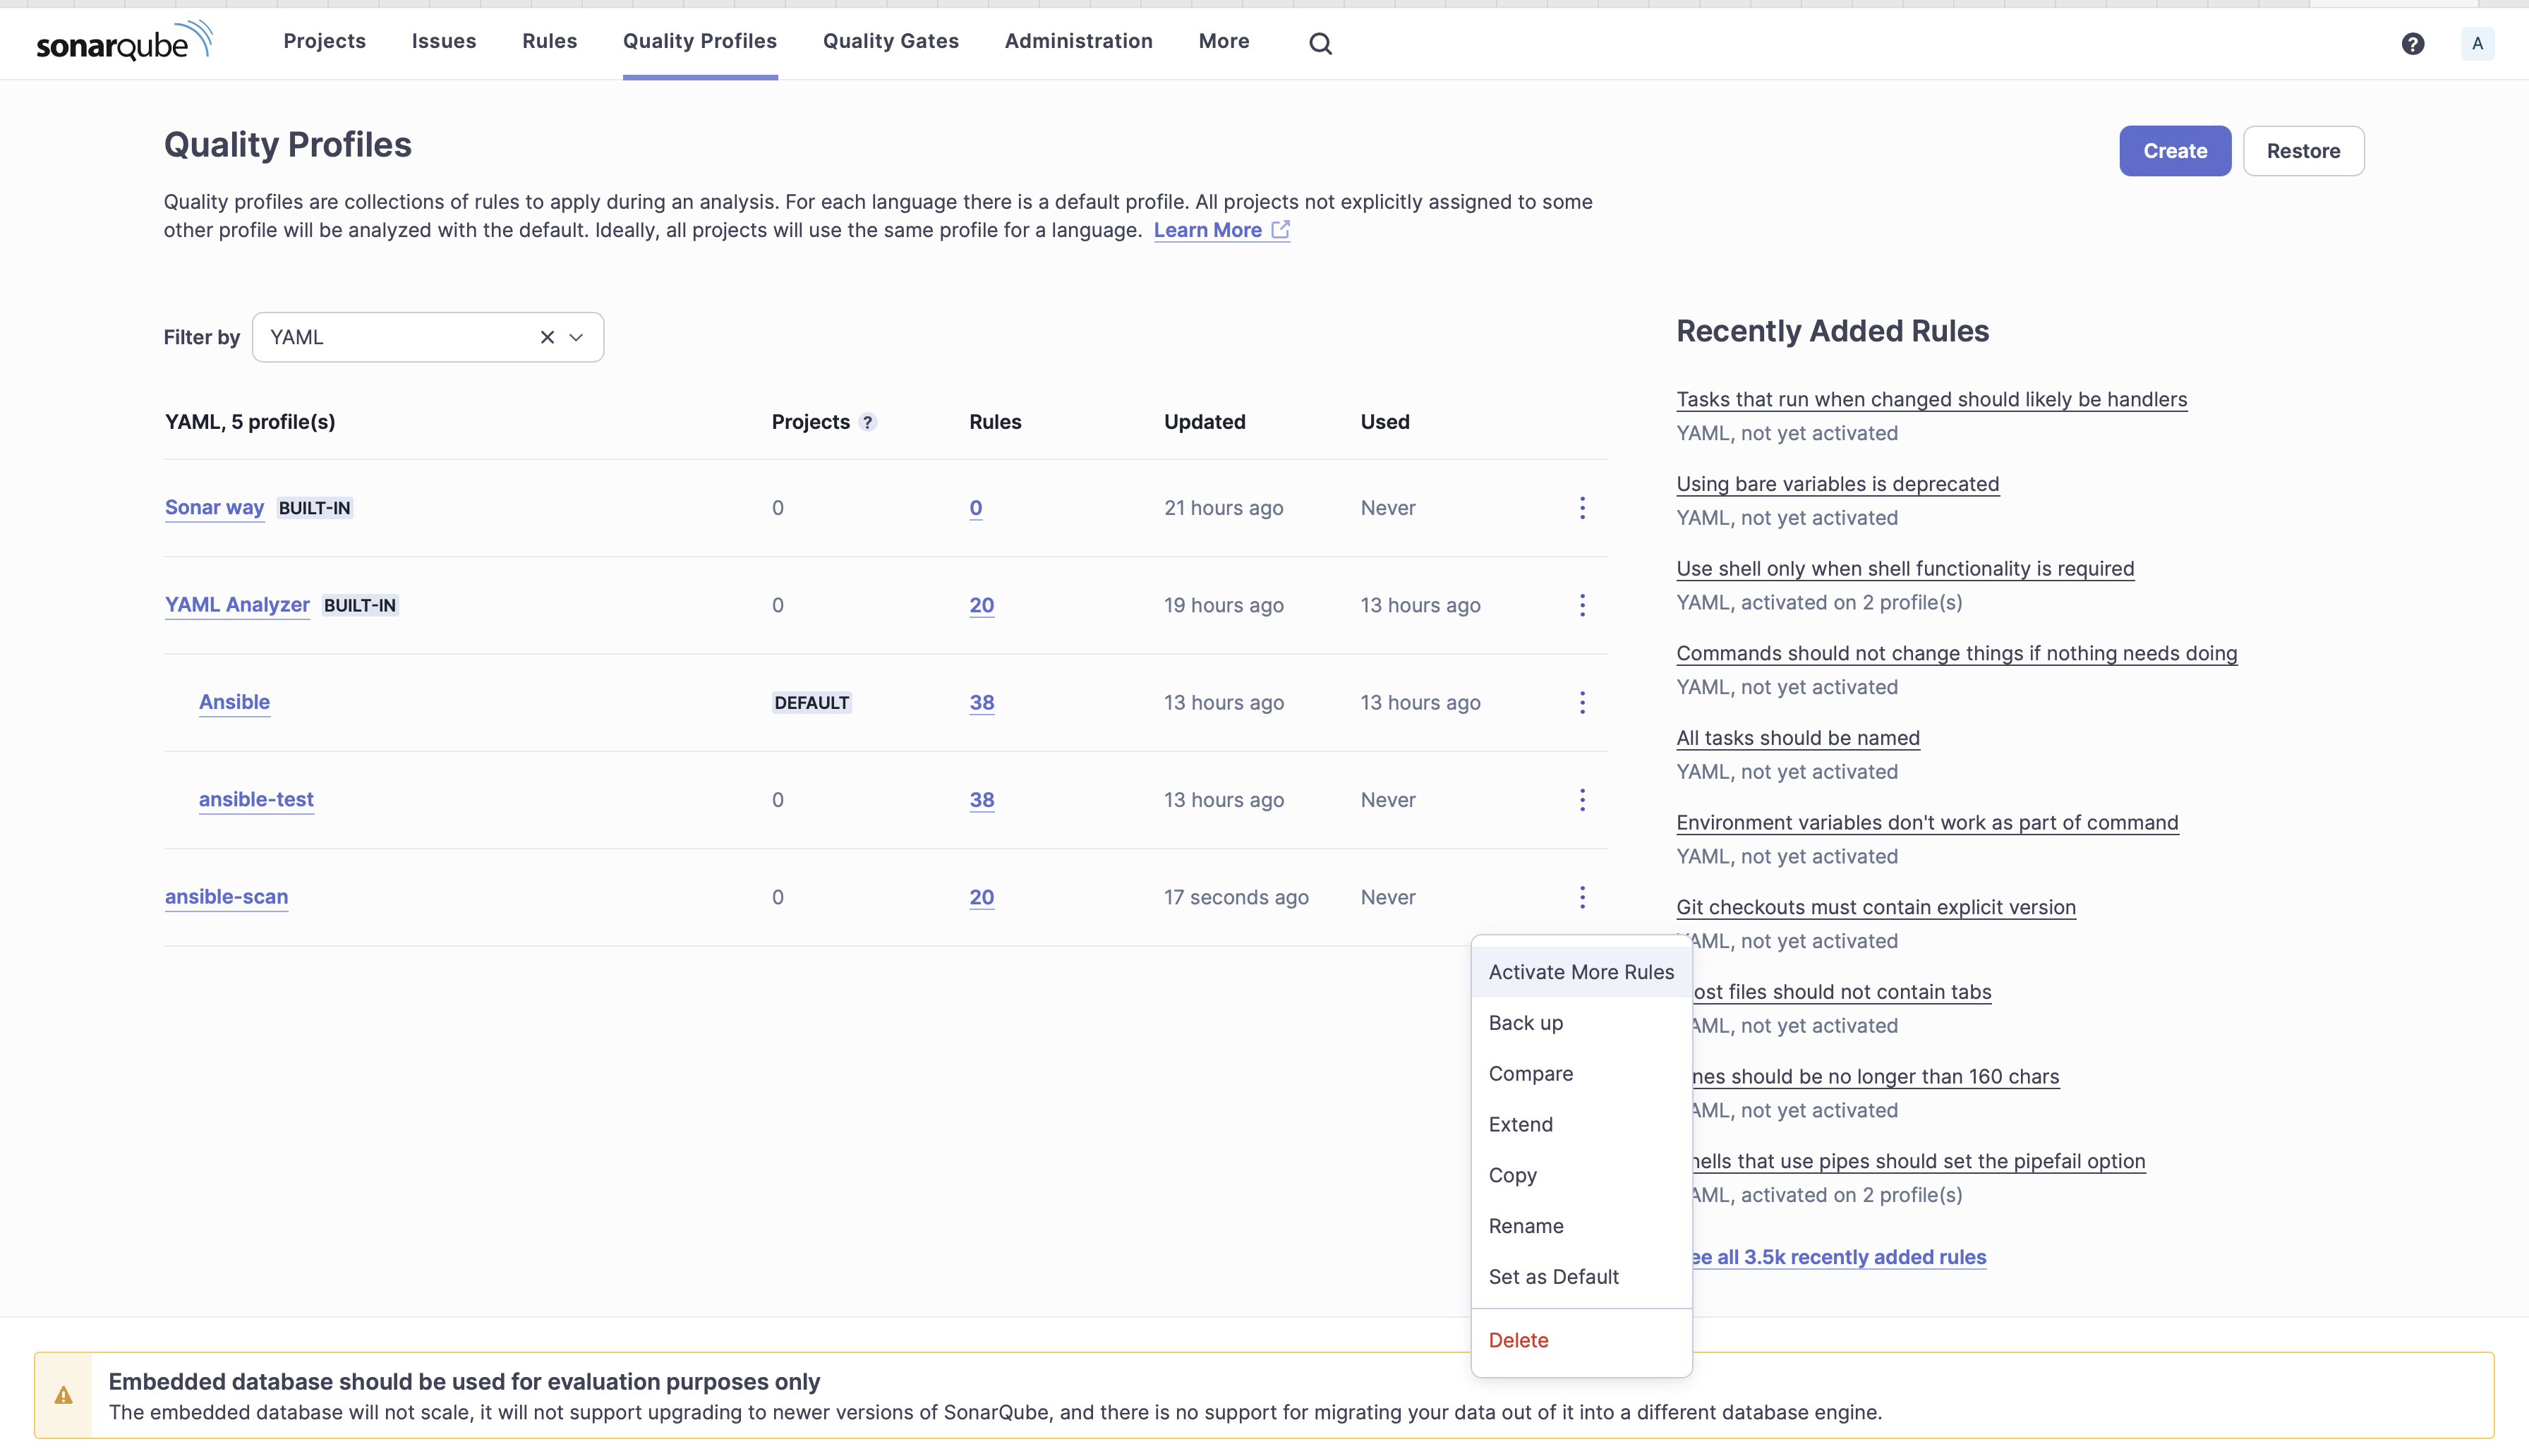
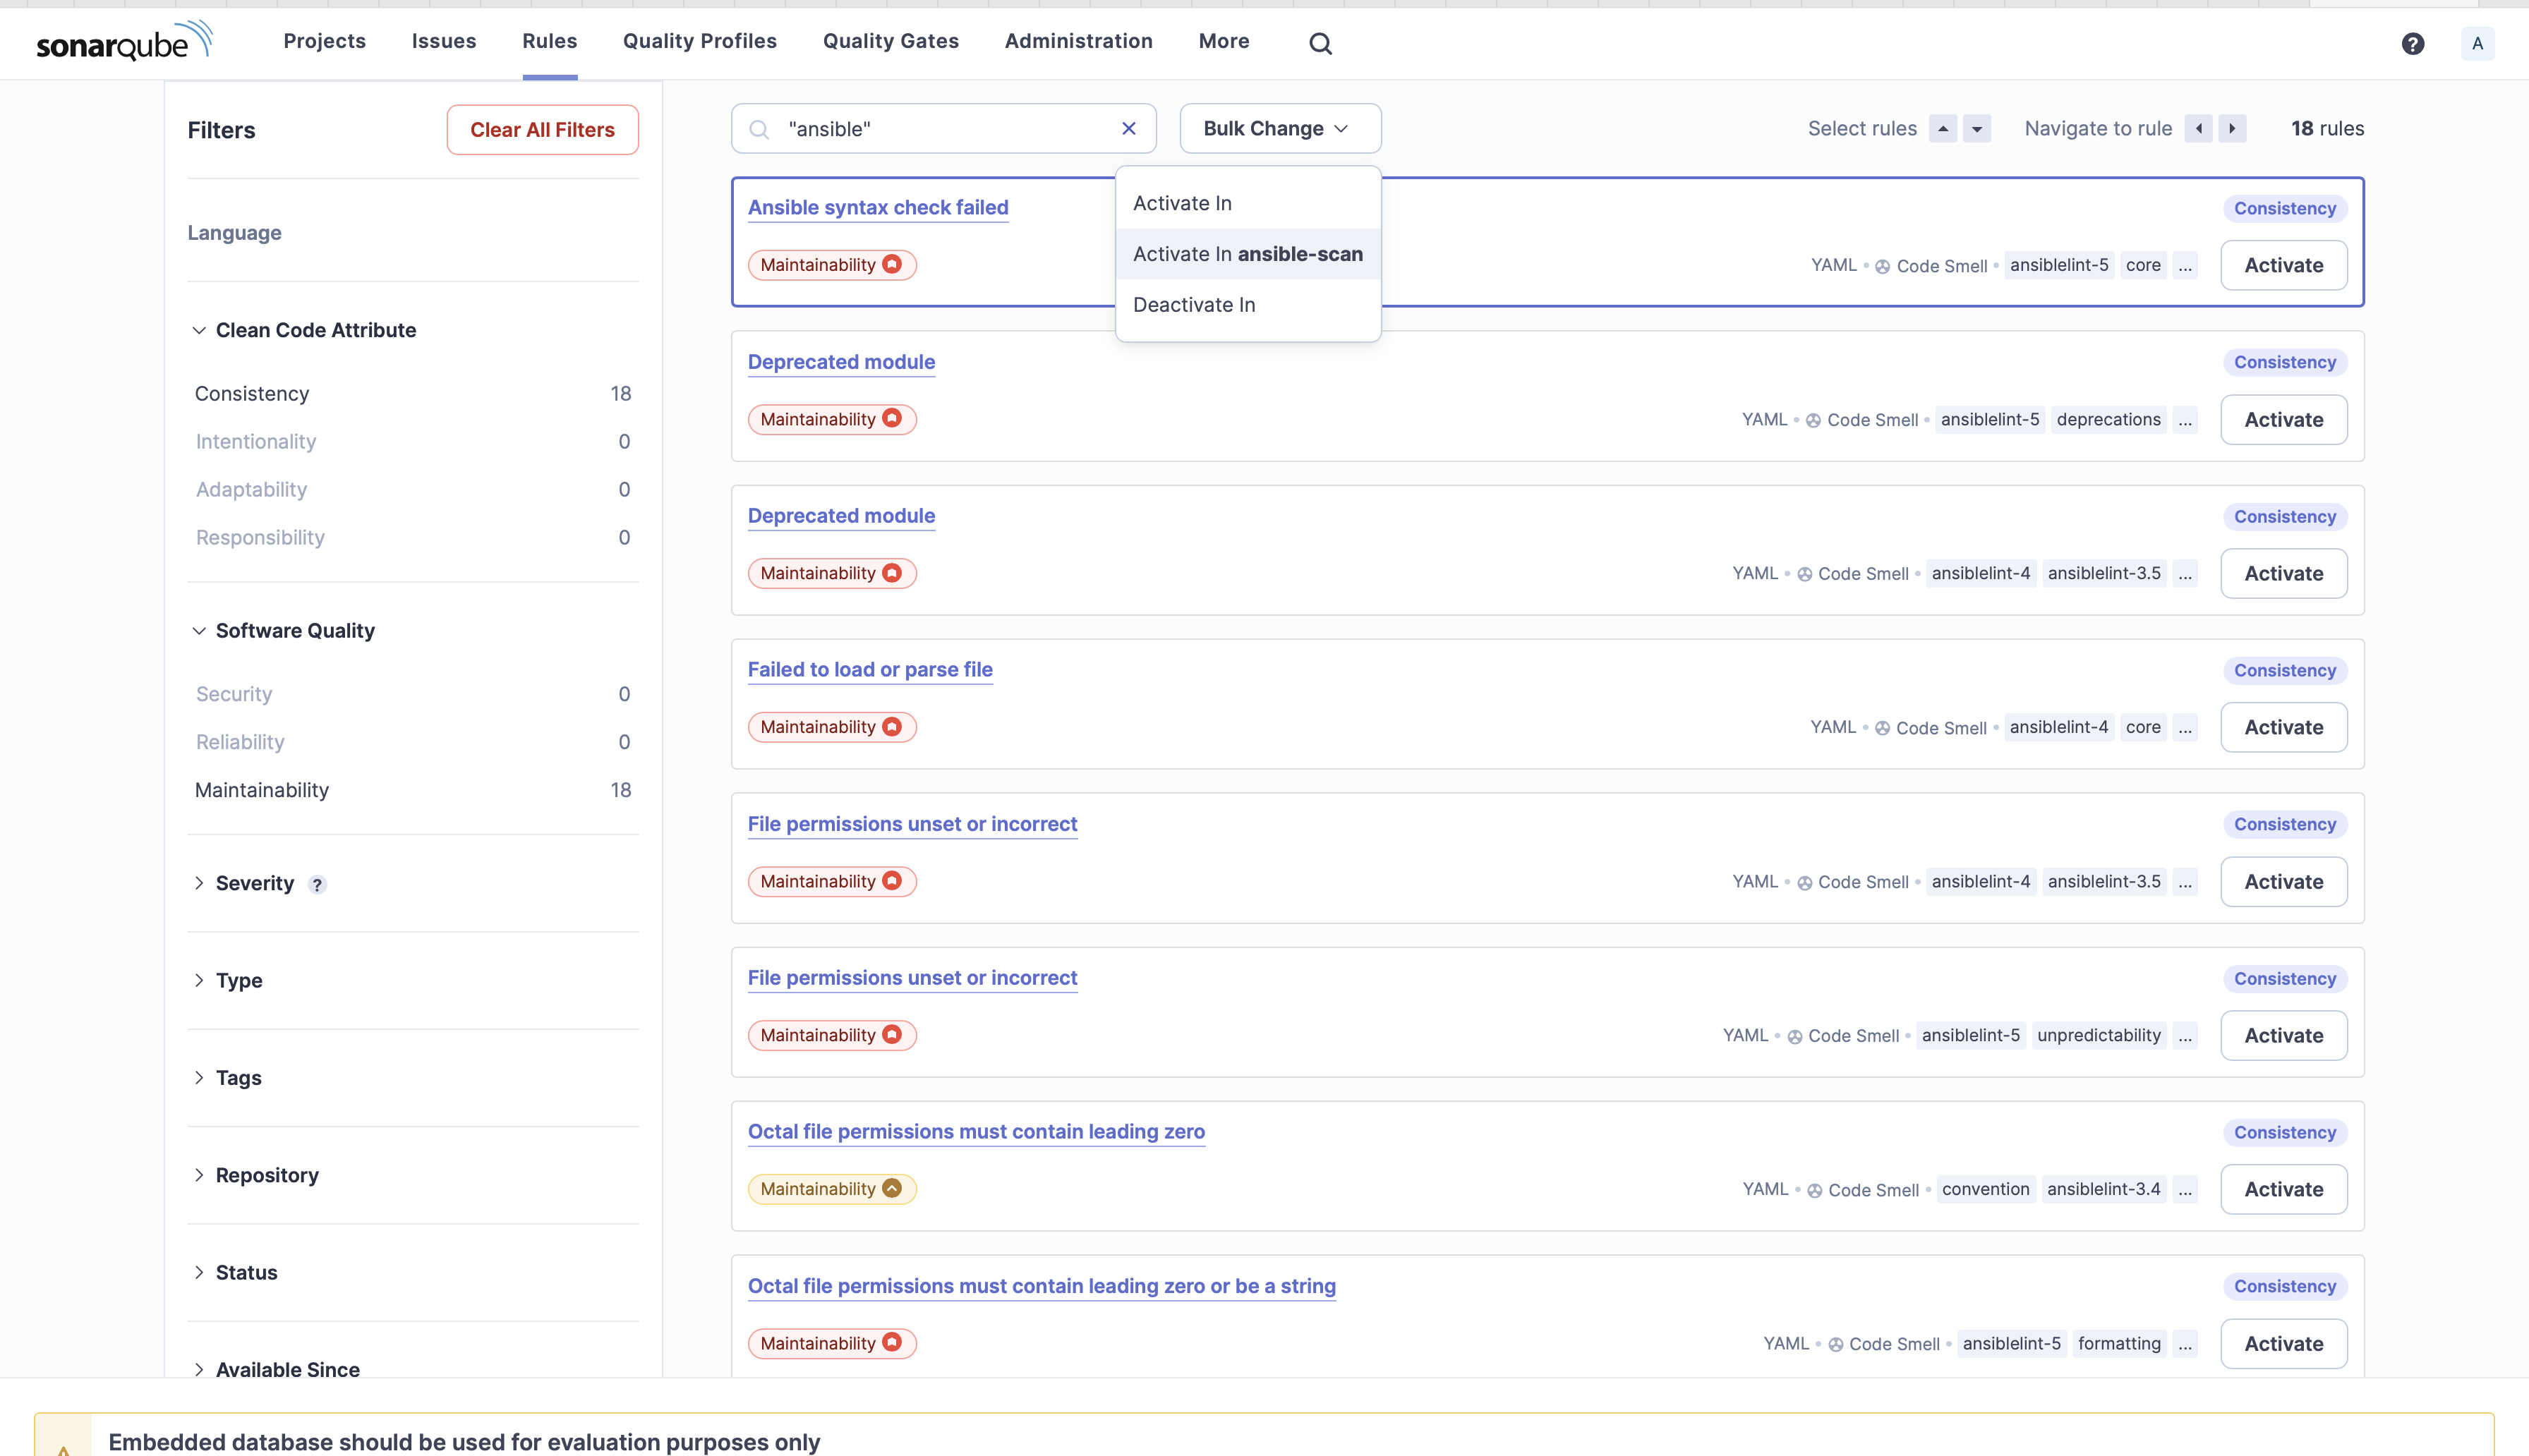
8. Search with the tag "ansible" and from the Bulk Change, Click on Activate in ansible-scan.
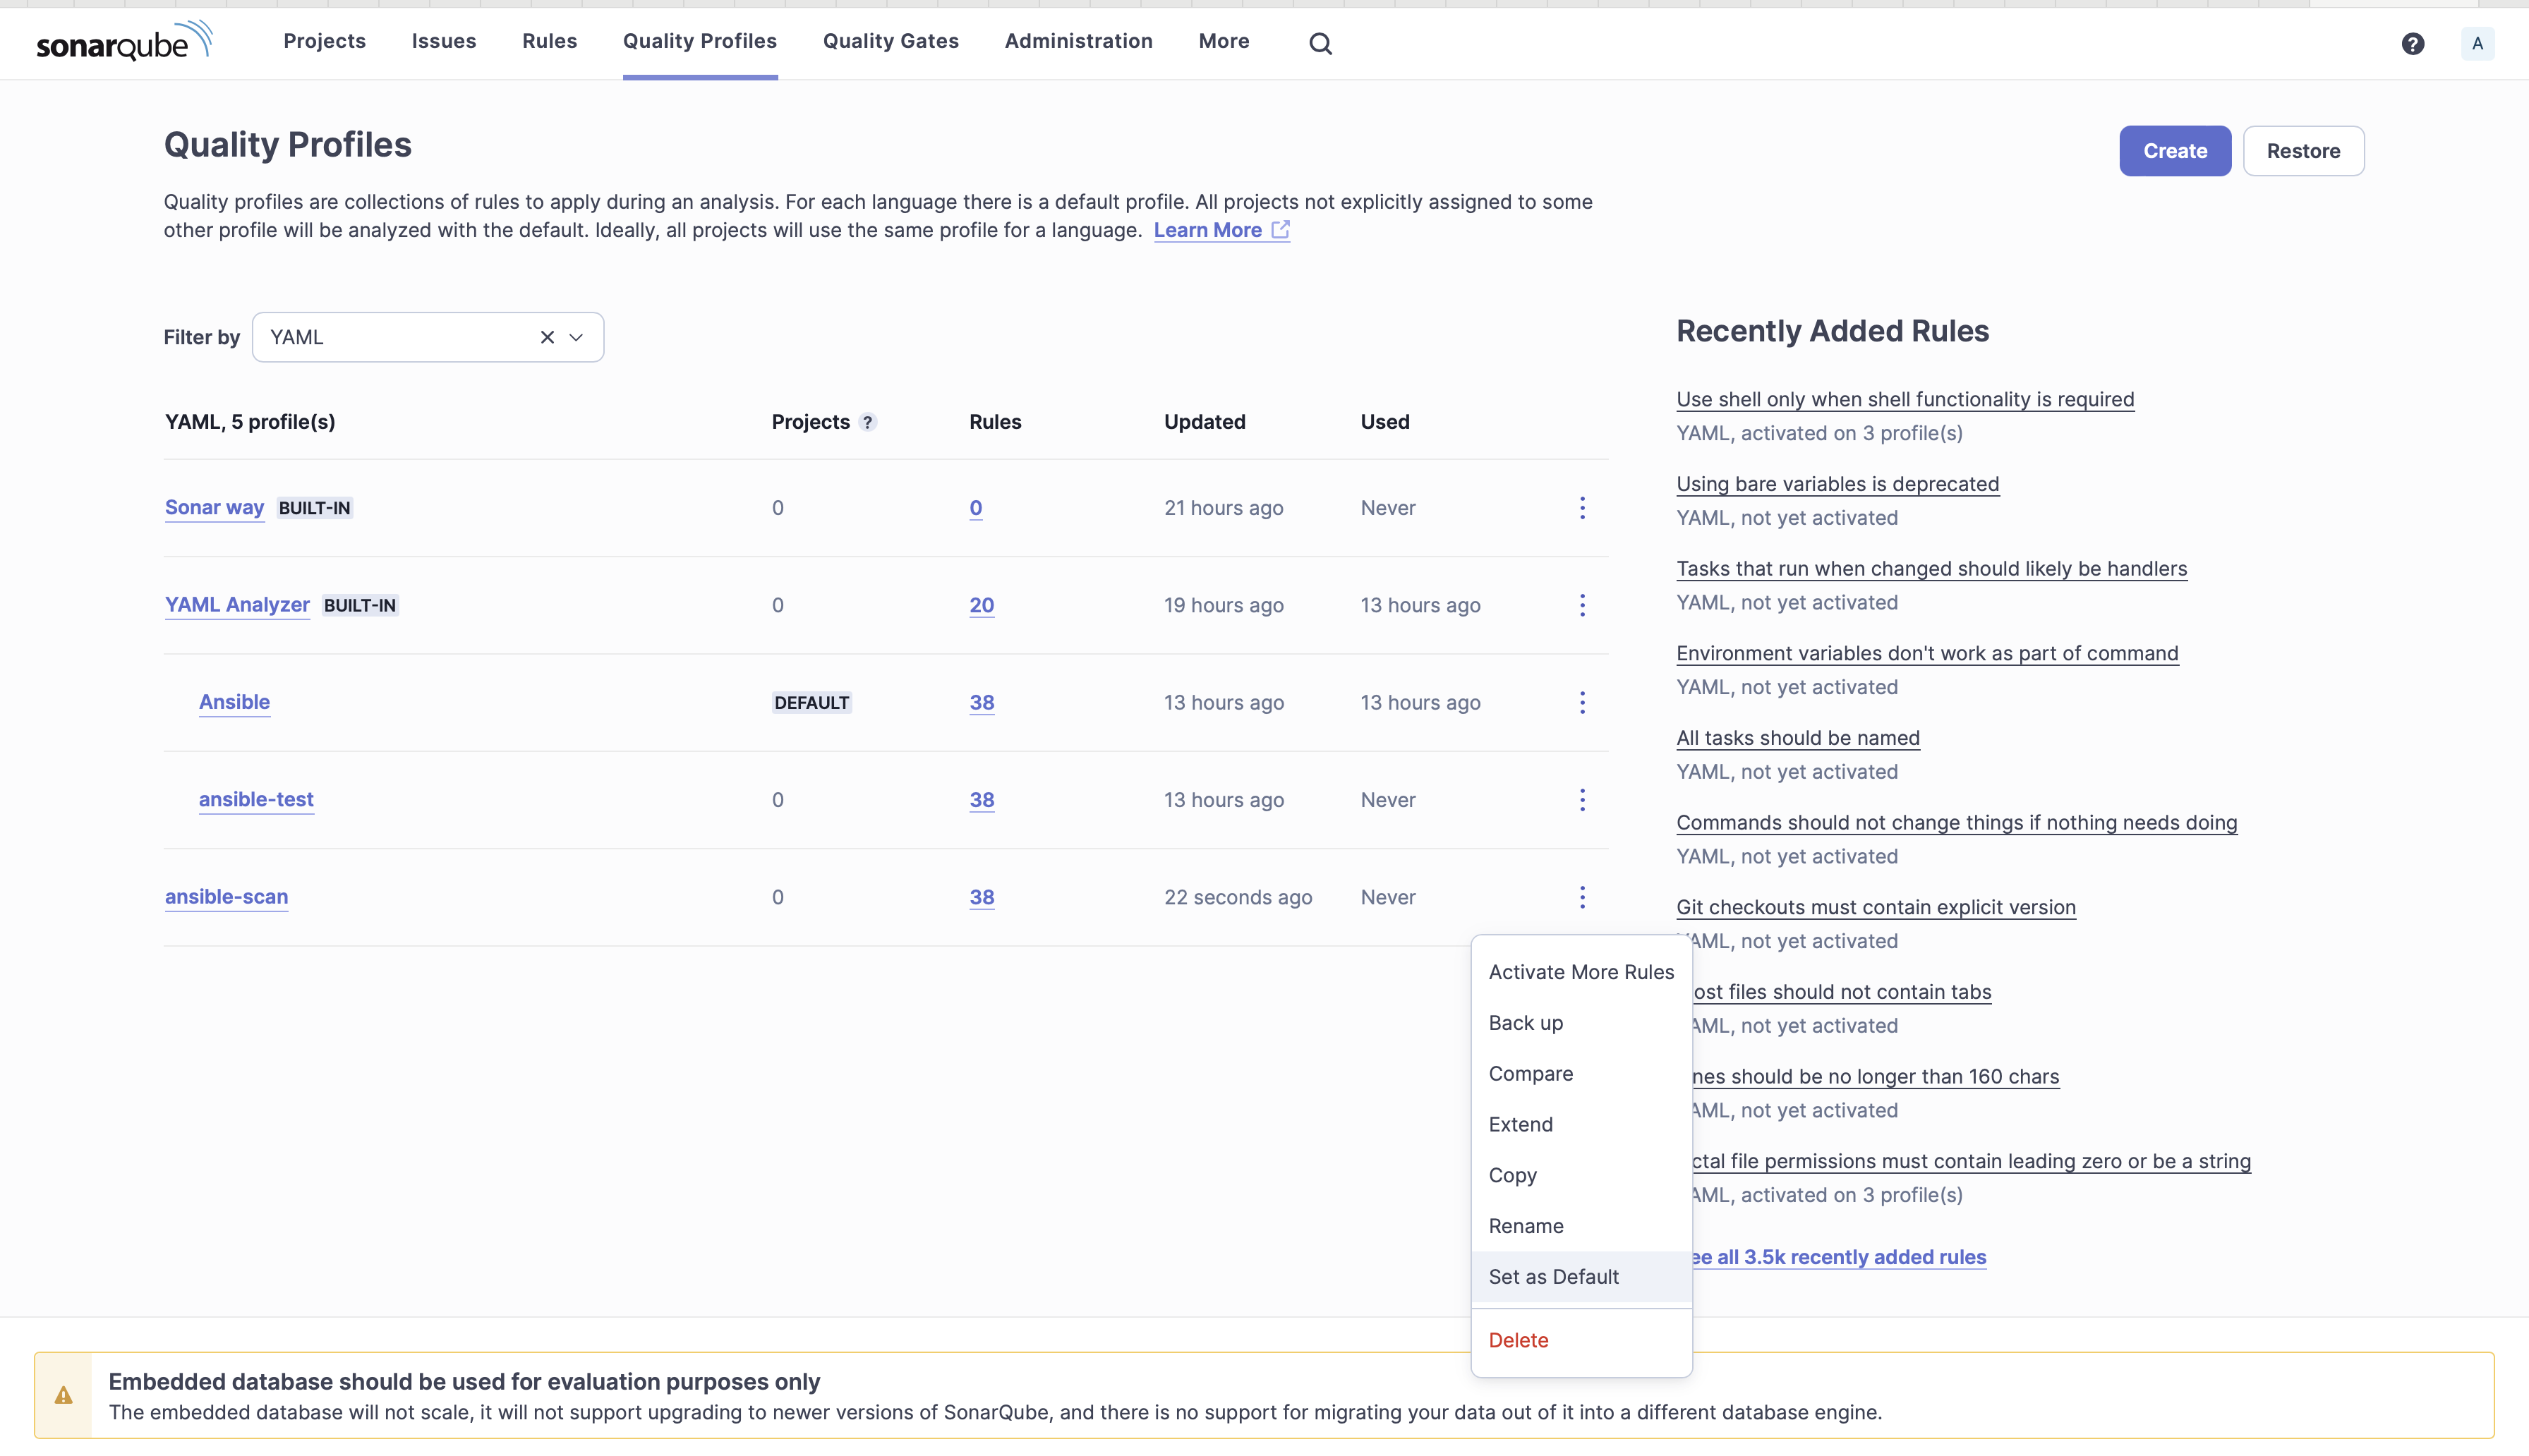
9. Set ansible-scan as the Default. The Ansible rules will be applicable to other YAML files. You can now see that for YAML you have 20 rules and for Ansible you have 38 rules.
Create a New Project and Run Your First Scan
- 1. Navigate to the localhost on your browser to launch the SonarQube Server console.
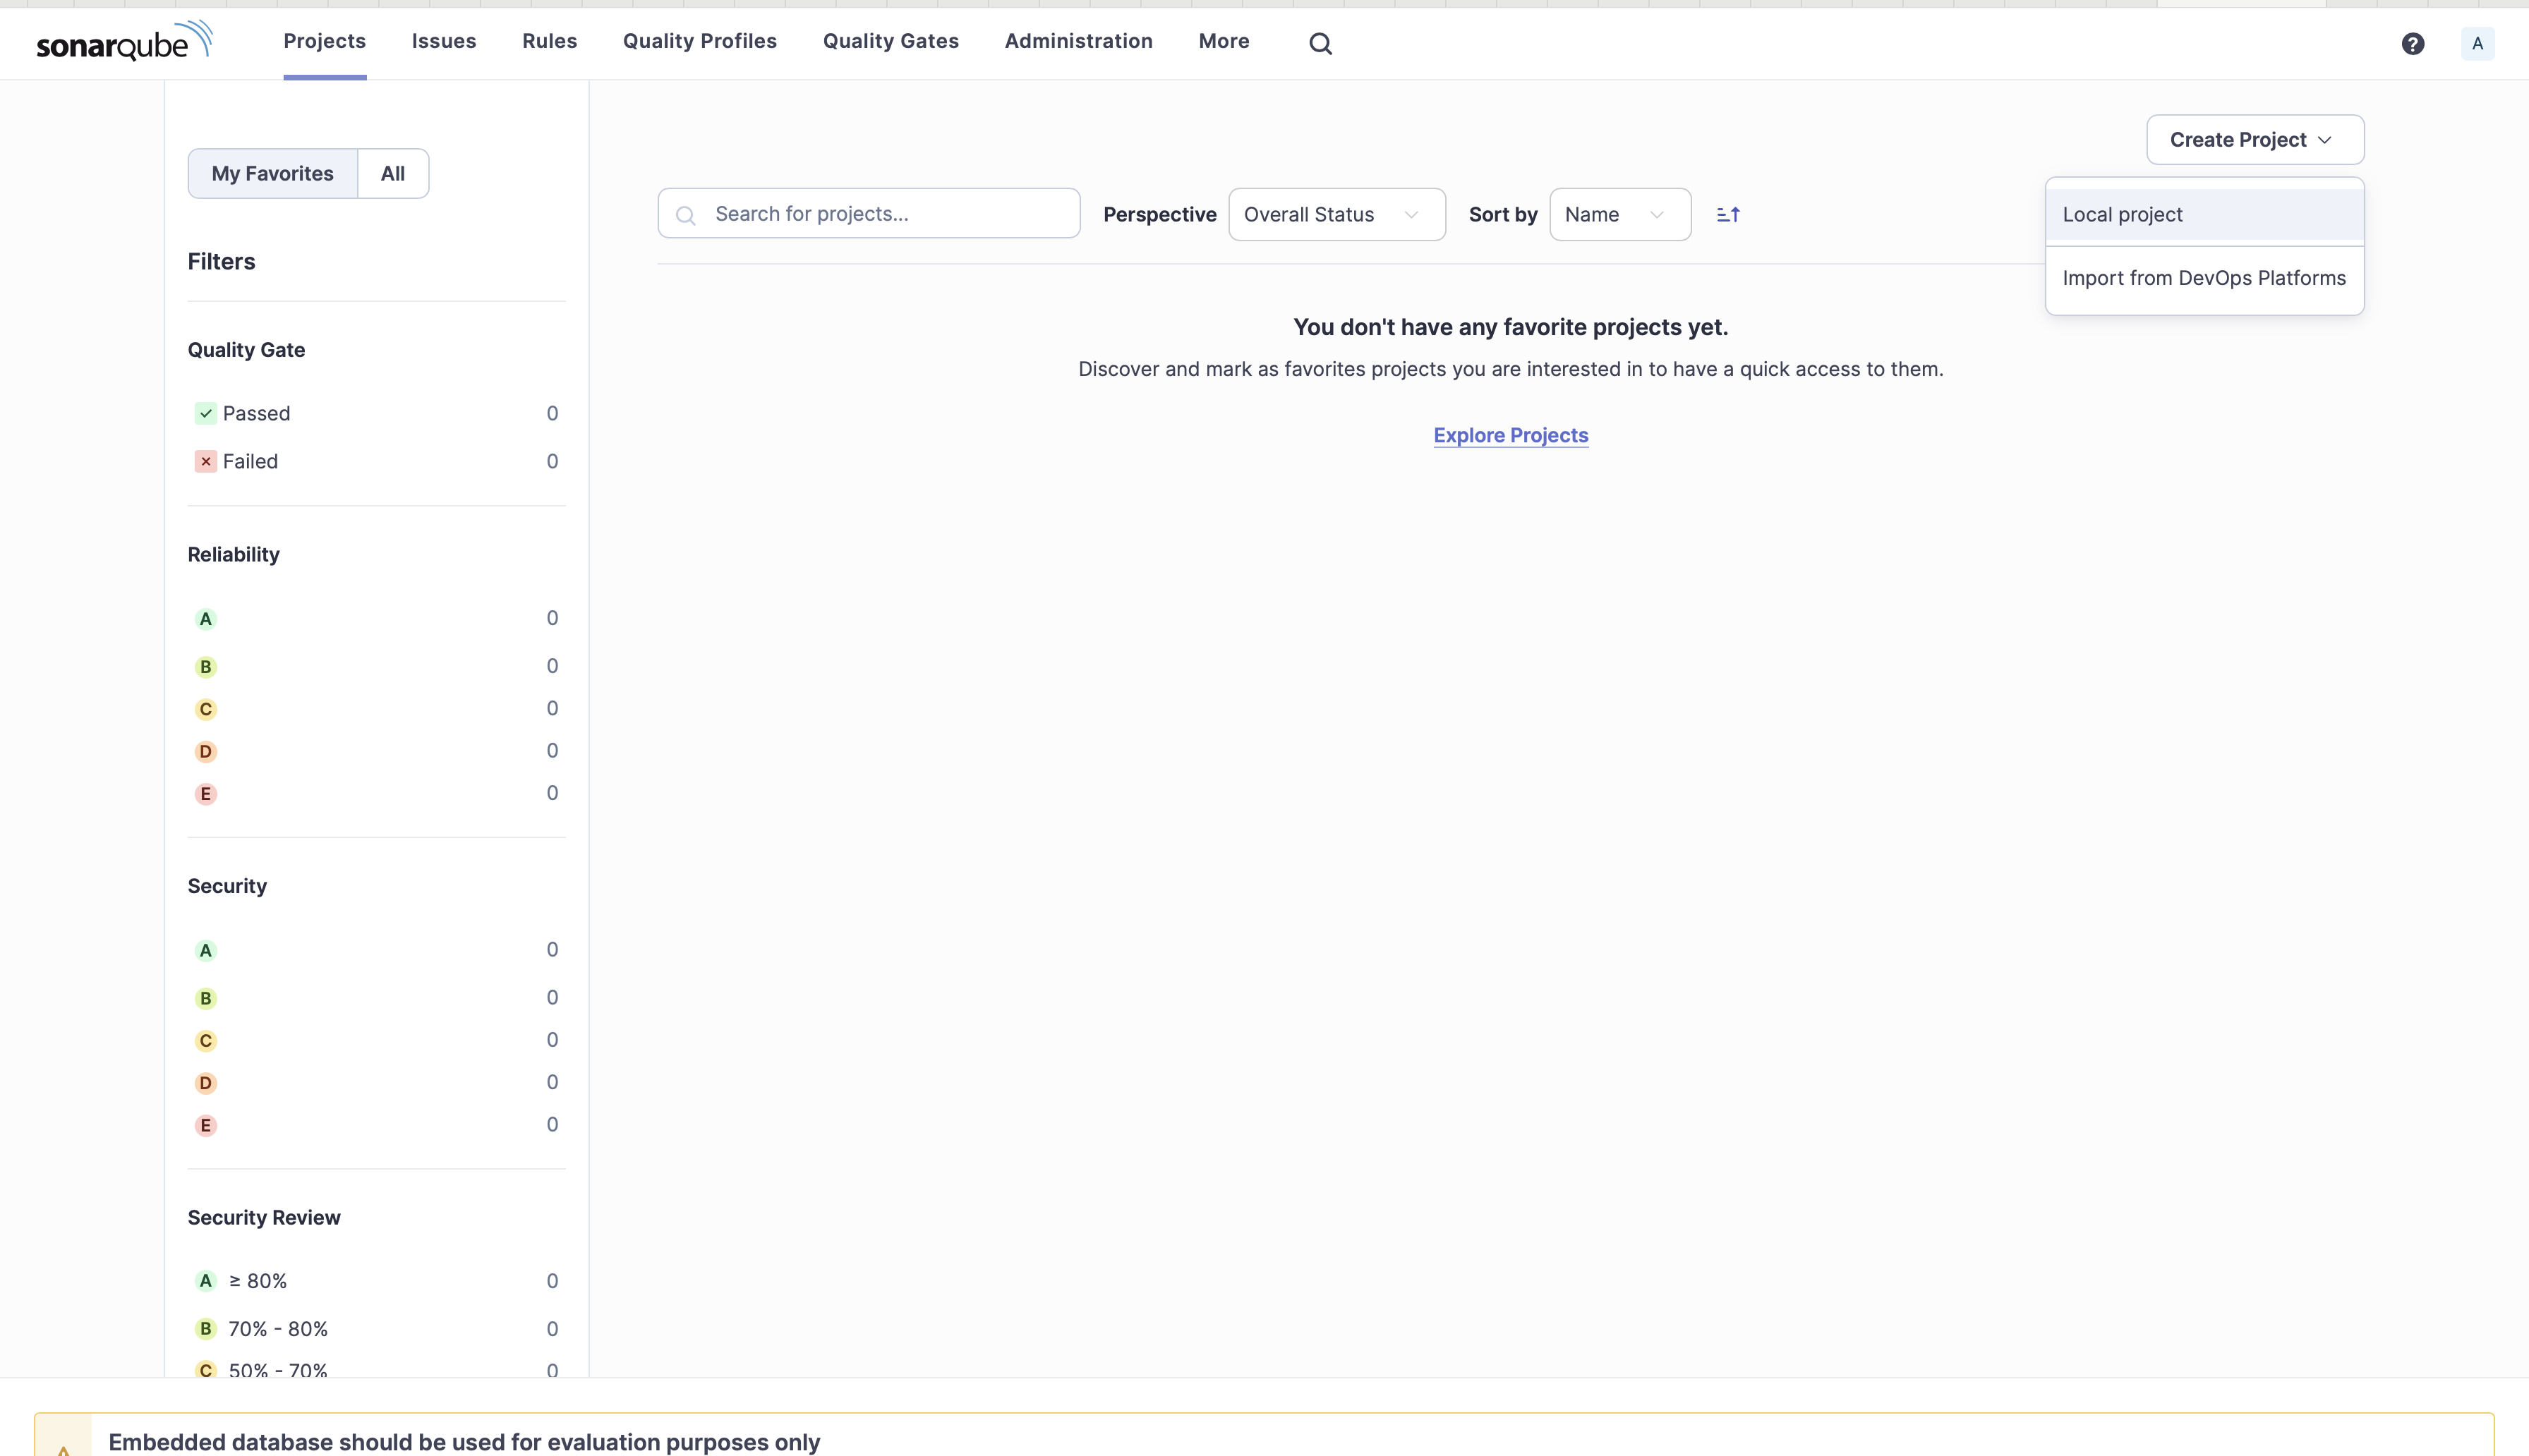
- 2. Click Create Project and select Local project.
For demo purpose, you can download Ansible code from this GitHub repository.
3. Enter a project displayname, project key, branch name, and click Next.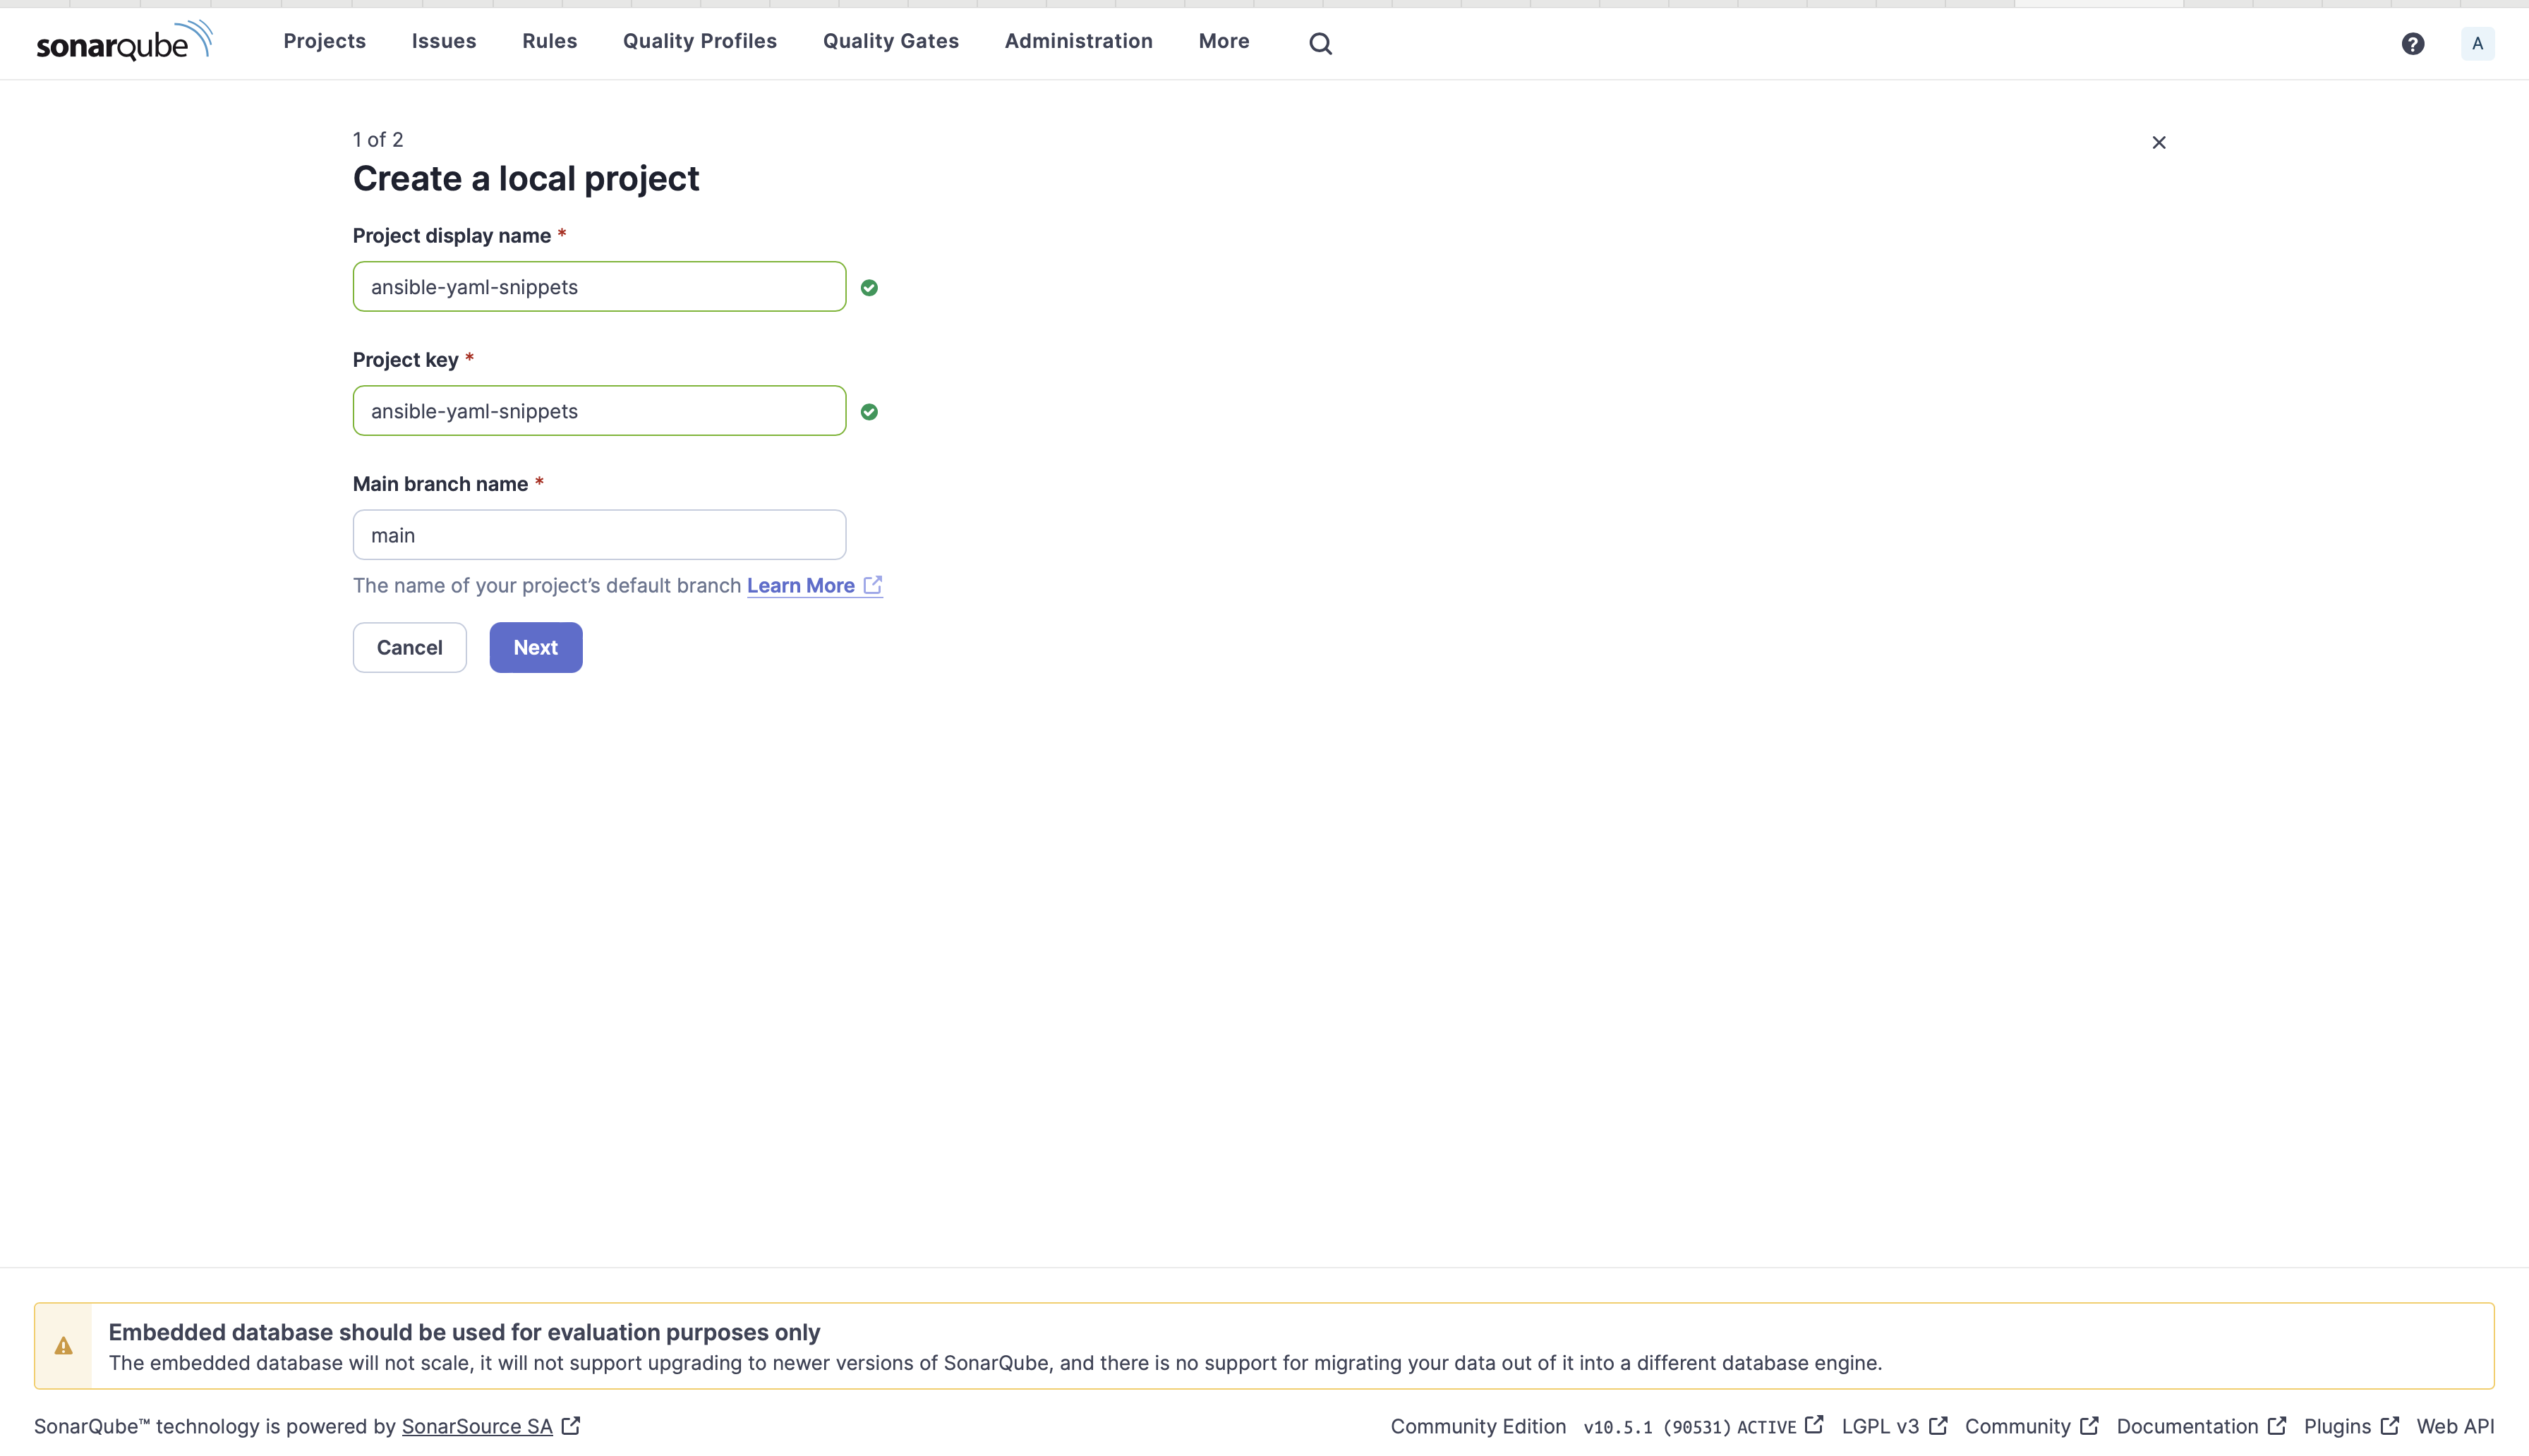
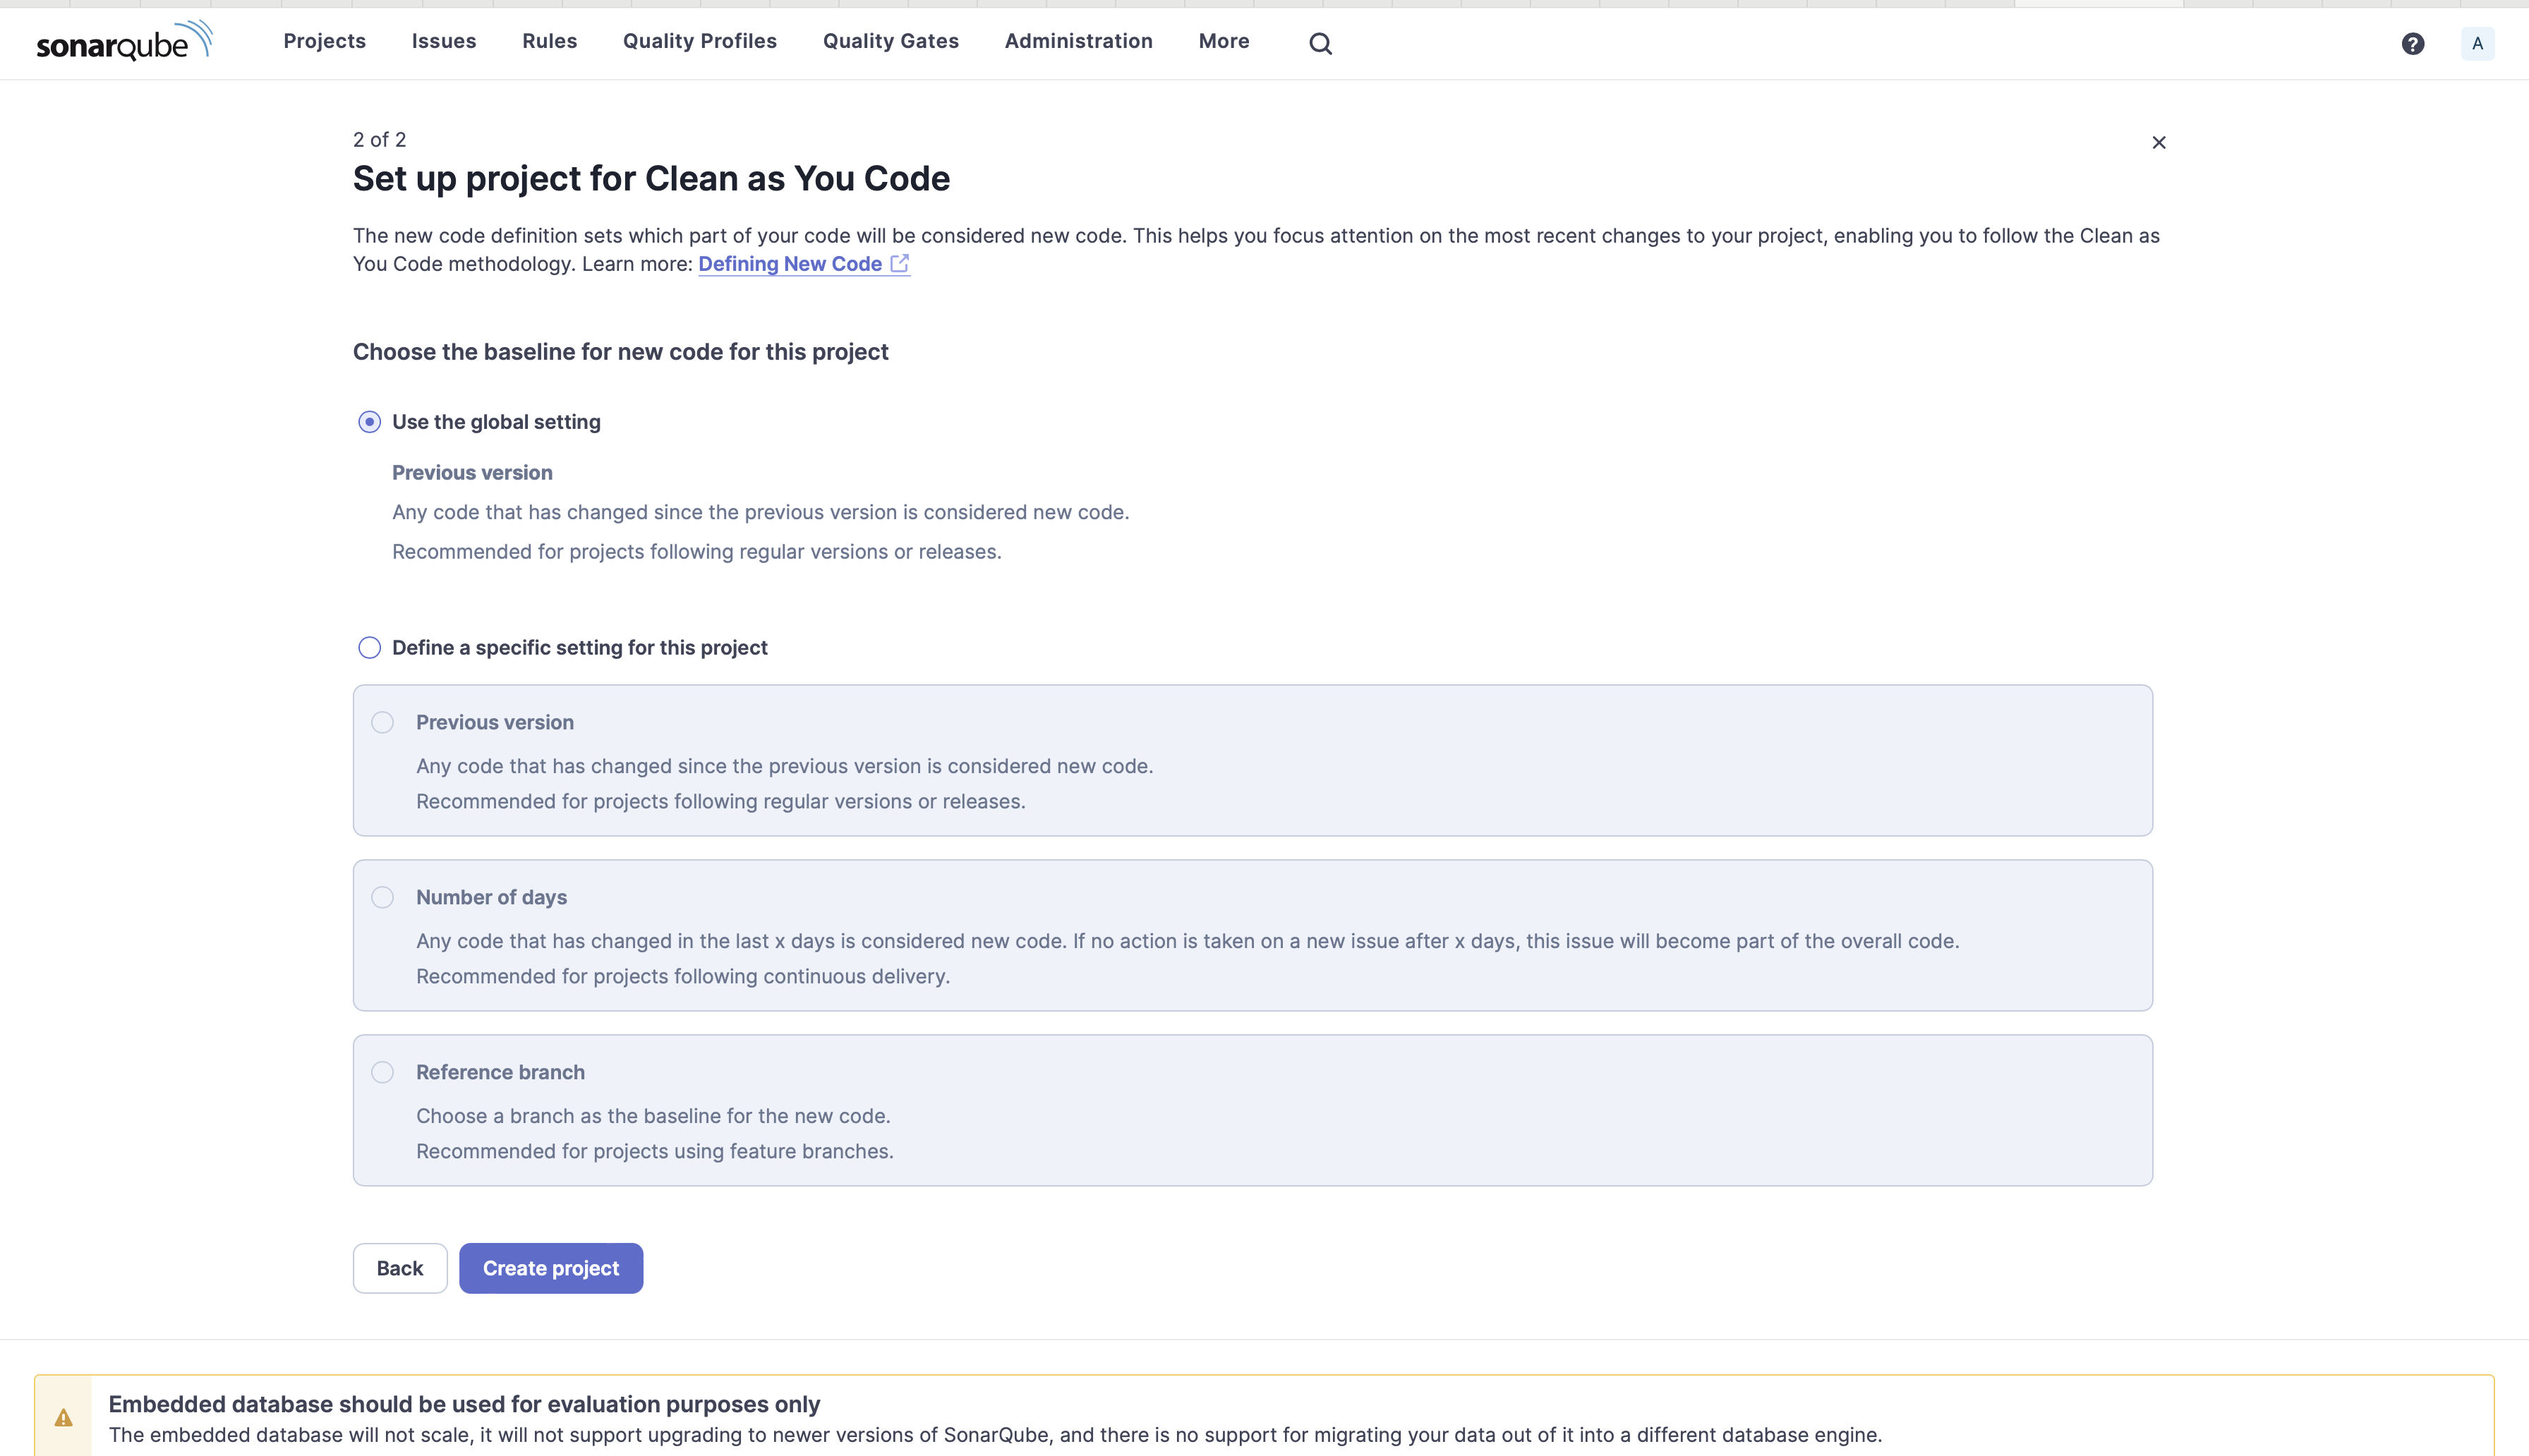
4. Under Choose the baseline for new code for this project, select Use the global setting and click Create project. Read the information below the selection to understand why you should pick this choice.
5. Select Locally under the Analysis Method as you will be running this locally on your machine.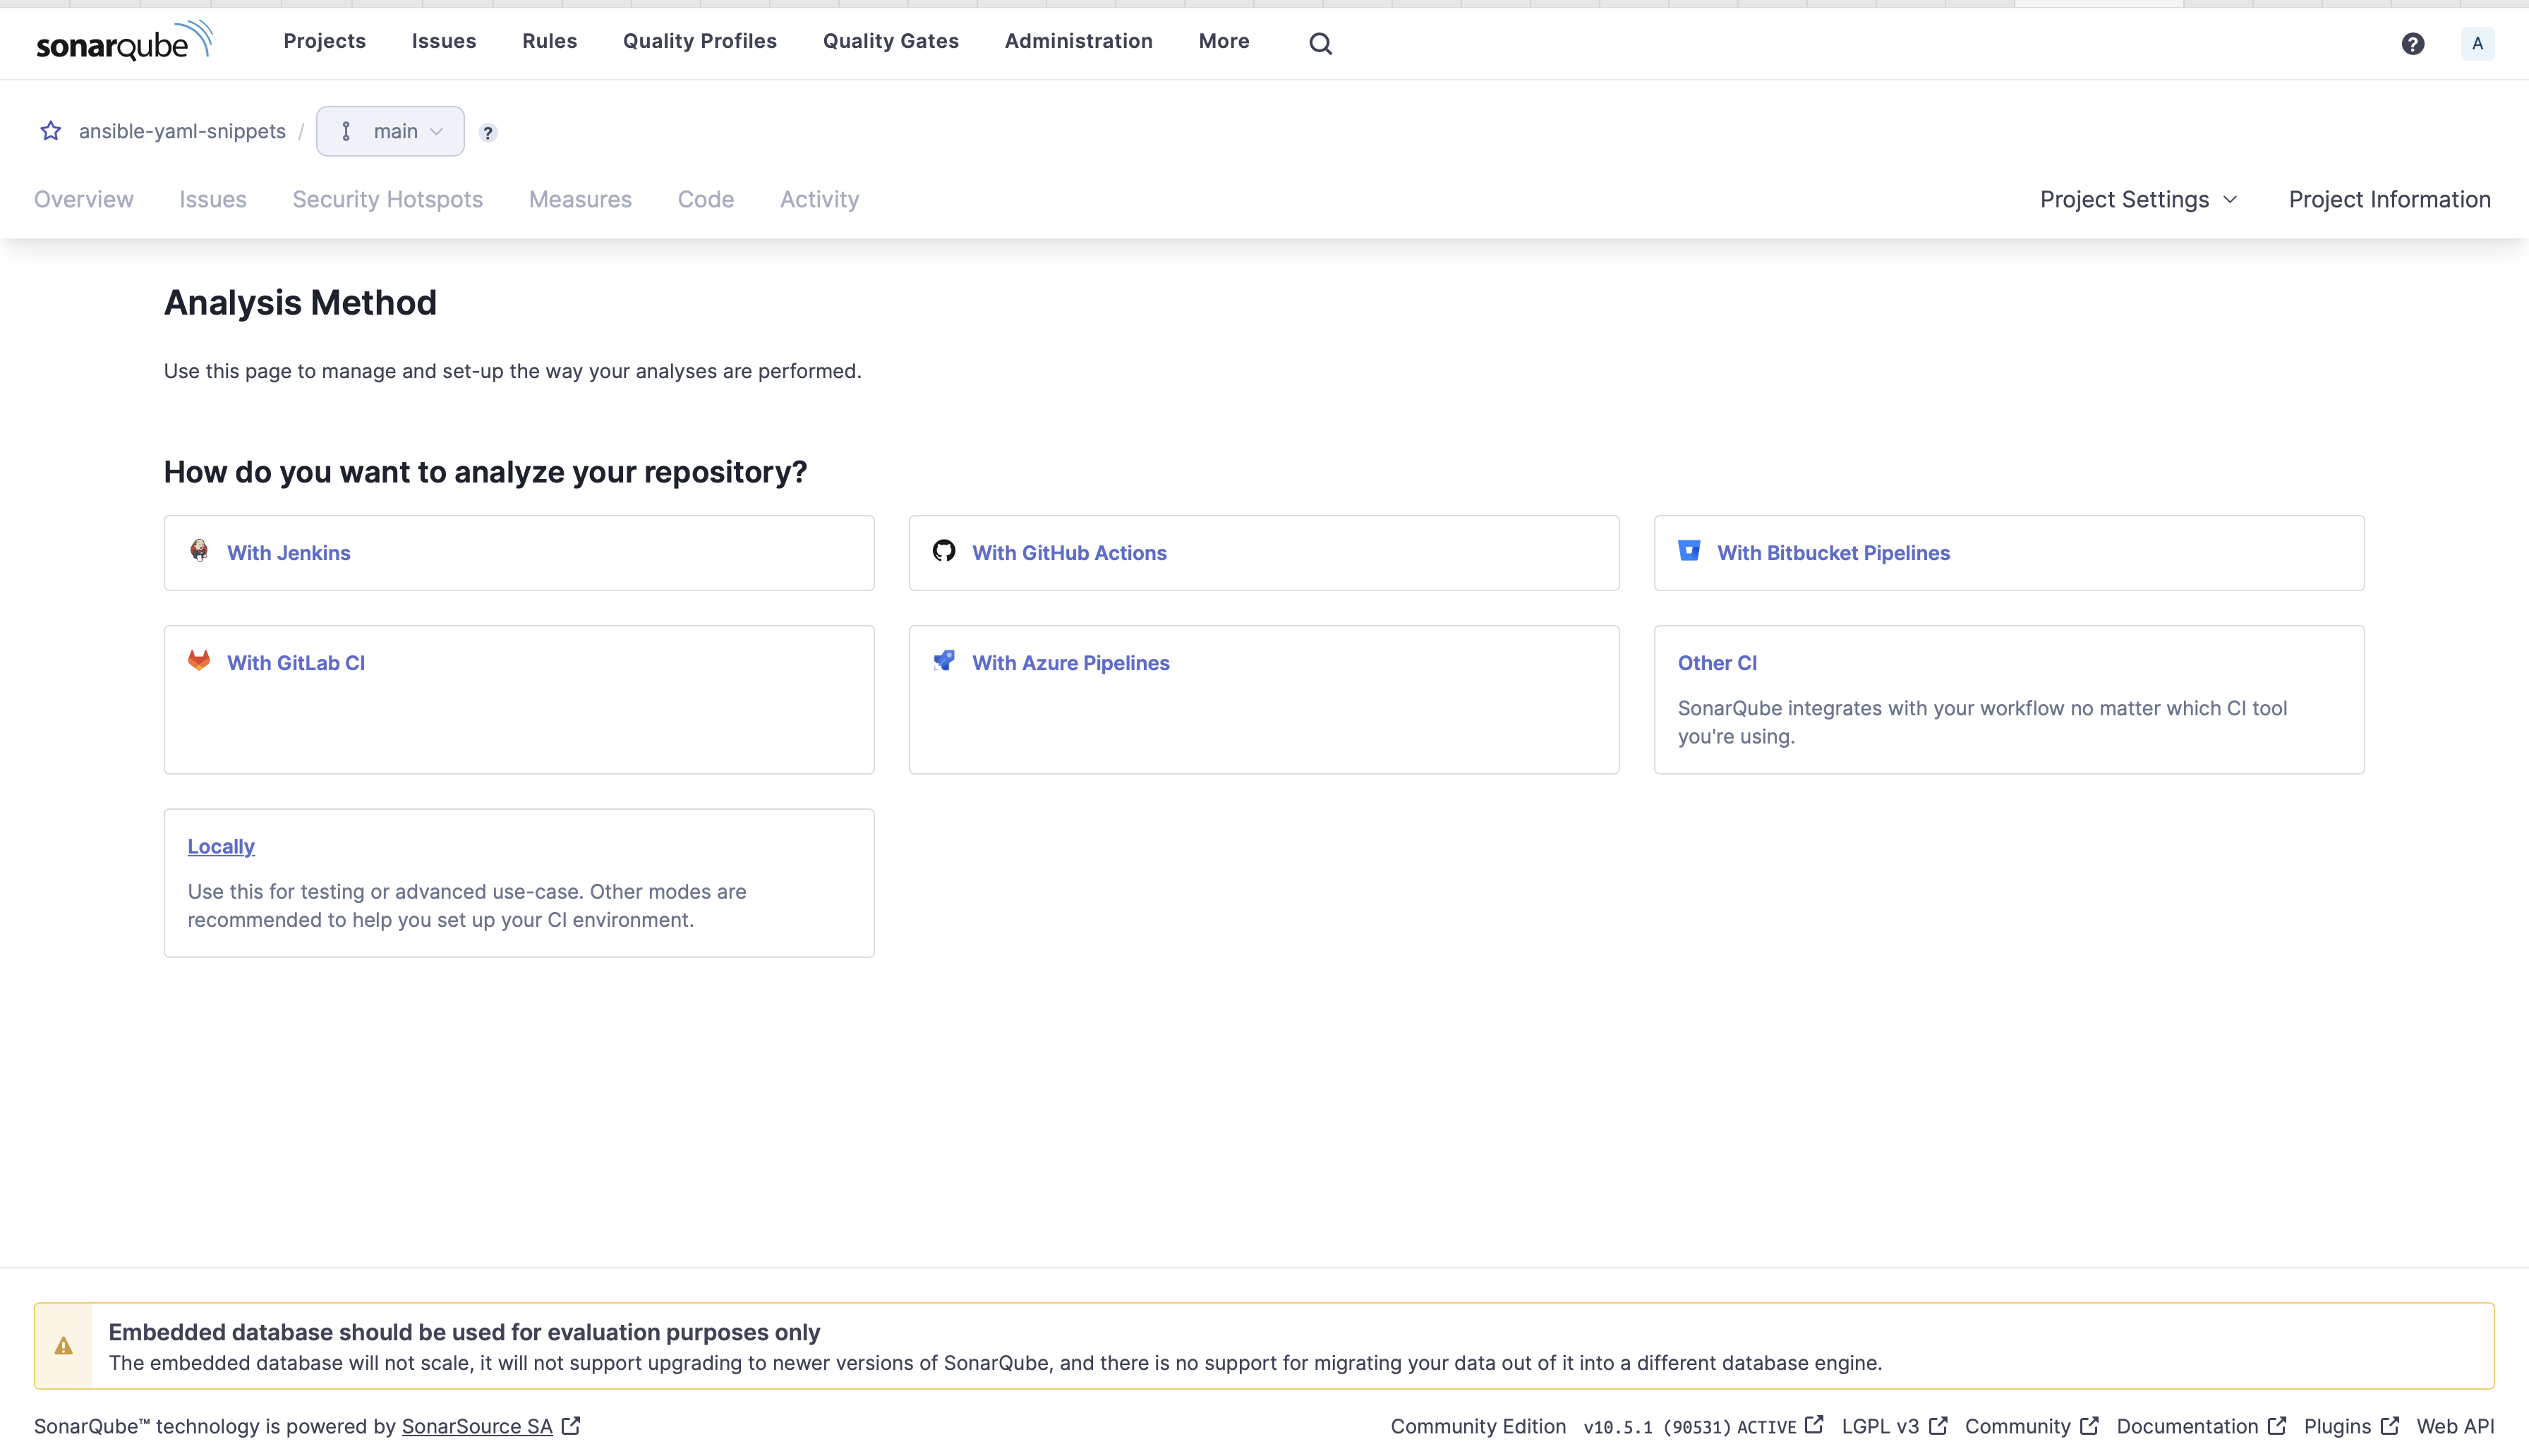
6. Under Provide a token, select Generate a token.
- Give your token a name, click Generate, and click Continue.
- Under Run analysis on your project, Select Other.
- Select the Operating System(OS).
7. Click on the Copy icon to save the commands to the clipboard. 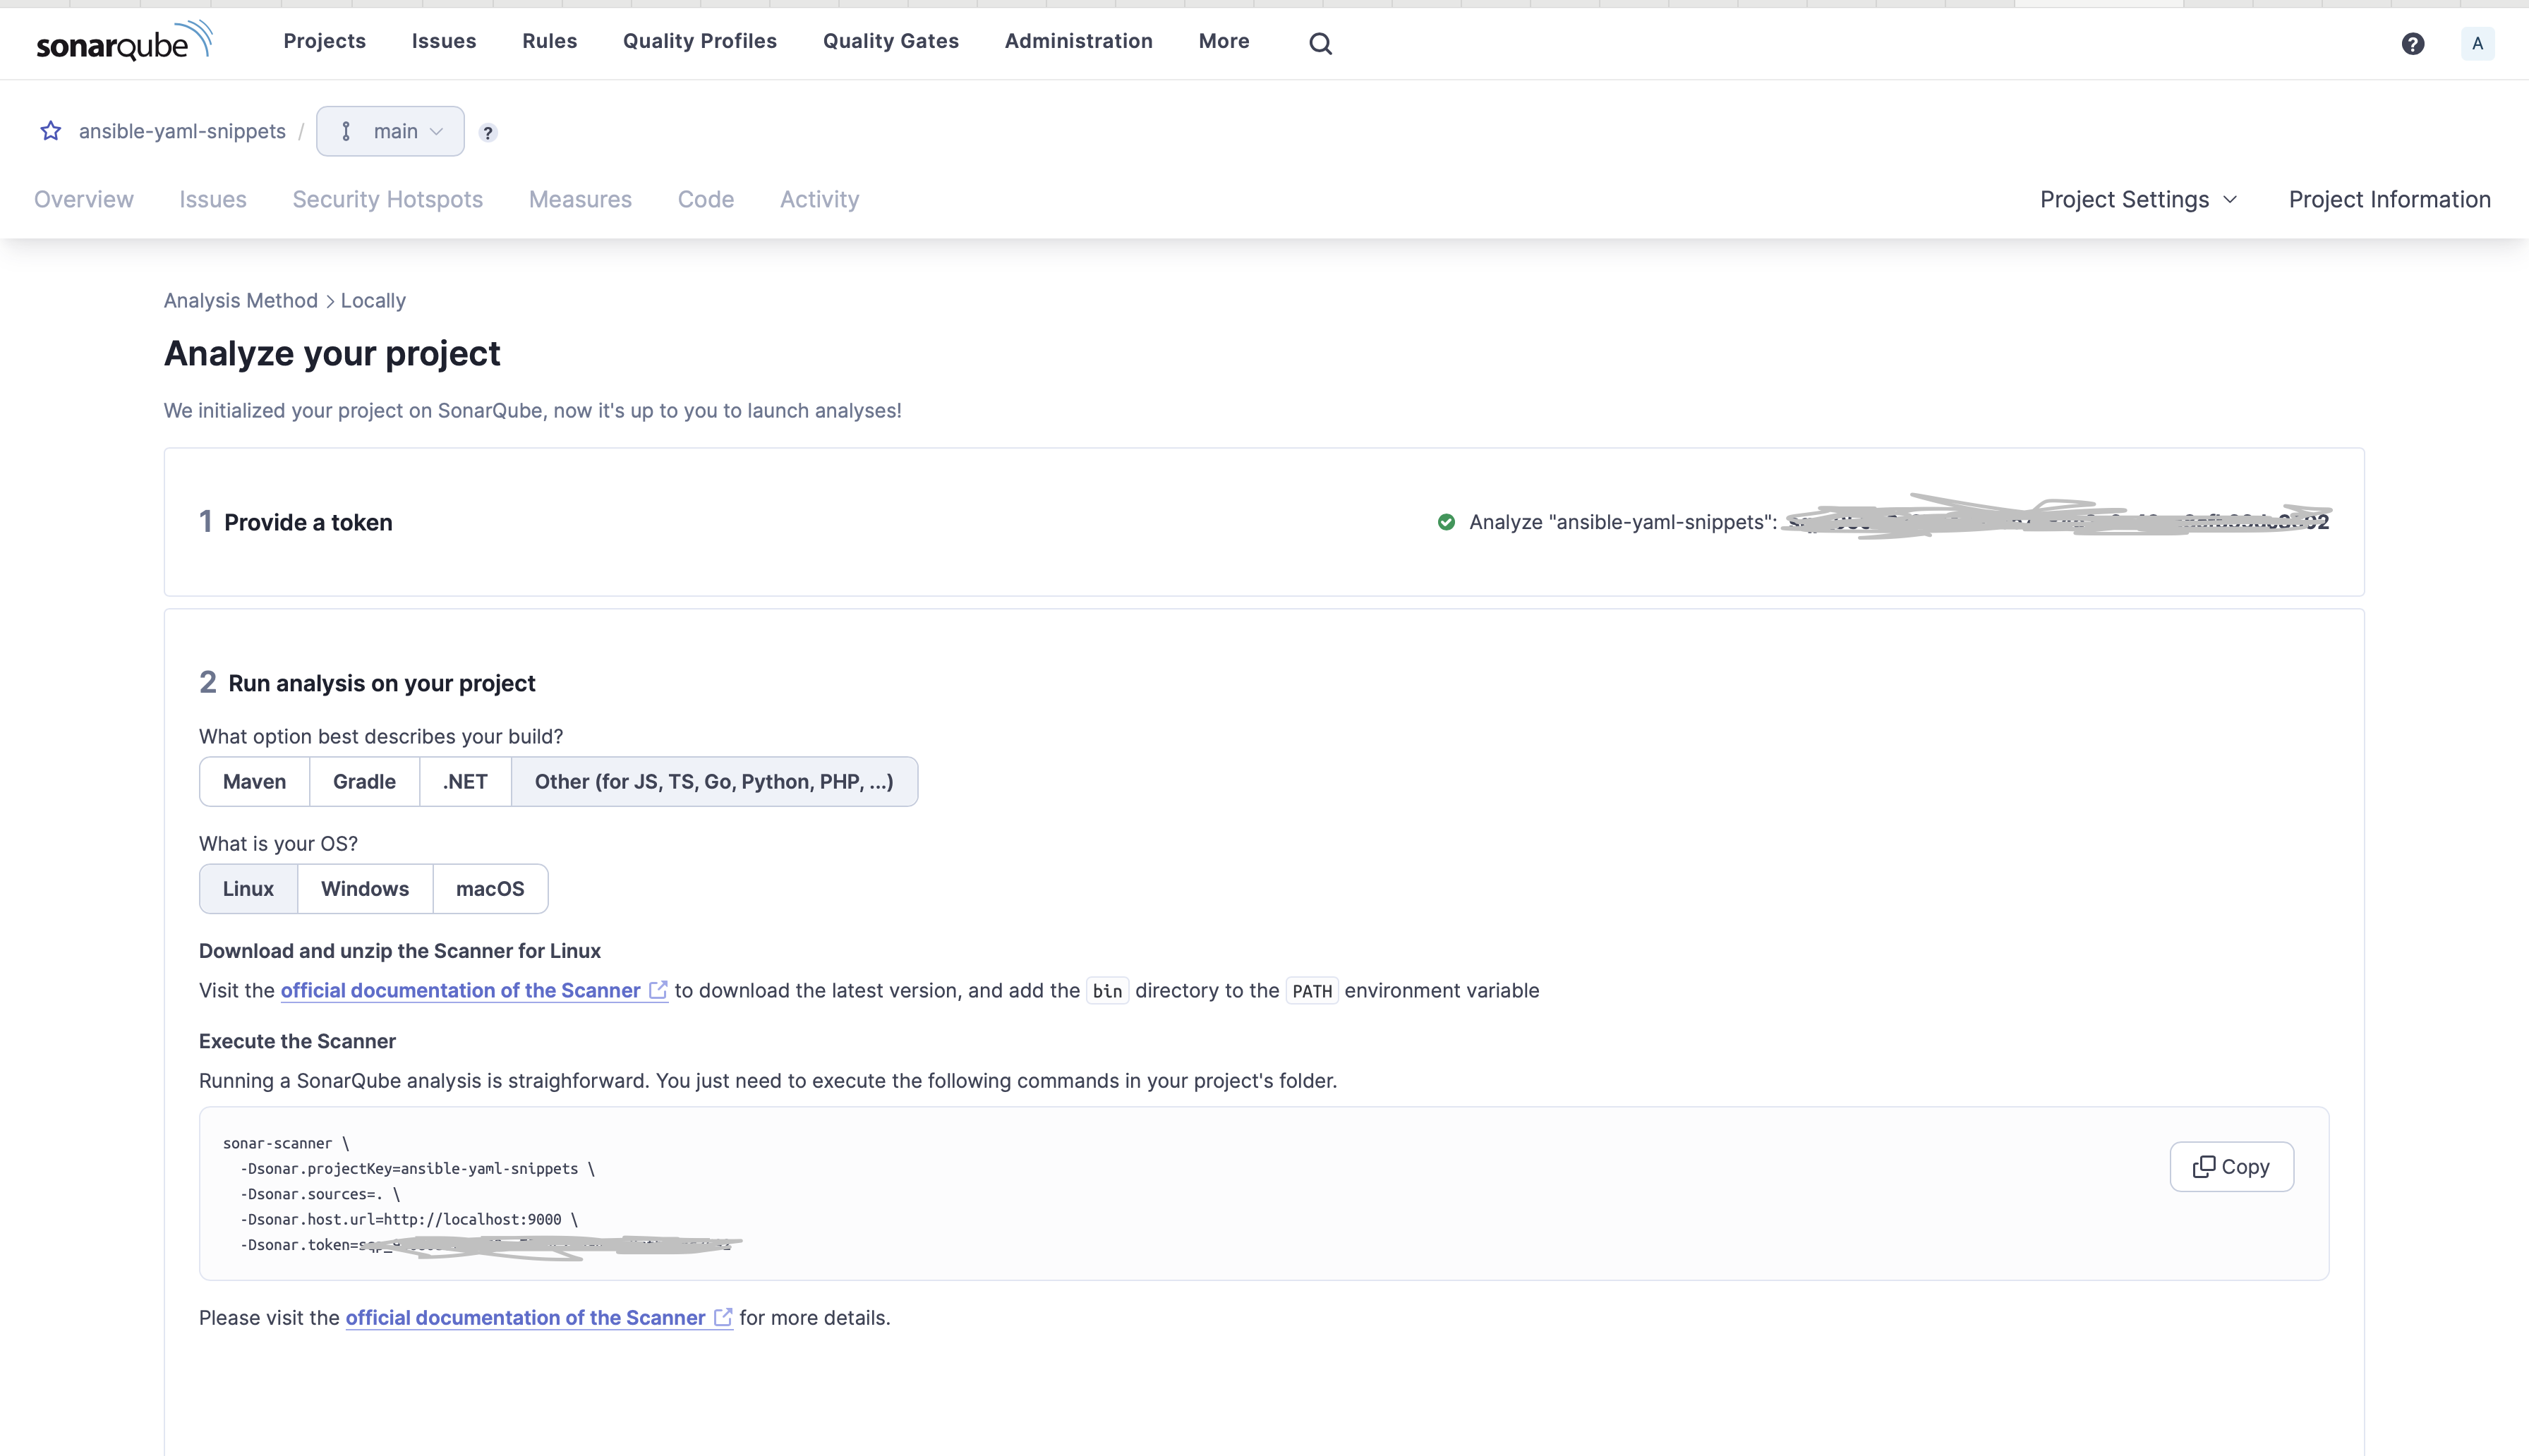
8. On a terminal or command prompt, navigate to your Ansible code folder, and paste and execute commands in your project's folder. You can see the Ansible-lint rules called in the log.
INFO: ansible version:
INFO: ansible [core 2.17.0]
INFO:   config file = None
INFO:   configured module search path = ['/Users/vmac/.ansible/plugins/modules', '/usr/share/ansible/plugins/modules']
INFO:   ansible python module location = /usr/local/Cellar/ansible/10.0.1/libexec/lib/python3.12/site-packages/ansible
INFO:   ansible collection location = /Users/vmac/.ansible/collections:/usr/share/ansible/collections
INFO:   executable location = /usr/local/bin/ansible
INFO:   python version = 3.12.3 (main, Apr  9 2024, 08:09:14) [Clang 15.0.0 (clang-1500.3.9.4)] (/usr/local/Cellar/ansible/10.0.1/libexec/bin/python)
INFO:   jinja version = 3.1.4
INFO:   libyaml = True
INFO: ansible-lint version:
INFO: ansible-lint 24.6.0 using ansible
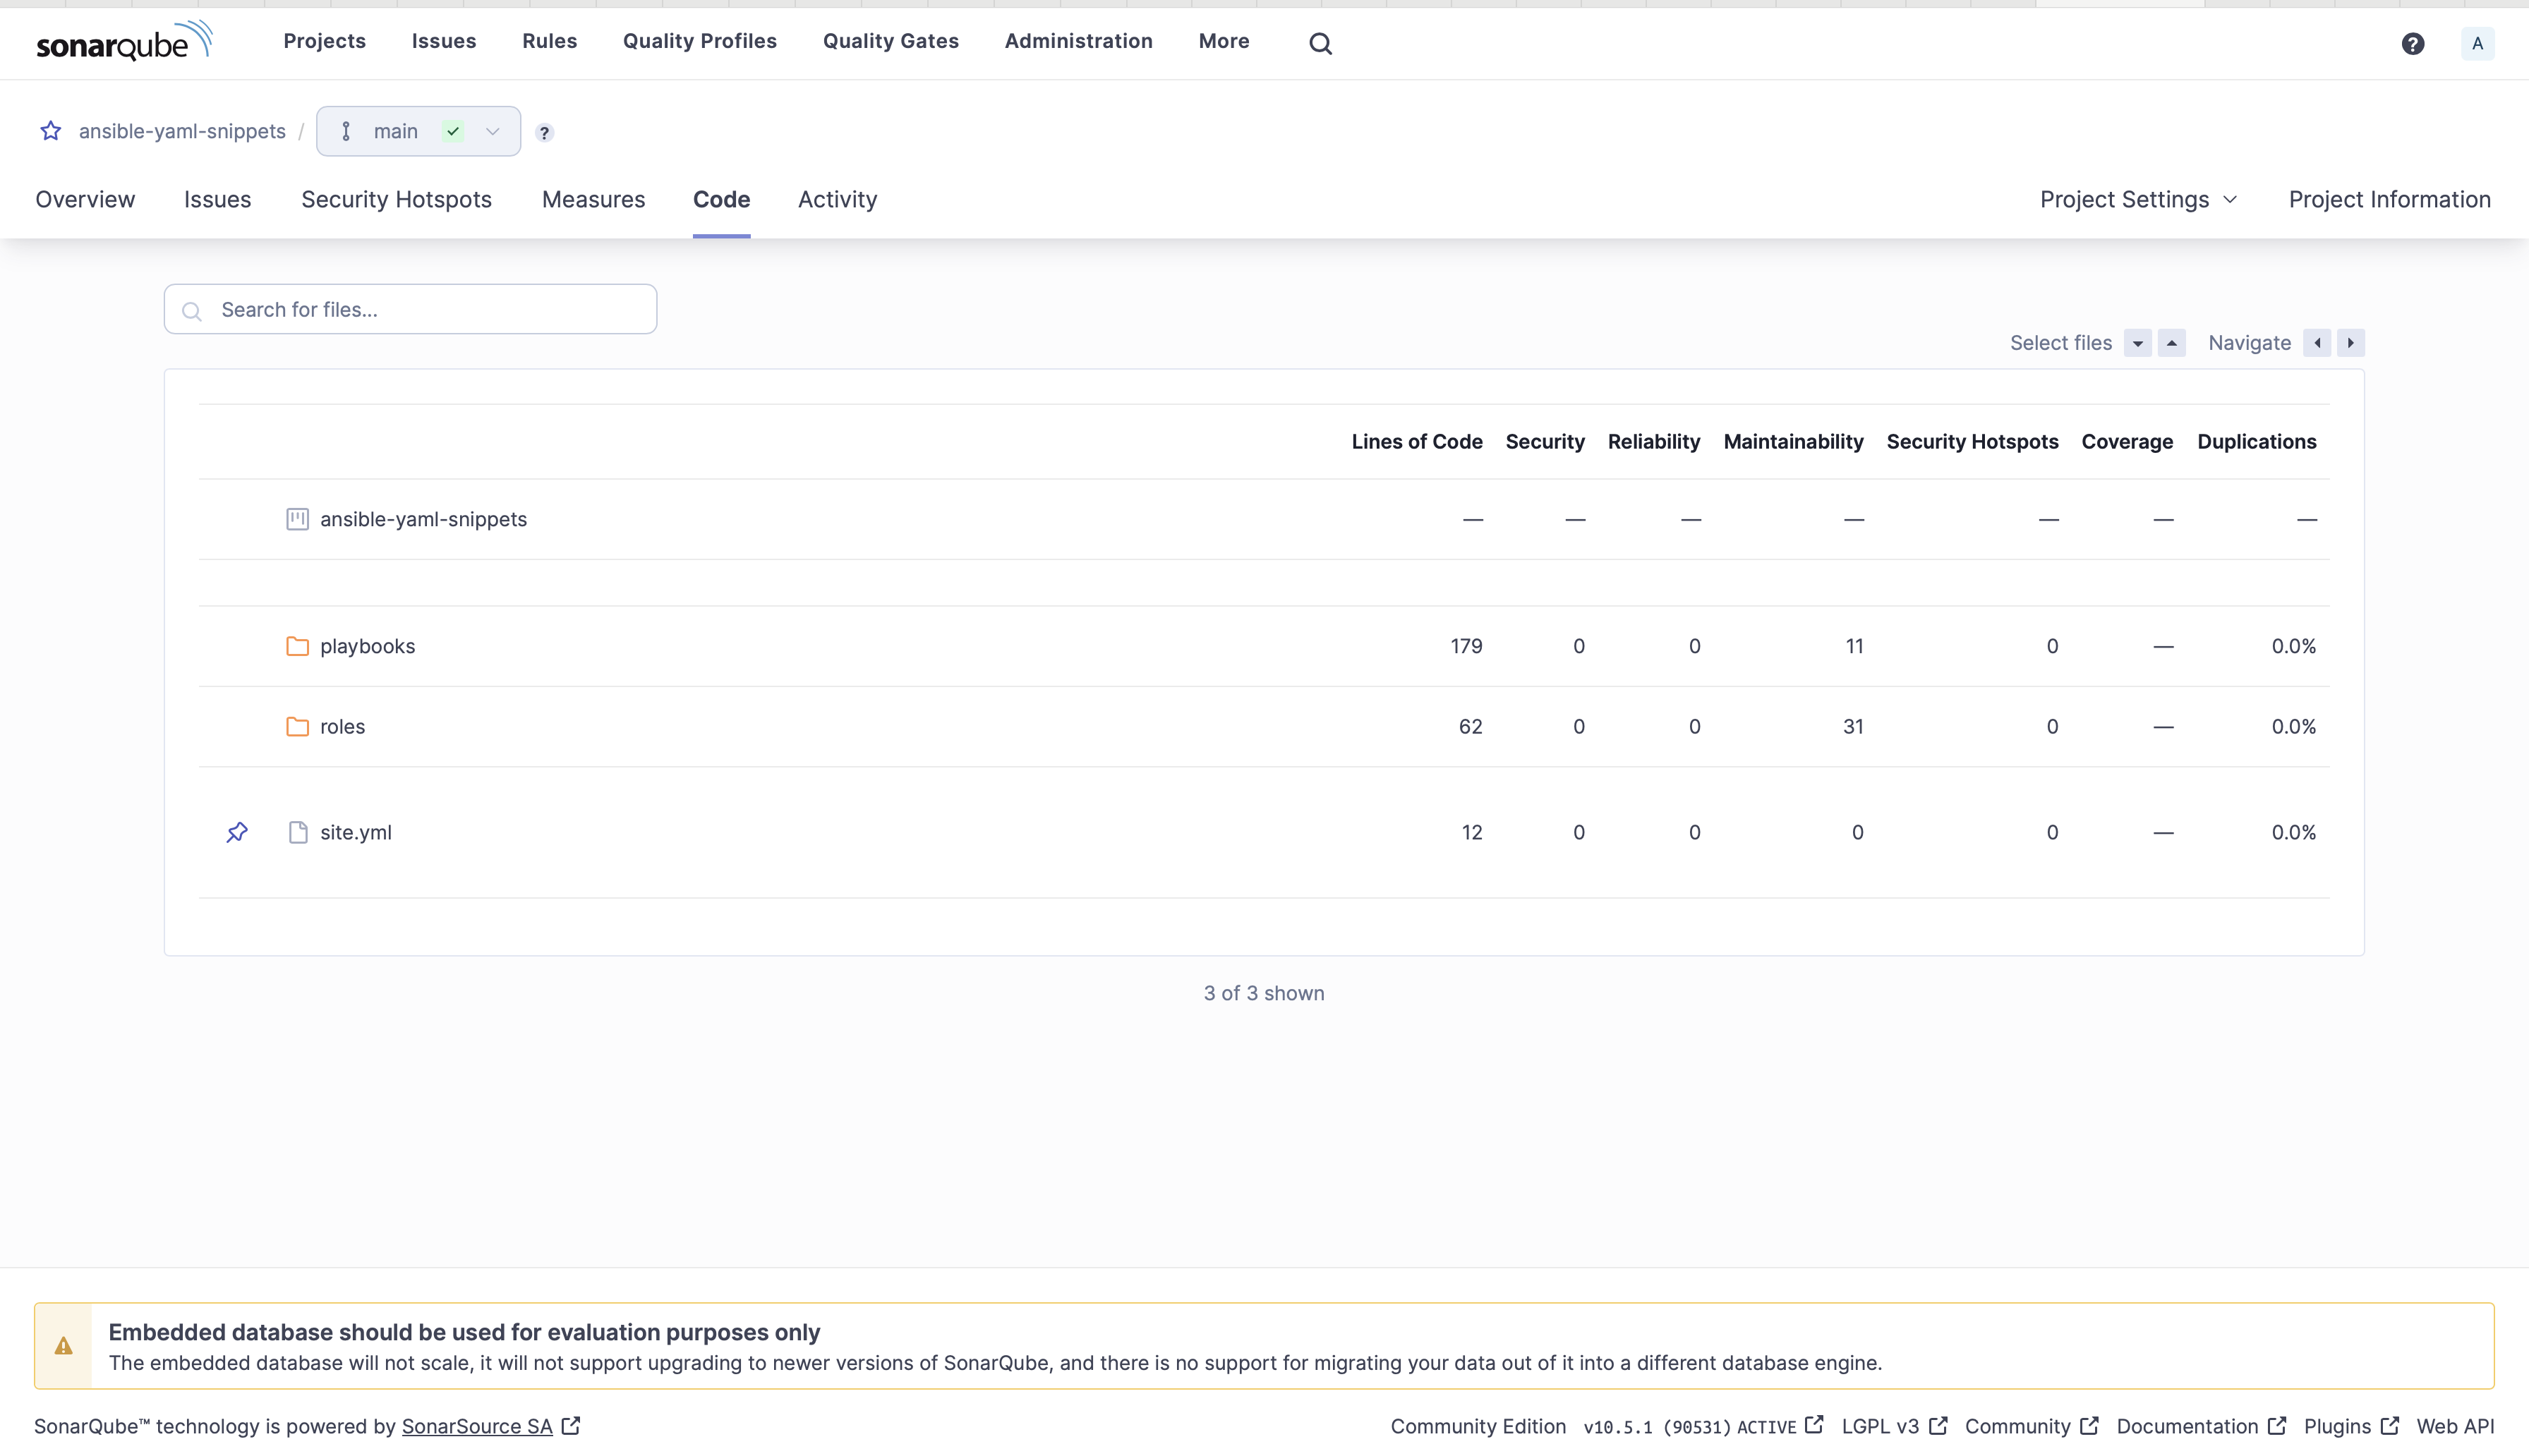
9. On the SonarQube server console, you can see the analysis information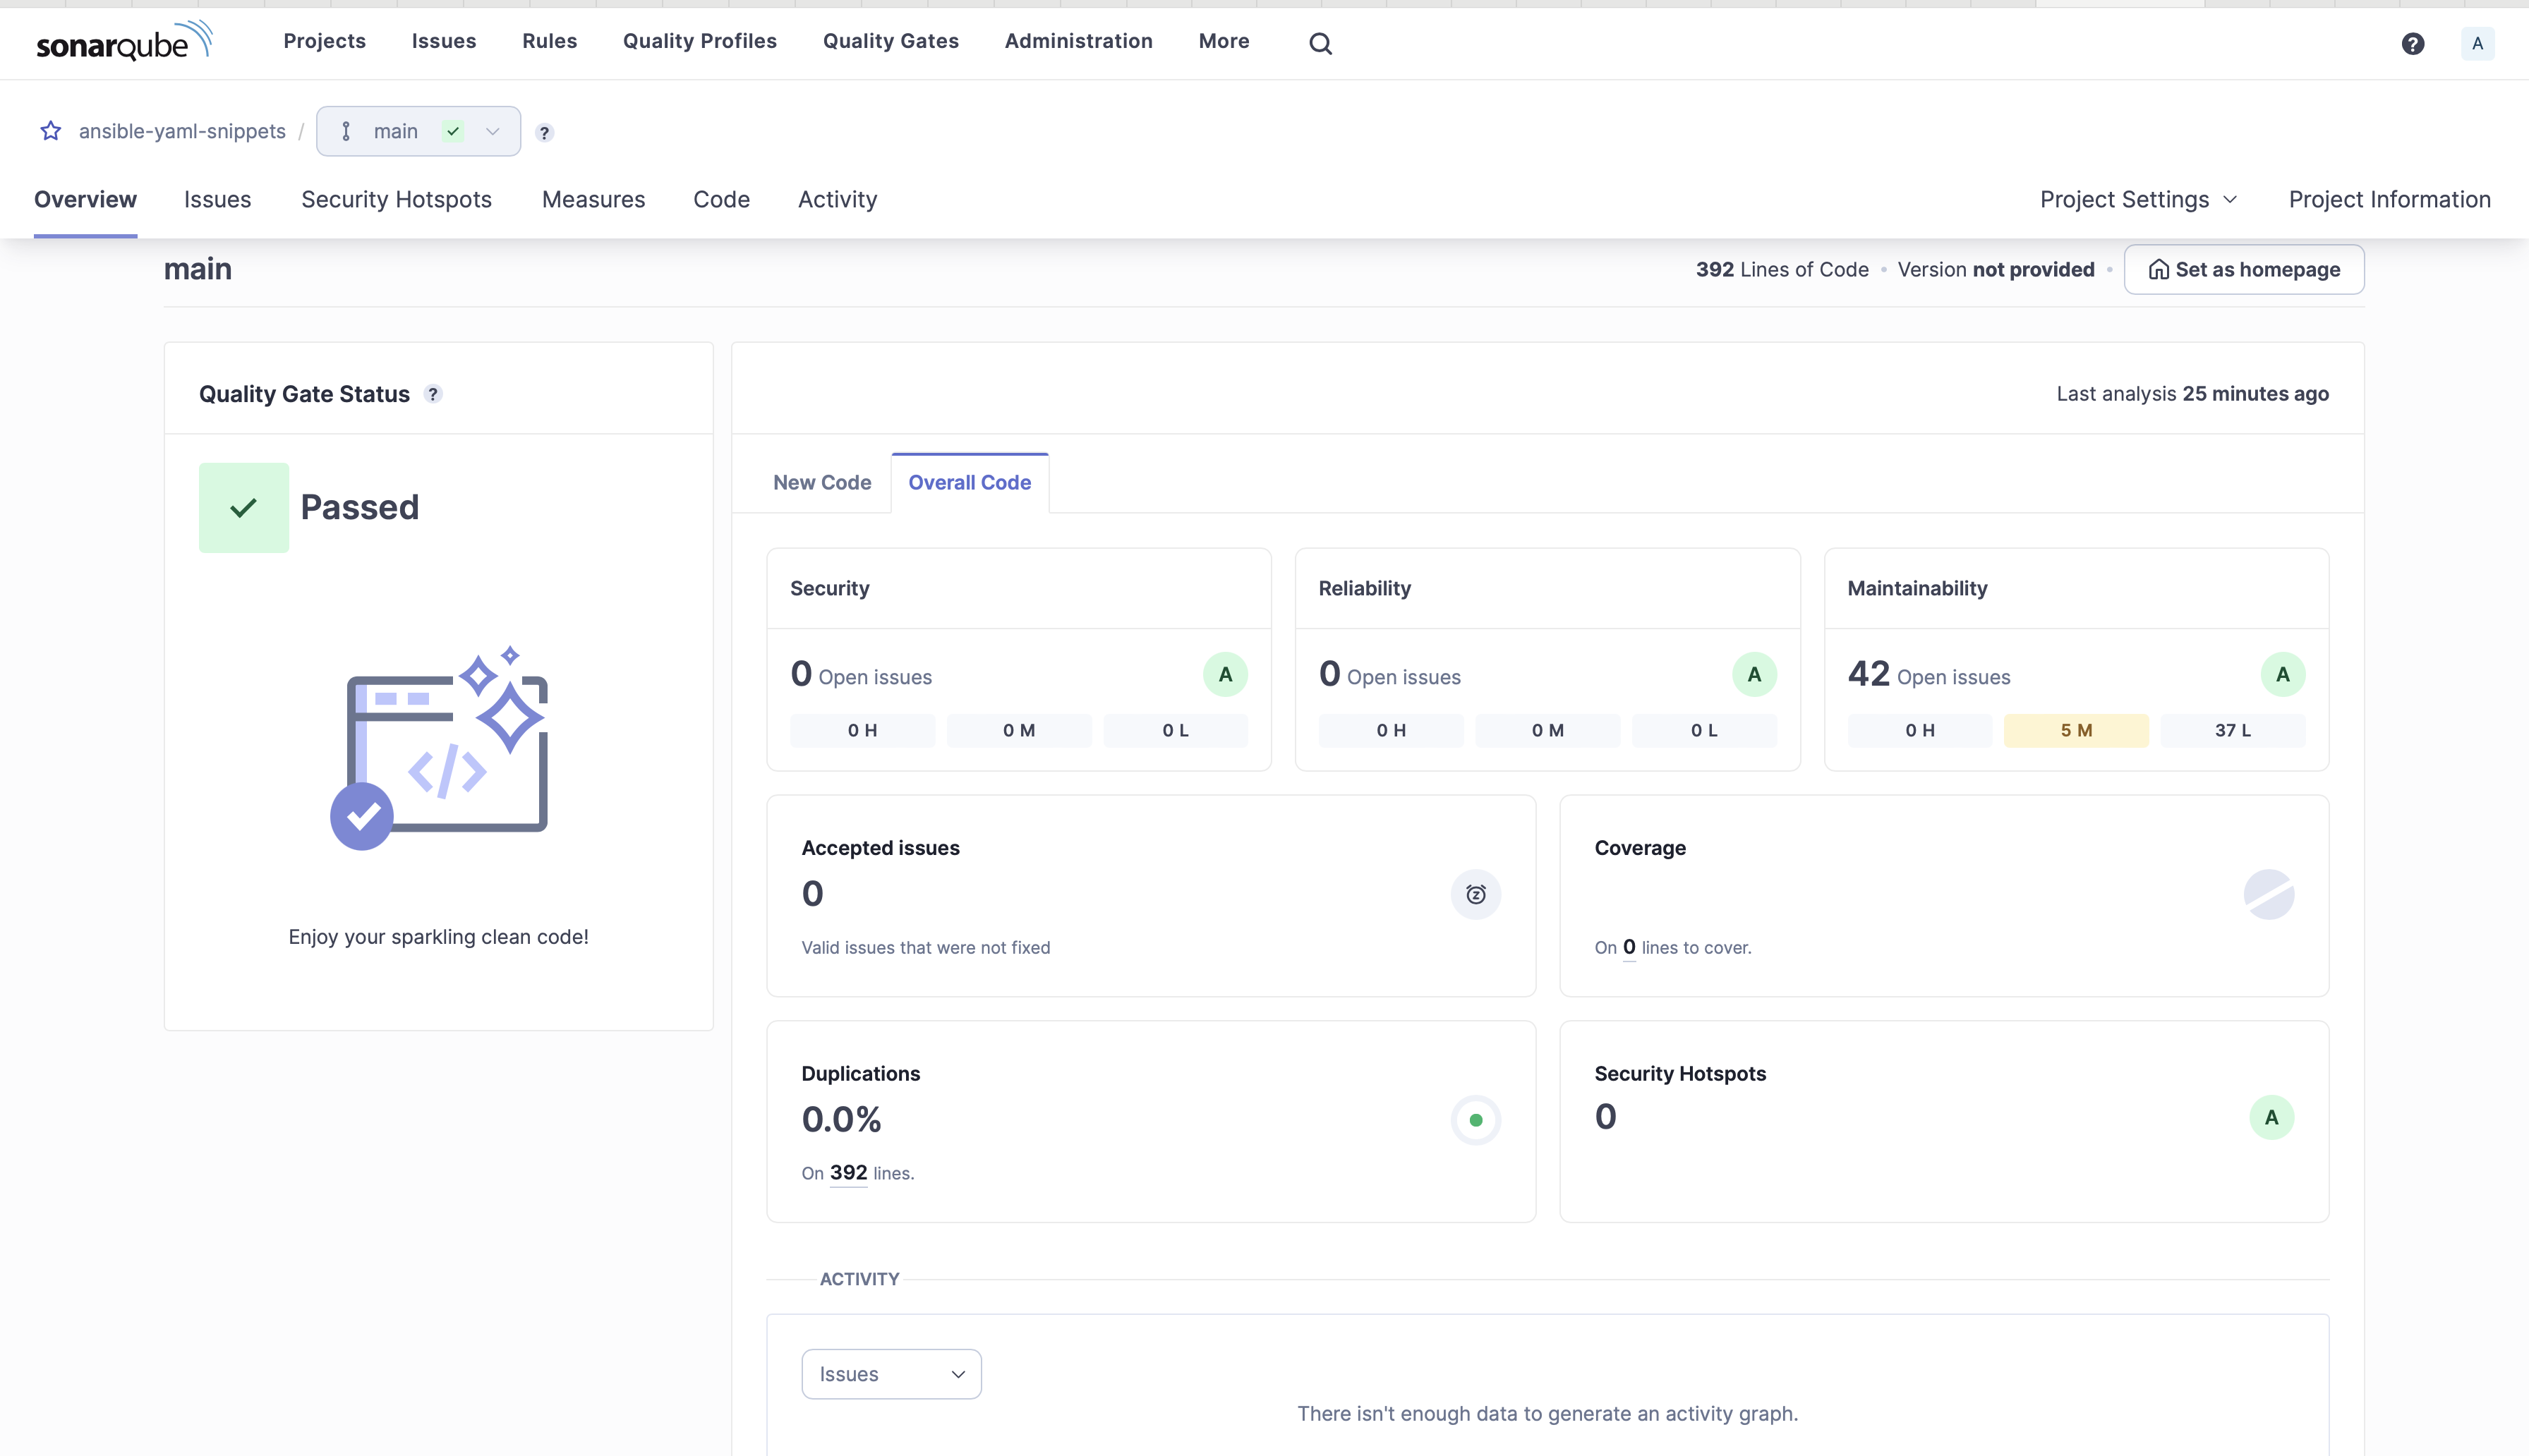
Conclusion
In this article, you learned how to install, configure, and run the SonarQube plugin for Ansible that allows developers and operations teams to analyze the Ansible playbooks and/or roles for code quality, security vulnerabilities, and best practices. It leverages the YAML SonarQube plugin and adds additional rules specifically tailored for Ansible.
Suggested Reading
If you are new to Ansible and want to learn the tools and capabilities it provides, check my previous articles:
Opinions expressed by DZone contributors are their own.

Comments