Create Proxy Application for Mule APIs
In this article, we will learn what a proxy is and discuss how to configure a proxy application for the MuleSoft Application using API Manager in the Anypoint Platform.
Join the DZone community and get the full member experience.
Join For FreeWhat Is a Proxy?
A proxy is an additional layer for an application that acts as a secure channel, enabling communication and controlling access to backend services.
Why Do We Need a Proxy?
MuleSoft proxies play a crucial role in enabling secure, reliable, and efficient communication between clients and backend services in modern distributed systems.
Some of the advantages of adding a proxy are:
- Security: Proxies act as gateways, controlling access to backend services. They can enforce security policies such as authentication, authorization, and encryption, ensuring that only authorized clients can access the services and that data remains secure in transit.
- Traffic management: Proxies can distribute incoming requests among multiple backend instances to improve scalability and reliability. They can also perform load balancing to ensure that no single instance is overwhelmed with requests.
- Protocol transformation: Proxies can translate between different communication protocols, allowing clients and backend services to use different formats or versions. For example, a proxy could accept requests over HTTP/1.1 from clients and forward them to backend services using HTTP/2.
- Caching: Proxies can cache responses from backend services, reducing latency and improving performance for subsequent requests. This is especially useful for frequently accessed data that doesn't change often.
- Monitoring and analytics: Proxies can collect metrics and logs on incoming requests and responses, providing valuable insights into application usage, performance, and errors. This information can be used for troubleshooting, optimization, and capacity planning.
- Service virtualization: Proxies can present a unified interface to clients, even if backend services are distributed or have different APIs. This abstraction layer simplifies client interactions and shields them from the complexities of the underlying infrastructure.
- Rate limiting and throttling: Proxies can enforce rate limits and throttle requests to prevent abuse or overloading of backend services. This helps ensure fair usage and maintain service availability for all clients.
Use Case
Consider we have a Mule application that connects to a backend database system to retrieve information about employees in an organization. We want to secure the API and do not want to expose our host information to the client. To achieve this, we will create a proxy application.
Goals
- Create a RAML specification.
- Create a mule application in Anypoint Studio using RAML Spec.
- Deploy application to Runtime Manager.
- Create a Proxy Application.
- Verify Proxy Application Deployment and Endpoints
Step 1: Create a RAML Specification
- Create an account in the Anypoint Platform.
- Navigate to the Design Center and create a RAML Specification.
- Publish to exchange.
#%RAML 1.0
title: Bio Data SAPI
description: This API allows you to fetch the basic bio-data of employees.
version: 1.0
mediaType: application/json

types:
 bio-data: !include types/bioData_dataType.raml

securitySchemes:
 basic-auth: !include exchange_modules/org.mule.examples/basic-auth-securityscheme/1.0.0/basic-auth-securityscheme.raml

securedBy: basic-auth

/bio/{id}:
 uriParameters:
   id:
     required: true
     example:
       value: DC0003
 get:
  displayName: Get BioData by CID
  description: This resources fetches bio data based on the unique **id** sent in the URI Parameter
  responses:
    200:
      description: If **id** exists, returns the bio data
      body:
        application/json:
          type: bio-data
          example: !include examples/bioData_example.raml
In the above RAML specification, we have a resourceType “/bio/{id}”, which takes “id” as uriParam and gives bio-data information about that particular employee. Publish the asset to exchange.

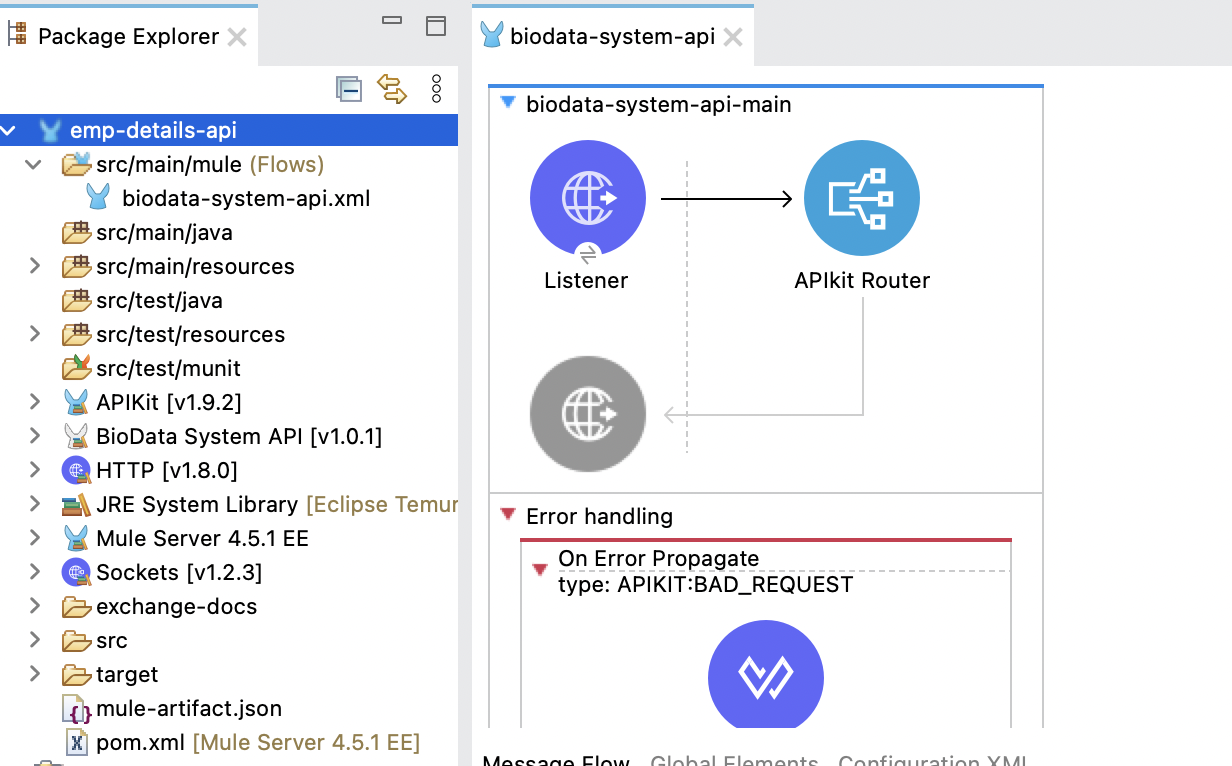
Step 2: Implementation of the API
- Create a mule application in Anypoint Studio using the above-published asset.
- Add the implementation as per the design. (Note: I have skipped the implementation details as we will focus on the proxy)
Step 3: Deploy the Application to Runtime Manager
Deploy the application to the Runtime Manager in the Anypoint Platform.

Step 4: Create a Proxy Application in the API Manager
-
Navigate to API Manager and click on Add API. Select Add new API.

-
Select Mule Gateway to connect directly to deploy a new proxy app.

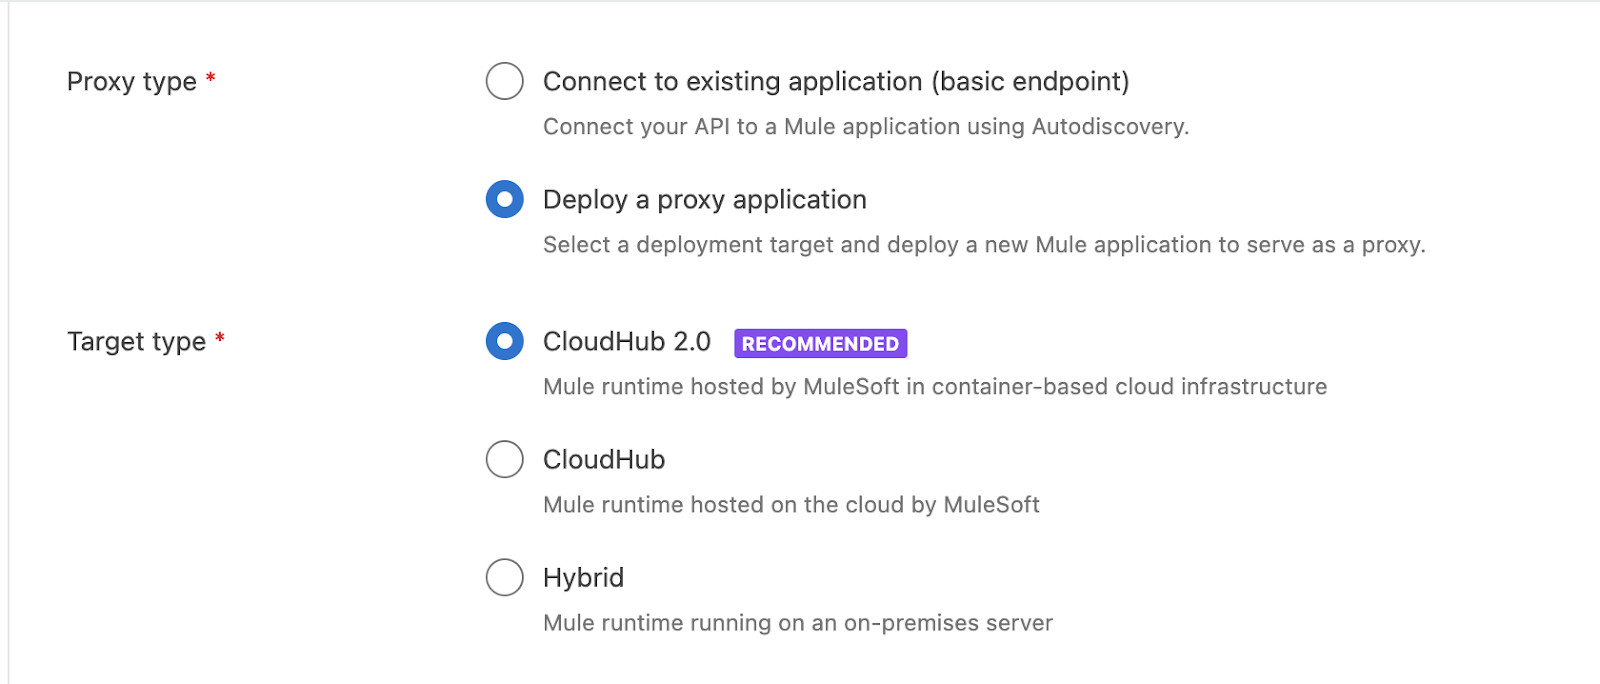
- Select Deploy a proxy application as Proxy Type.
- Select the CloudHub version that you are using as the Target Type.
-
Give an appropriate proxy application name as per your use case.

-
Select your API from the list. In this case, I chose the BioData-system-api that we have implemented.
-
Select a protocol for your proxy application as per your use case.
 Select a protocol for your proxy application as per your use case.
- Enter the implementation URI of the application that you have deployed before configuring the proxy application.
- Select “ Save & Deploy.”

Step 5: Verify Proxy Information
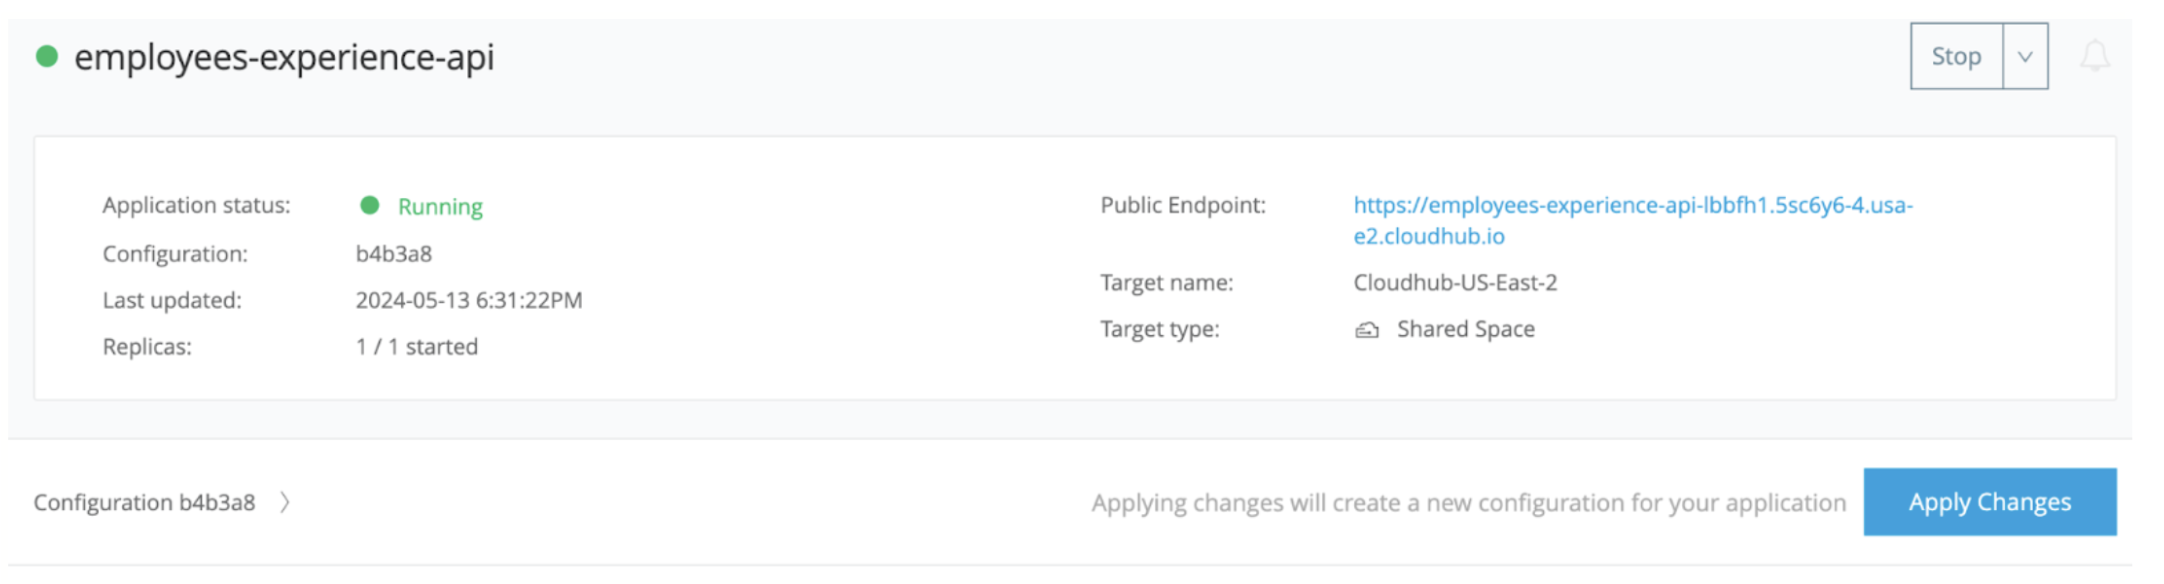
- You can see a new proxy application deployed to your Runtime Manager with the proxy app name that you have provided.

- Below is the new public endpoint that you can provide to your client to hit the endpoints.
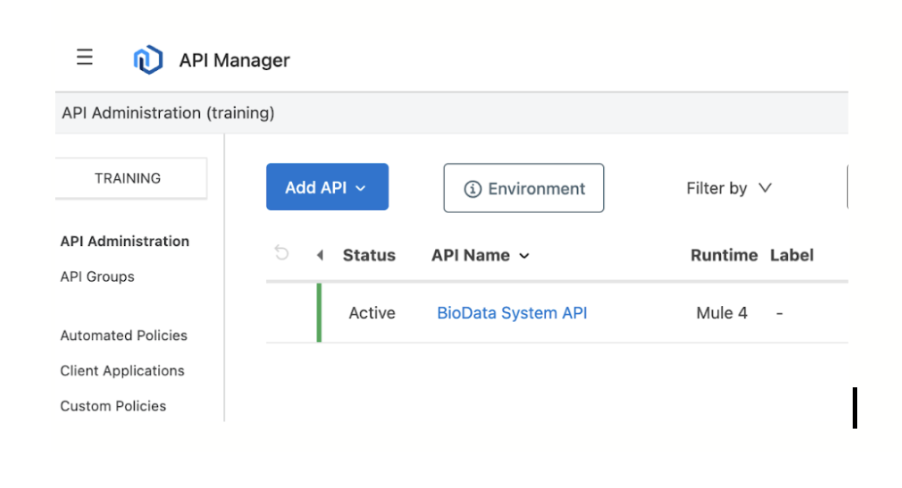
- You can see your API being active in the API Manager.
Summary
We have learned what a proxy is, and why we need a proxy for our application. Also, we created a sample Mule application, deployed it to Runtime Manager, and added a proxy application to secure the API.
Opinions expressed by DZone contributors are their own.
Comments