Lessons Learned Moving From On-Prem to Cloud Native
See how to move a sample ecommerce app from an on-premise architecture to a cloud-native one, using YugabyteDB database, Hasura Cloud, and Vercel.
Join the DZone community and get the full member experience.
Join For FreeRecently, I came across a sample e-commerce application that demonstrates how to use Next.js, GraphQL engine, Postgres, and a few other frameworks to build a modern web application. The application supports basic e-commerce capabilities such as product inventory and order management, recommendation system, and checkout function. This made me curious as to how much effort it would take to turn this application from an on-prem to a cloud-native solution.
The original architecture for this sample app looked like the below diagram. You can start the whole setup in a few minutes following this guide.
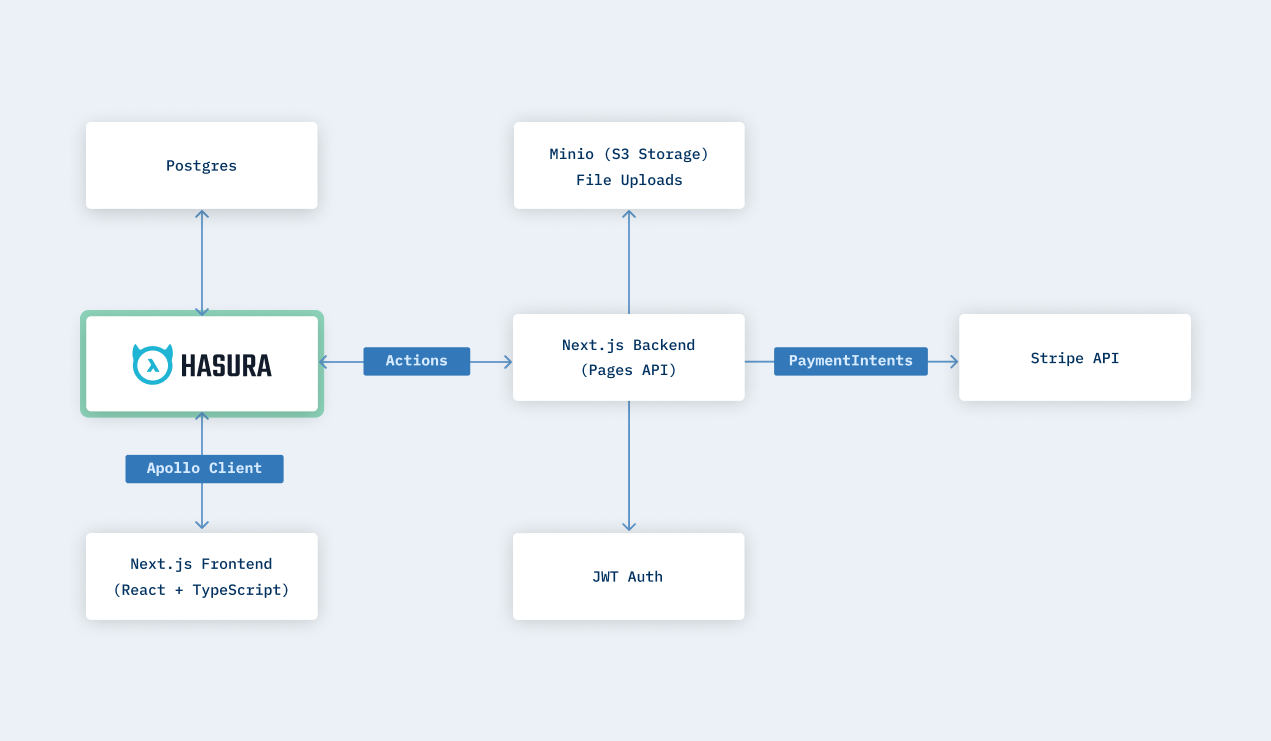
My curiosity was so tempting that I forked the project and replaced several components from the original architecture with their cloud-native counterparts:
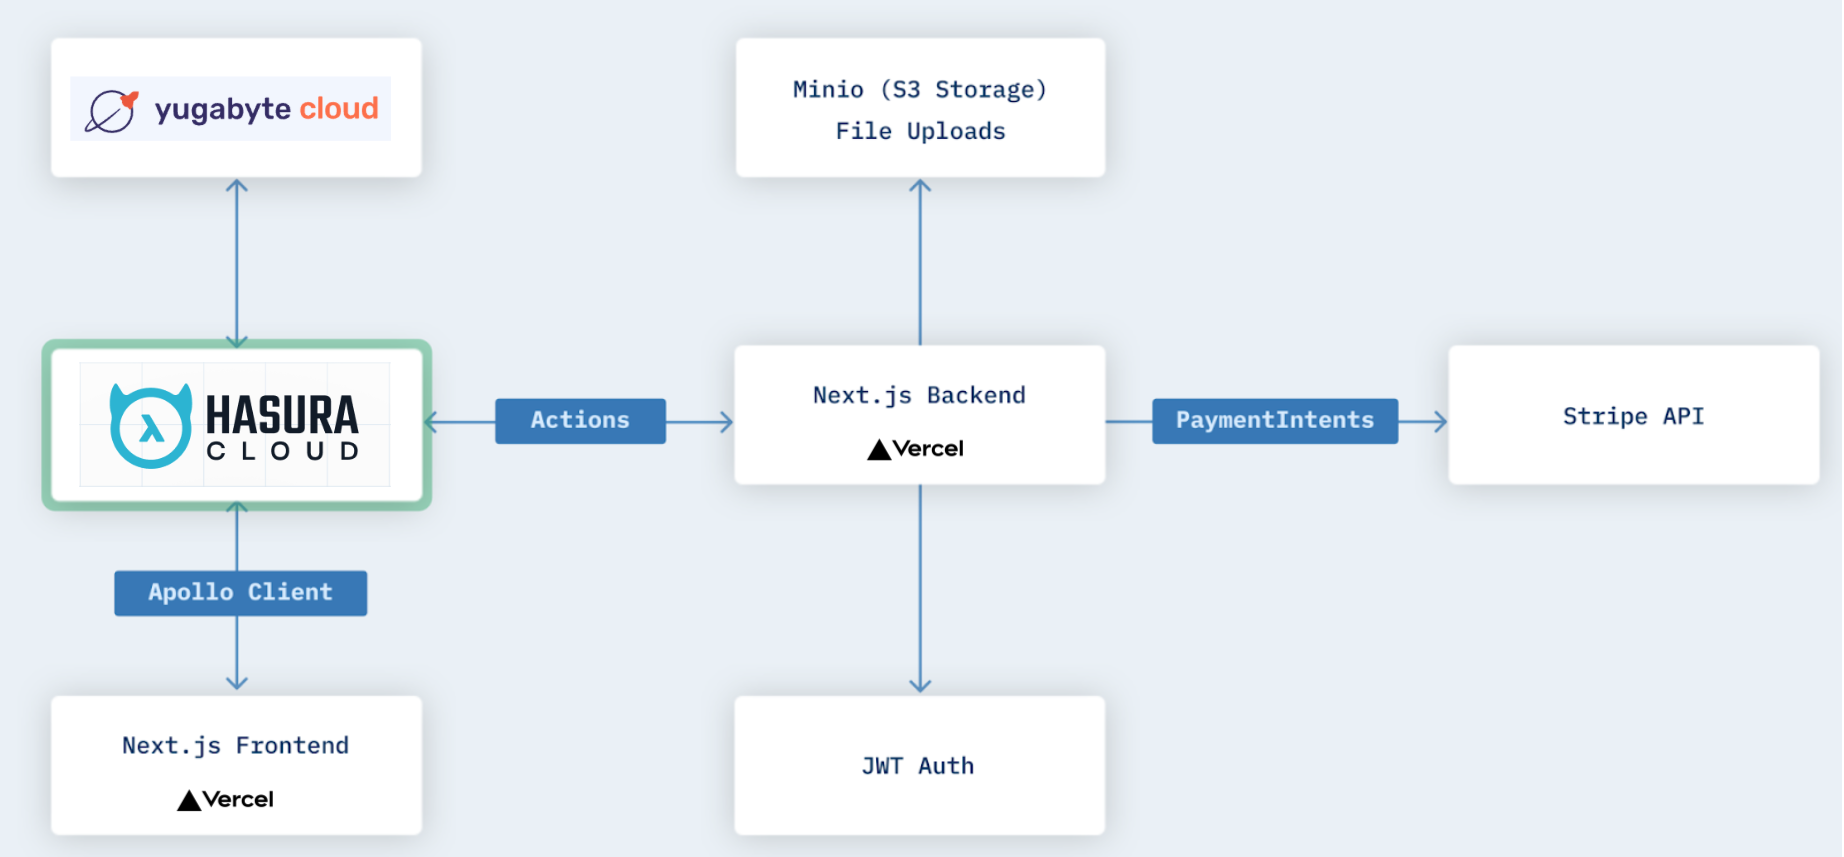
- PostgreSQL to Yugabyte Cloud.
- Hasura on-prem GraphQL engine to Hasura Cloud.
- Local server for the Next.js frontend and backend to Vercel.
The migration didn’t finish overnight but was relatively smooth. Let’s quickly walk through my three main lessons learned.
Lesson 1: PostgreSQL Compatibility Matters a Lot
In a cloud-native deployment, I want to have a relational database that scales horizontally and is resilient to failures such as zone- or region-level outages. Even though YugabyteDB is a Postgres-compliant, distributed SQL database, I was still skeptical that the application's migration would go smoothly with no code changes on the SQL side. My skepticism grew even more after seeing that the original DDL script had many stored procedures and triggers that are pretty hard to support in many distributed databases.
However, my skepticism turned into joy when the application booted with no issues after I introduced two changes to the Docker compose startup script:
- Asked Docker to launch a YugabyteDB container (comprised of YB-Master and YB-TServer) instead of the Postgres one.
- Updated the database URL in the GraphQL engine container’s settings to the following:
postgresql://yugabyte:yugabyte@yb-tserver:5433/yugabyte
And that’s it! That's Postgres compatibility in action. The application was running, the data was loaded, and the frontend worked with no issues. So, I prepared a separate docker-compose file for those who would like to launch the app on-premises with YugabyteDB. I also moved closer to my original goal — turning the app into a cloud-native solution.
Lesson 2: Cloud-Native Services Are Easy to Switch To
This lesson might be just an obvious fact to most of you. But for me, a person who developed his first application when nobody even talked about cloud environments—and IT/database administrators were on every serious dev team—this was a big positive lesson.
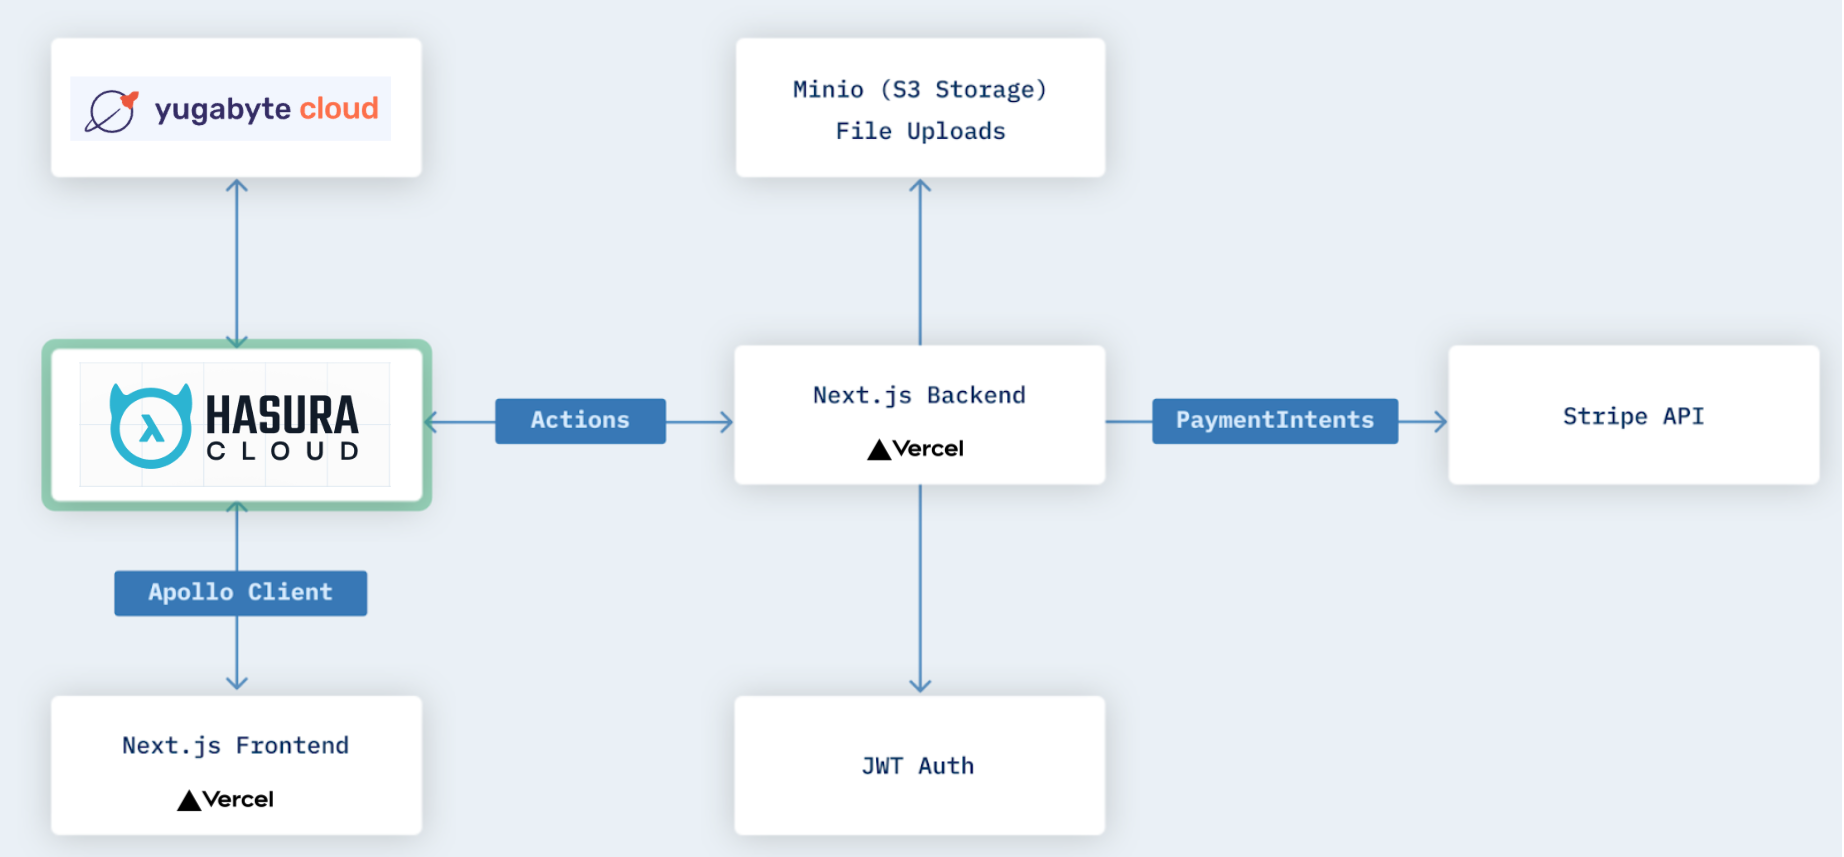
To remind you, I intended to transform the application to a cloud-native solution by replacing the following components with their cloud-native counterparts:
- PostgreSQL/YugabyteDB to Yugabyte Cloud.
- Hasura on-prem GraphQL engine to Hasura Cloud.
- Local server for the Next.js frontend and backend to Vercel.
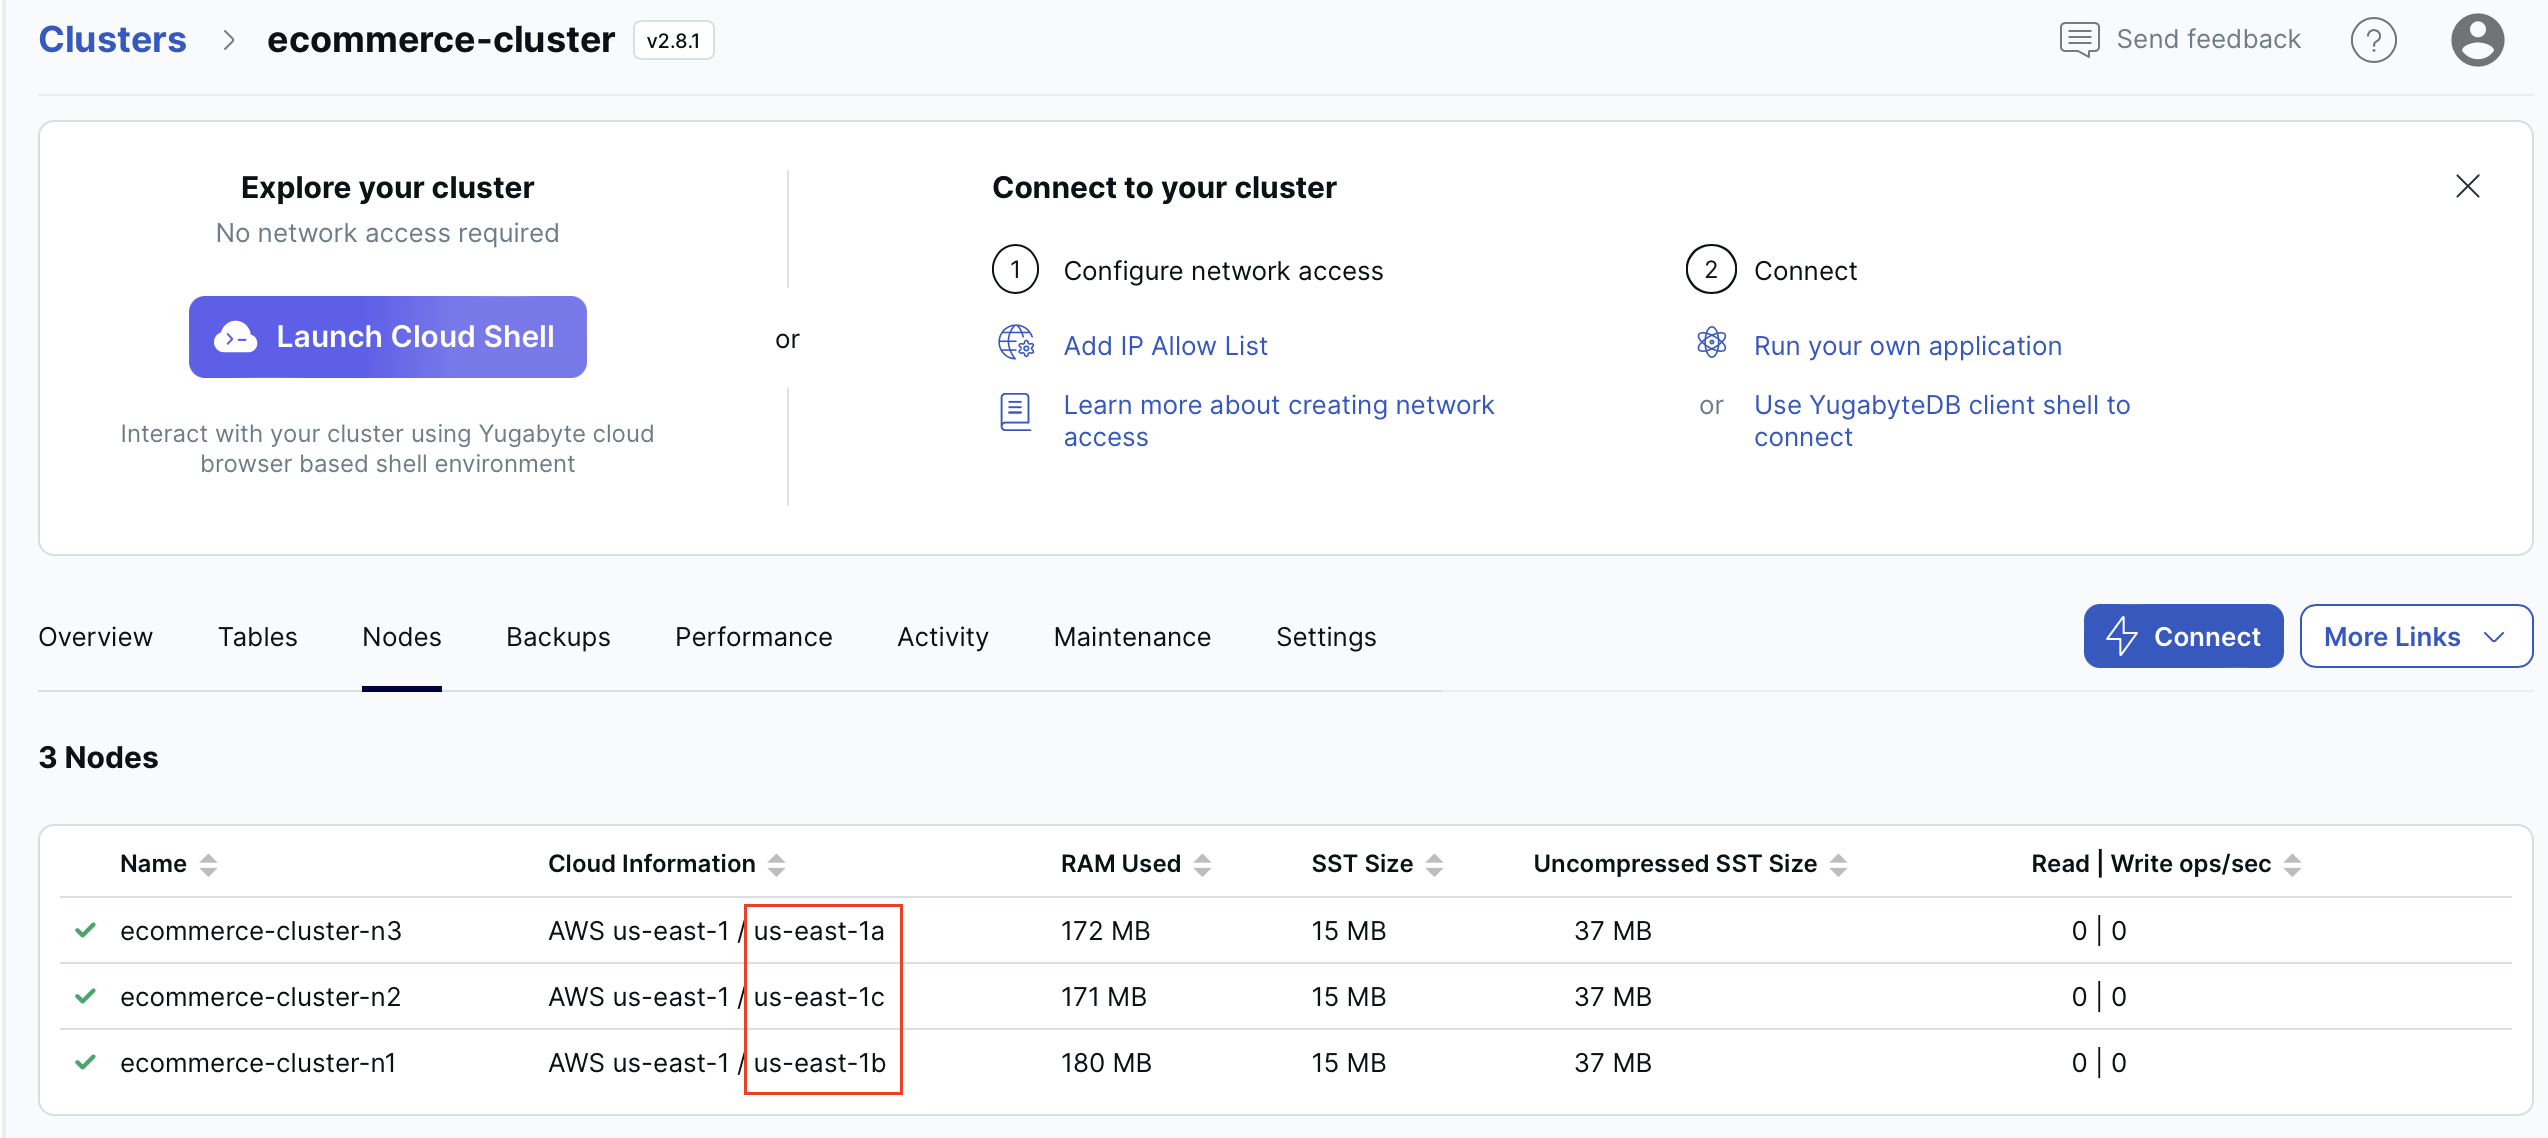
So, starting with step 1, I provisioned a 3-node cluster with Yugabyte Cloud. The cluster is deployed across several availability zones and can tolerate zone-level outages:
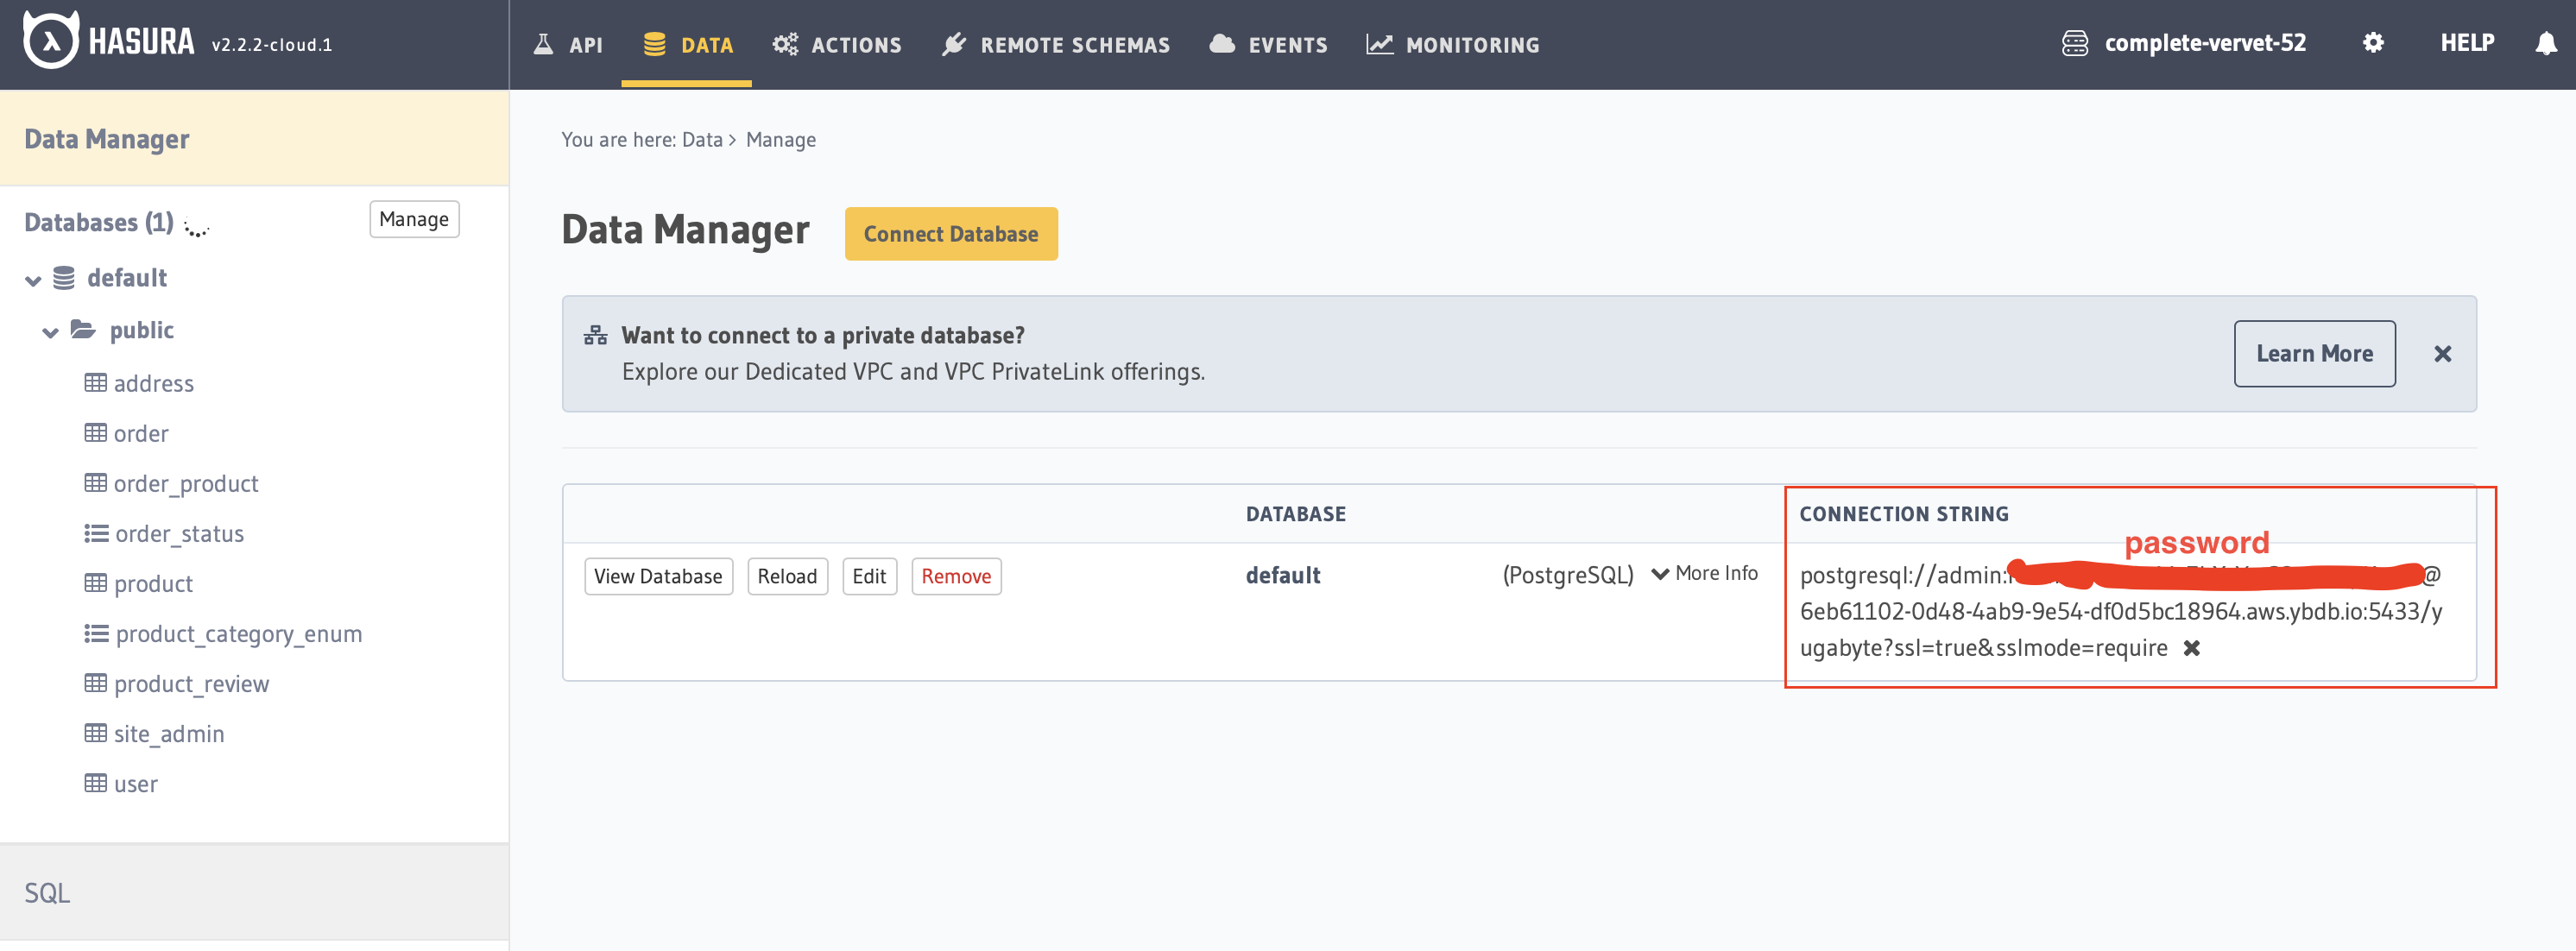
Next, moving to step 2, I created a Hasura Cloud deployment using the Standard Tier (that scales automatically and supports high availability) and connected Hasura to my Yugabyte Cloud database:
Lastly, finishing with step 3, I deployed the Next.js backend and frontend with Vercel as instructed through the Environment Variables settings to connect to my Hasura Cloud GraphQL engine:
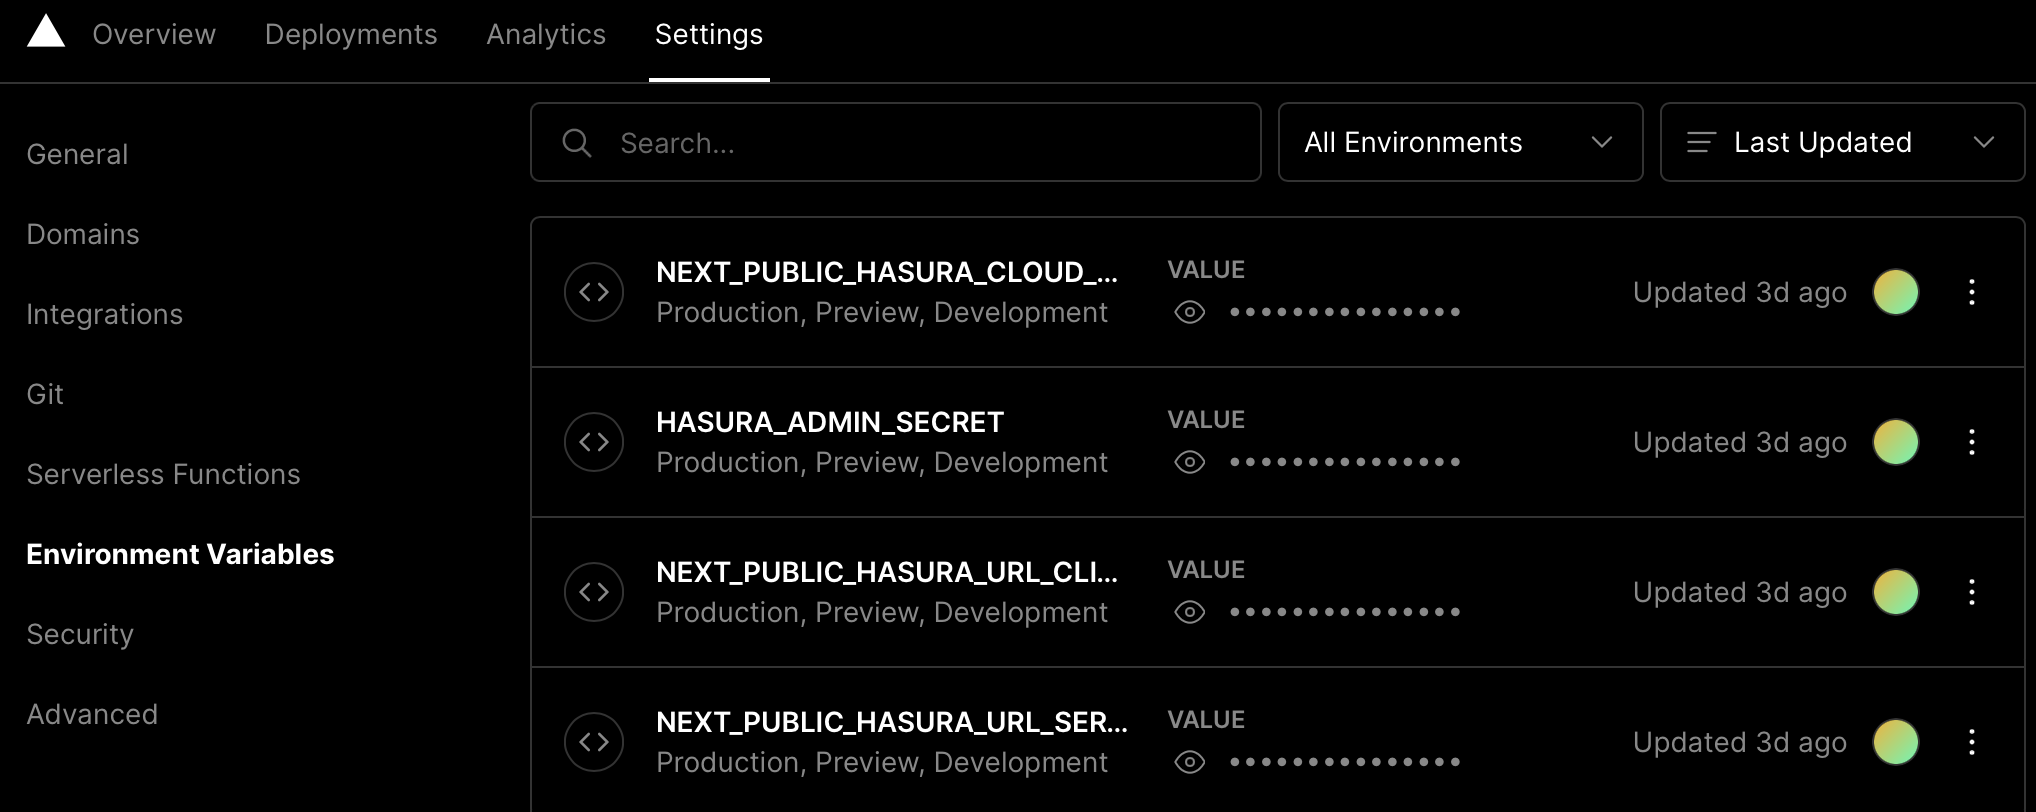
That’s it! As a result, my e-commerce application was running on a cloud-native stack, and the switch to these services was an easy thing:
Lesson 3: Zero Code Changes Are a Myth
As you see, the migration was smooth, and most of my time was spent adjusting configuration settings and provisioning cloud-native services. But I cannot say this was a “zero-code-changes” type of experience. Personally, I think that that’s just a myth. You still have to be ready to tweak your code to make it work properly or much more efficiently with new software or services.
In my case, I had to change the Next.js logic in a few places, making sure Hasura Cloud’s admin secret is used correctly by the GraphQL clients. I also had to optimize the SQL scripts the app used for initial data loading. For instance, the original SQL script loaded 85,000 products by executing 85,000 individual INSERT statements that translated to 85,000 distributed transactions in YugabyteDB! But that’s just an anti-pattern for distributed databases. Therefore, I dramatically reduced the initial loading time by replacing those 85,000 individual INSERTs/transactions with ~17 INSERTs/transactions with 5,000 values each.
Conclusion
Instead of closing the article with some clever statements and high-level guidance, I would encourage you to experience the process from start to finish yourself (except for the code-level changes, that’s done for you!):
- Deploy the app with the initial architecture (Postgres as a database) on your laptop.
- Transition to YugabyteDB but still deploy locally on your laptop. Follow the same instructions as above but ask Docker to start YugabyteDB.
- Deploy the application in a cloud-native environment.
If you follow these steps, then the application UI will look as follows:

Opinions expressed by DZone contributors are their own.

Comments